Real-life Minecraft interface for play-themed art exhibition at KANEKO
 Recently I was invited to design and build a playful, human-scale interactive installation piece for an exhibition entitled PLAY at KANEKO, a creative-oriented venue and gallery located in Omaha, NE. The exhibition aimed to “explore the power of play in our everyday world” by inviting creative professionals working in a variety of fields and media to create hands-on experiential pieces that the public can engage with directly.
For one of my pieces I chose to create a lifesize interface for Minecraft that encourages multiple visitors to work together to play the game in real-time, projected on a wall in front of them, all without using a keyboard or mouse.
Although this project was designed and built in approximately four weeks on shoestring budget with little to no access to even basic power tools, the result was robust enough to withstand three months of solid, enthusiastic play from people of all ages! Of the many interesting experiences I have had as a creative technologist, this has been one of my favorite so far. And in this case, the result speaks for itself:
Table of contents
Installation concept and design
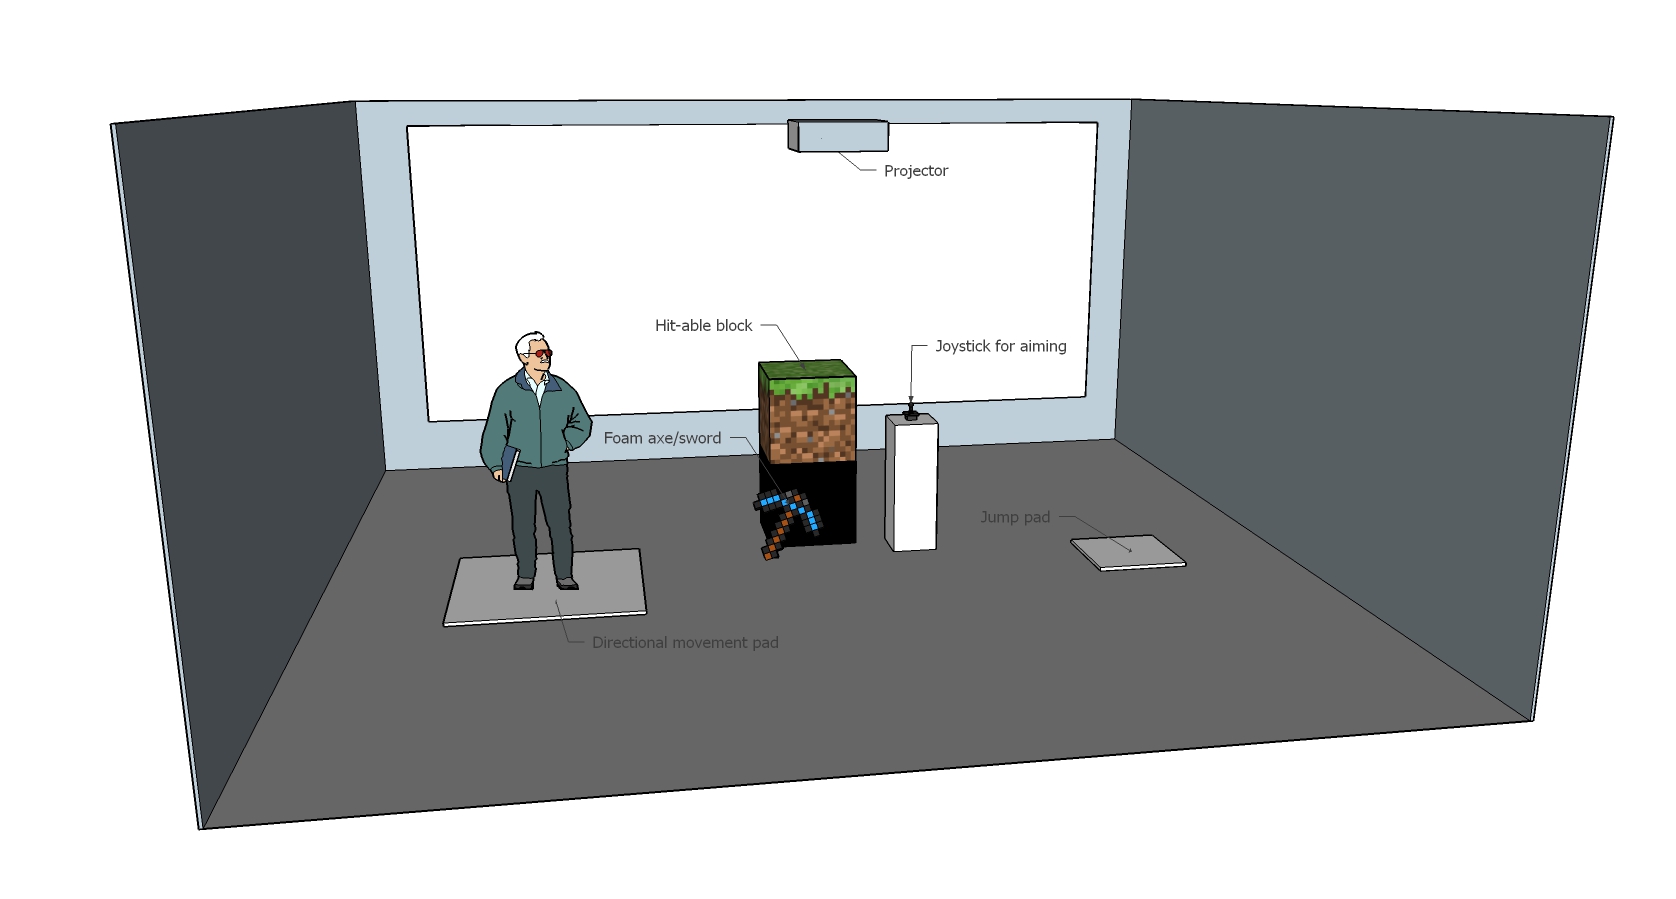
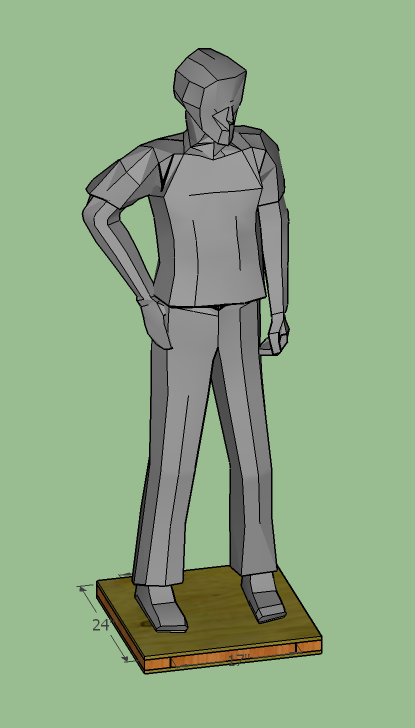
To pitch my concept and plan out the sizes and placements of the various components, I mocked up the exhibition space in Sketchup and tried out a few different arrangements. The only thing I knew at first was the size of the space and the placement of the projector – everything else was up to me.
I felt that in order to play the game of Minecraft effectively visitors needed some way to move the in-game character around in specific directions, turn to look in specific directions, swing their weapon, and jump. To make these actions possible without using a traditional keyboard or mouse I came up with fun, physical interfaces for each action that encourage groups of people, even complete strangers, to work together to achieve good outcomes.
The four interfaces I decided on were:
- A directional movement pad with four jump zones that move the in-game character around the same way that the traditional directional keys (WASD) on the keyboard do. Kind of like a big, wooden version of those Dance Dance Revolution pads.
- A big, 2′ wooden cube painted to resemble a dirt block from the game, which visitors can hit in real-life to cause the in-game weapon to swing.
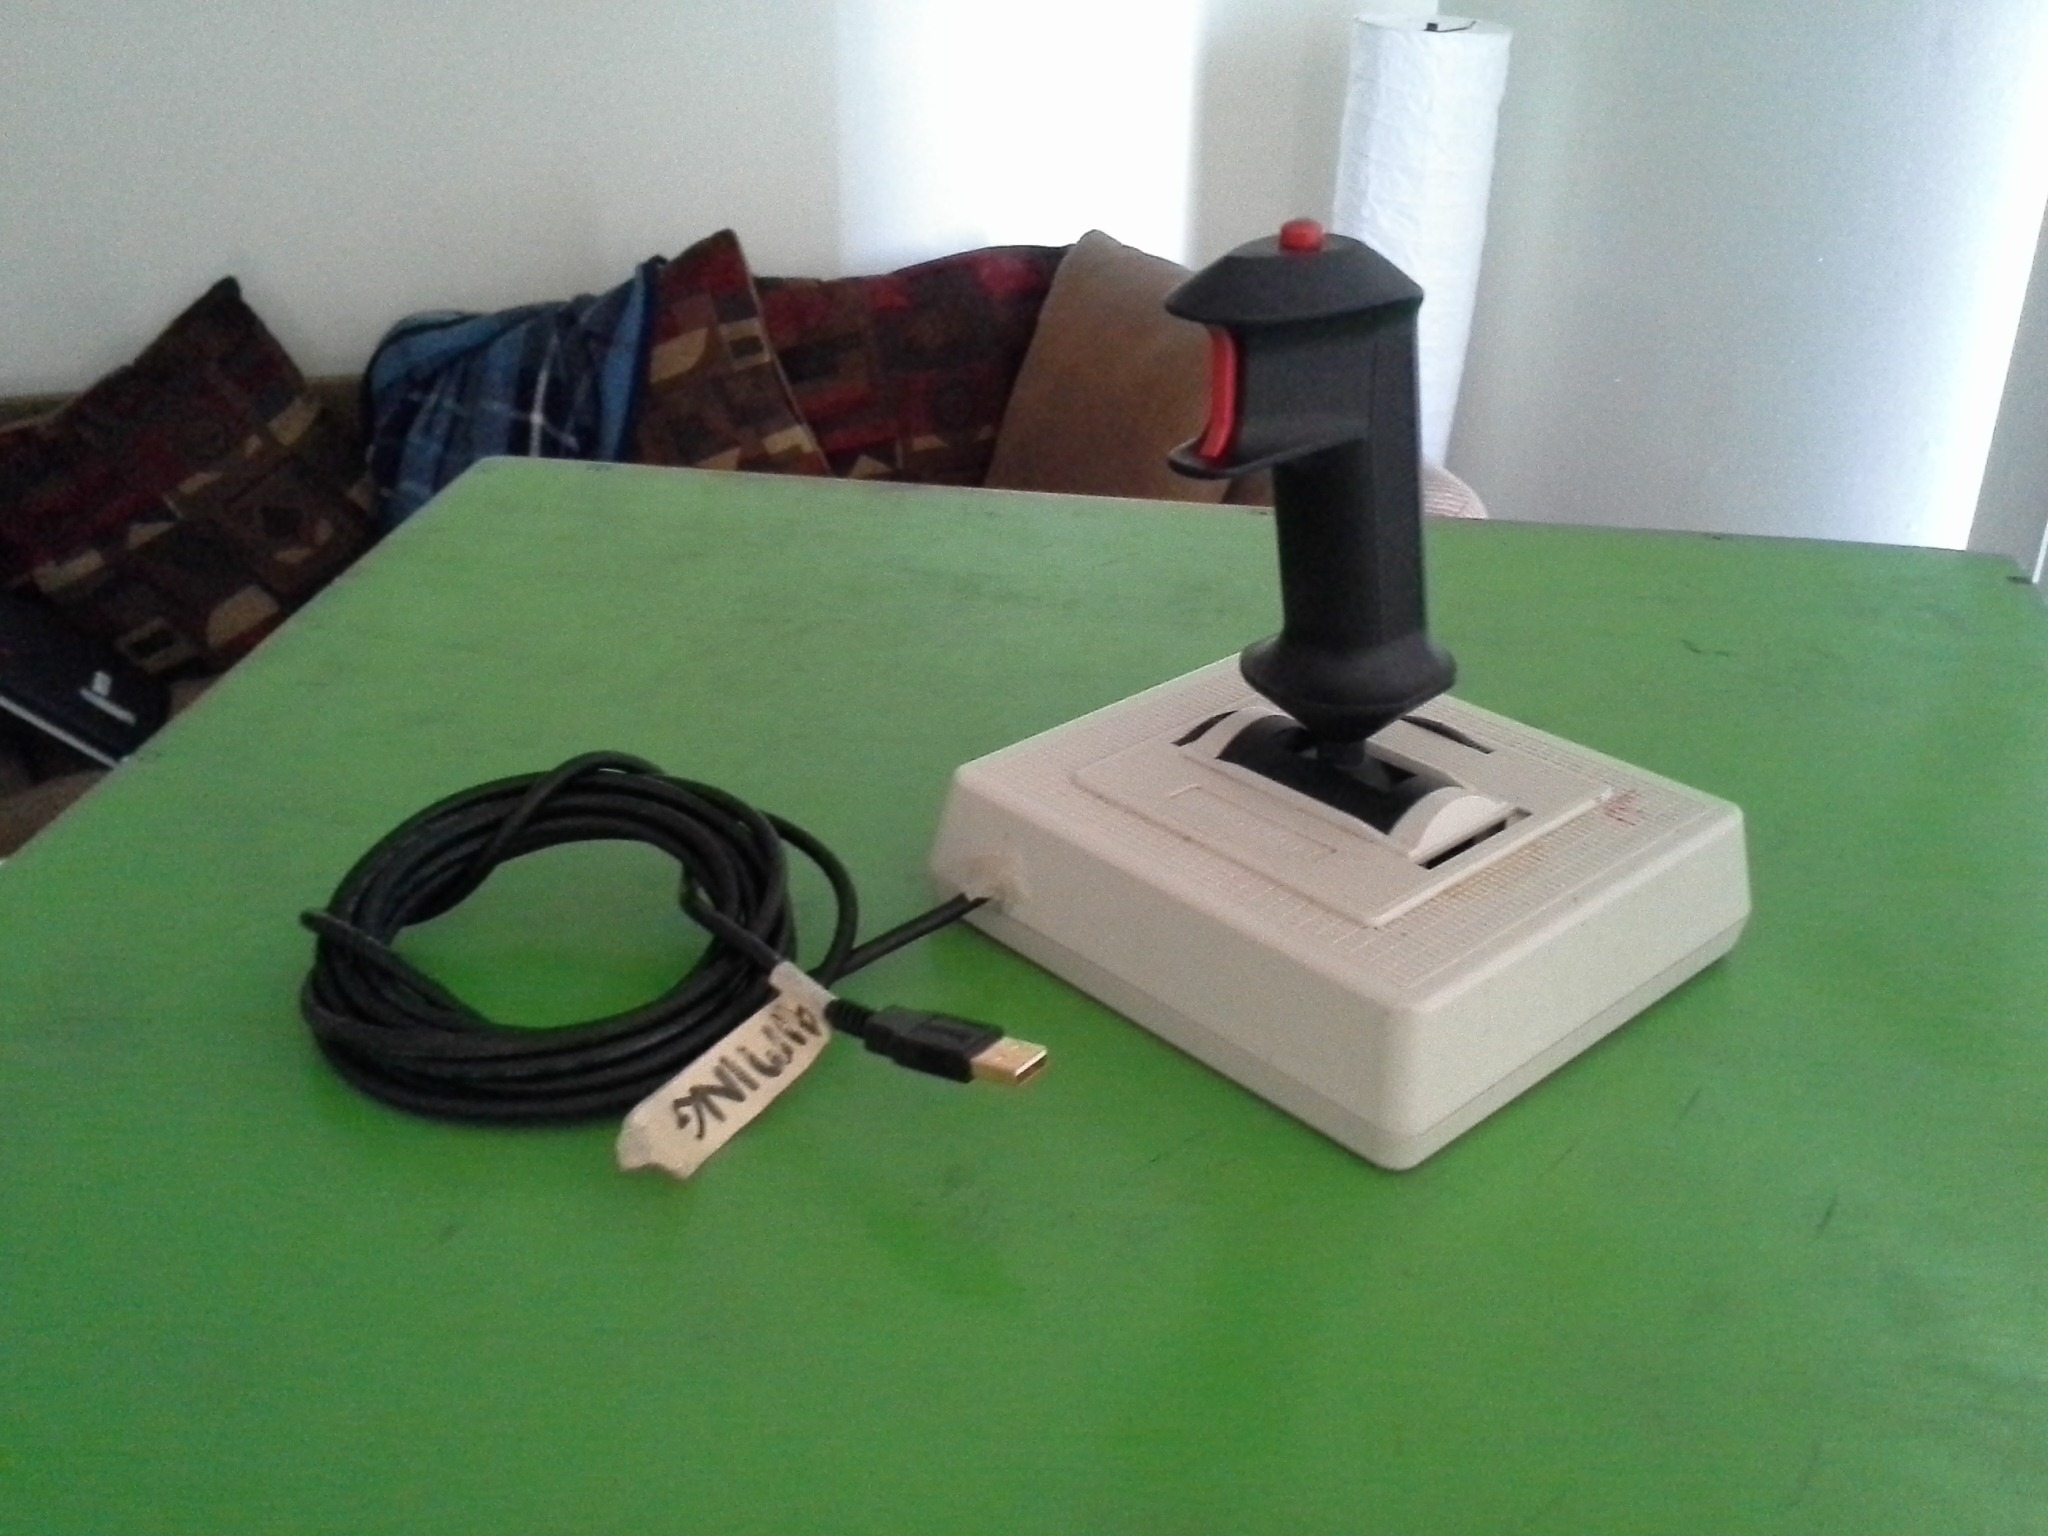
- A good old fashioned joystick that allows visitors to turn and look at specific things, not unlike flight controls.
- A jump pad that causes the in-game character to jump when the player jumps in real life.
Bill of materials (BOM)
Right from the beginning I had a pretty good idea of exactly what electronics components and various materials I would need. The basis for each individual interface is the wonderful Teensy microcontroller series from PJRC, which provides an extremely easy to use method for mimicing generic USB input devices like keyboards, mice, joysticks and more, all while being 100% Arduino compatible! Essentially, from the computer’s perspective, all I’ve done is created two more keyboards and two more mice that are each capable of only some of the actions of traditional keyboards and mice.
For most interactions I used low-cost piezo sensors embedded underneath wooden boards (more on that later), except for the joystick which internally uses two potentiometers that just needed to be wired up appropriately.
In the interest of encouraging others to remake, improve or simply learn from my experience I have compiled a complete bill of materials (BOM) for nearly everything used in this project.
Source code and design files
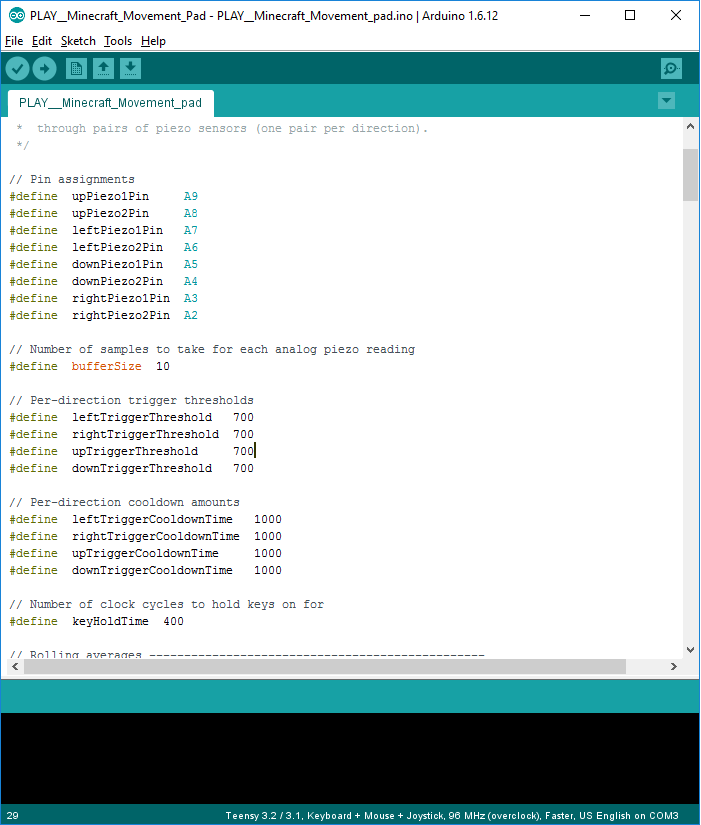 Each interface contains a Teensy microcontroller that needed to be programmed appropriately to process input from sensors and create USB keyboard or mouse events. Since the Teensy series is 100% Arduino compatible, all I had to do was whip up some very basic Arduino sketches for each piece.
Rather than sounding like a broken record and linking to the same repository over and over throughout the post, I figured I’d just put it here at the beginning!

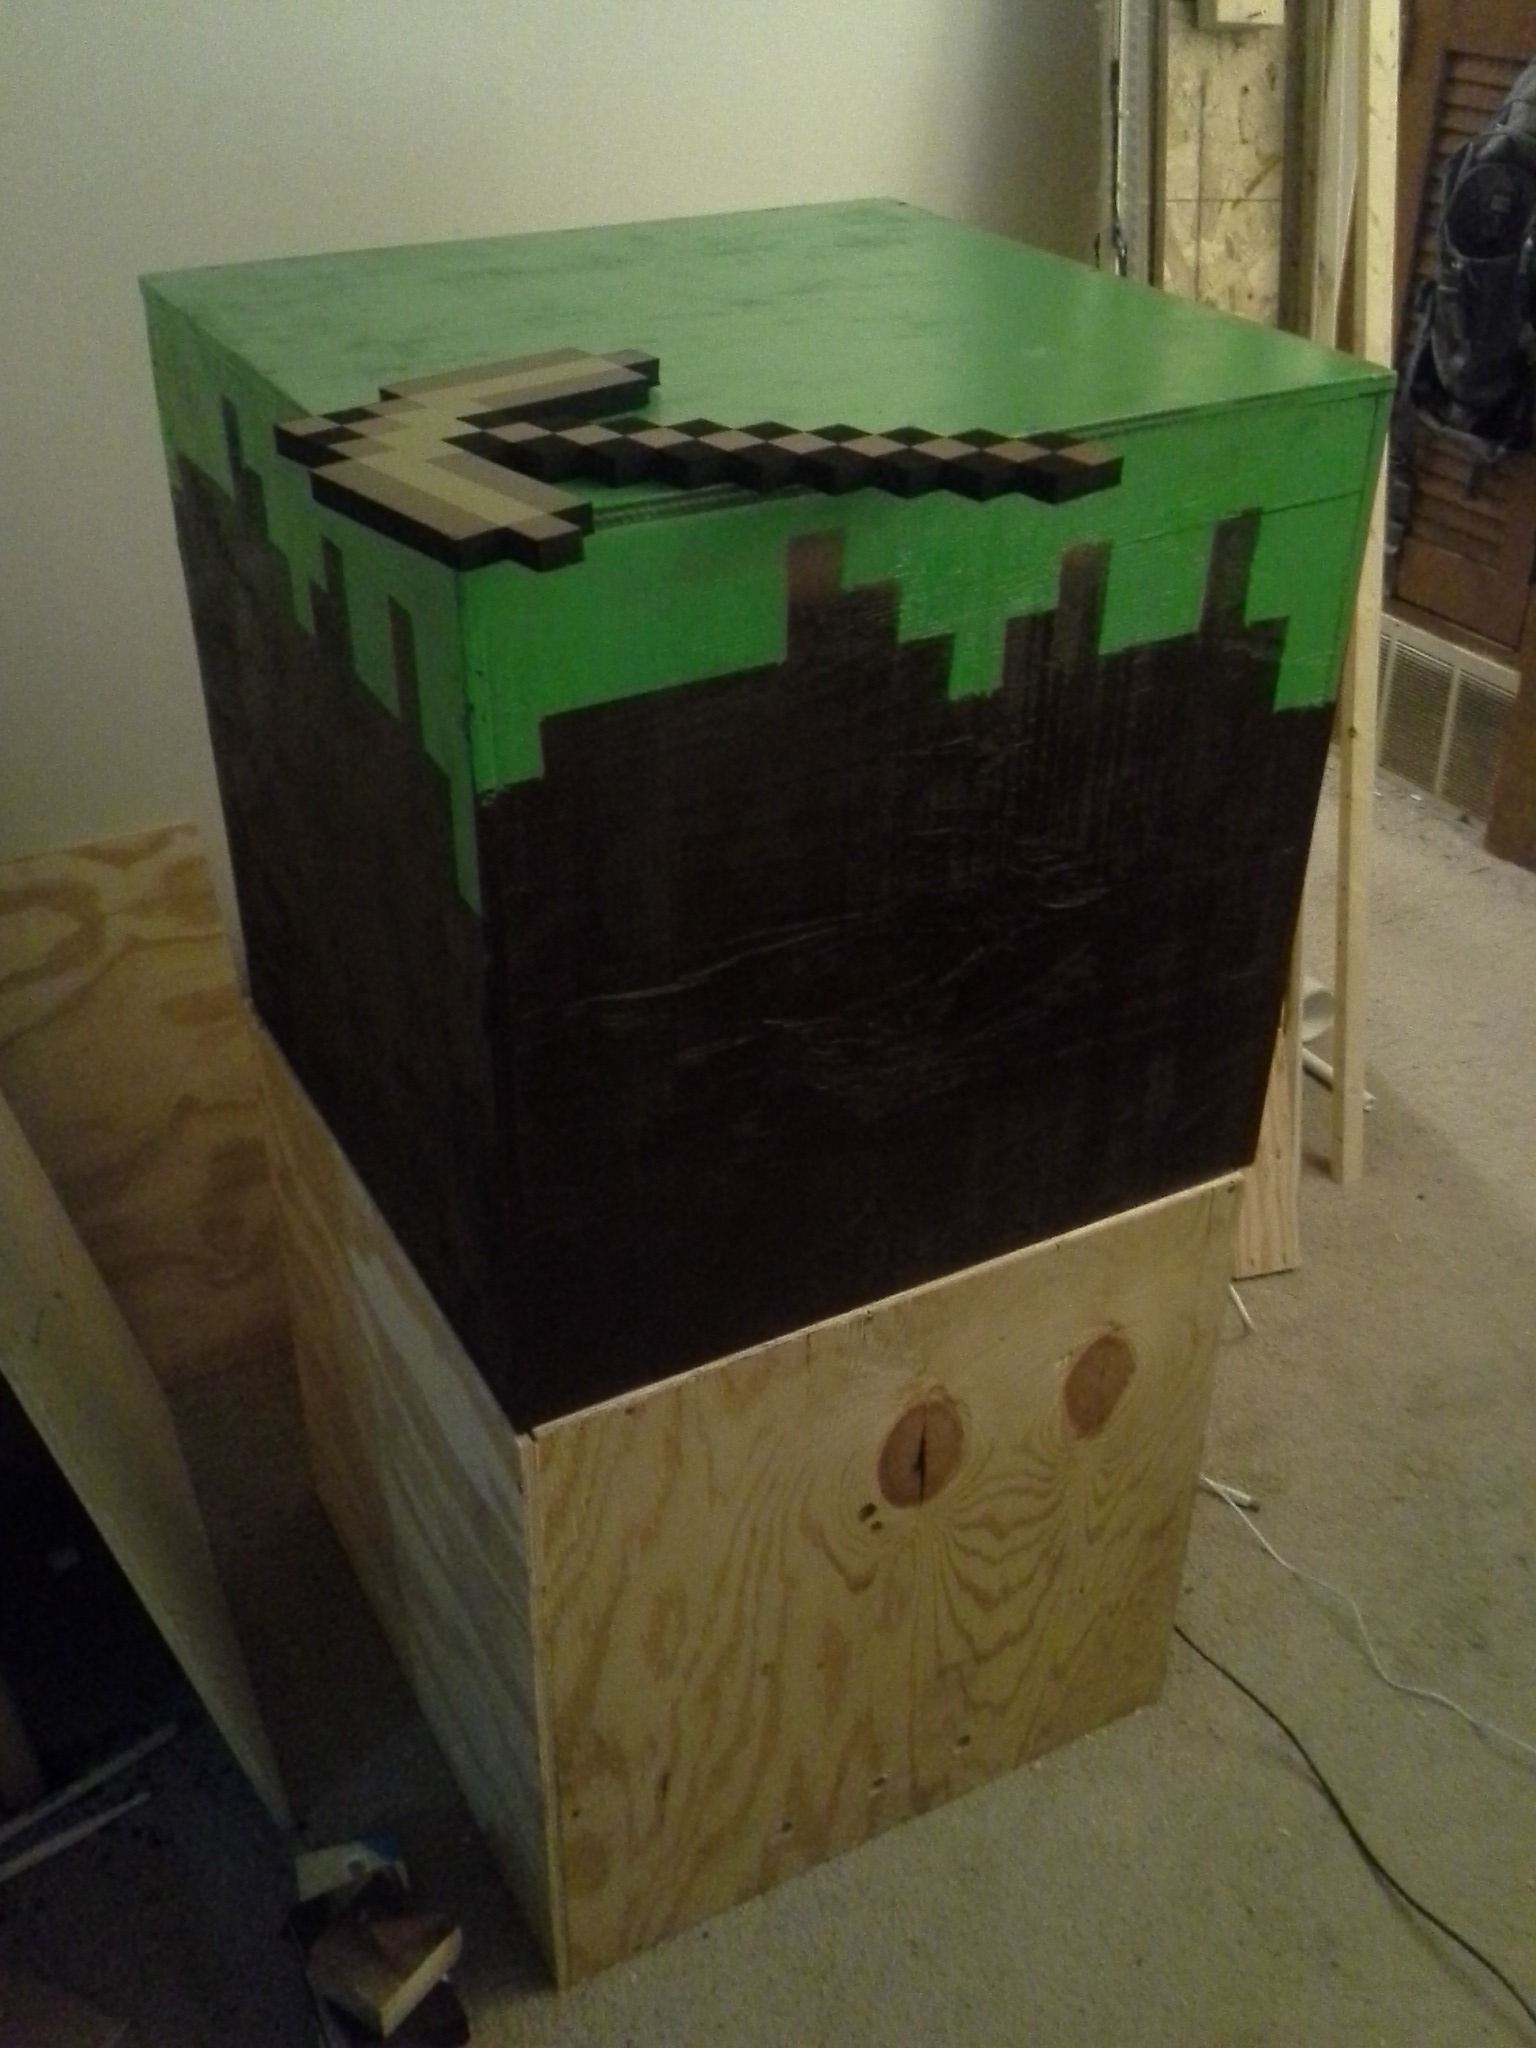
Interactive dirt block
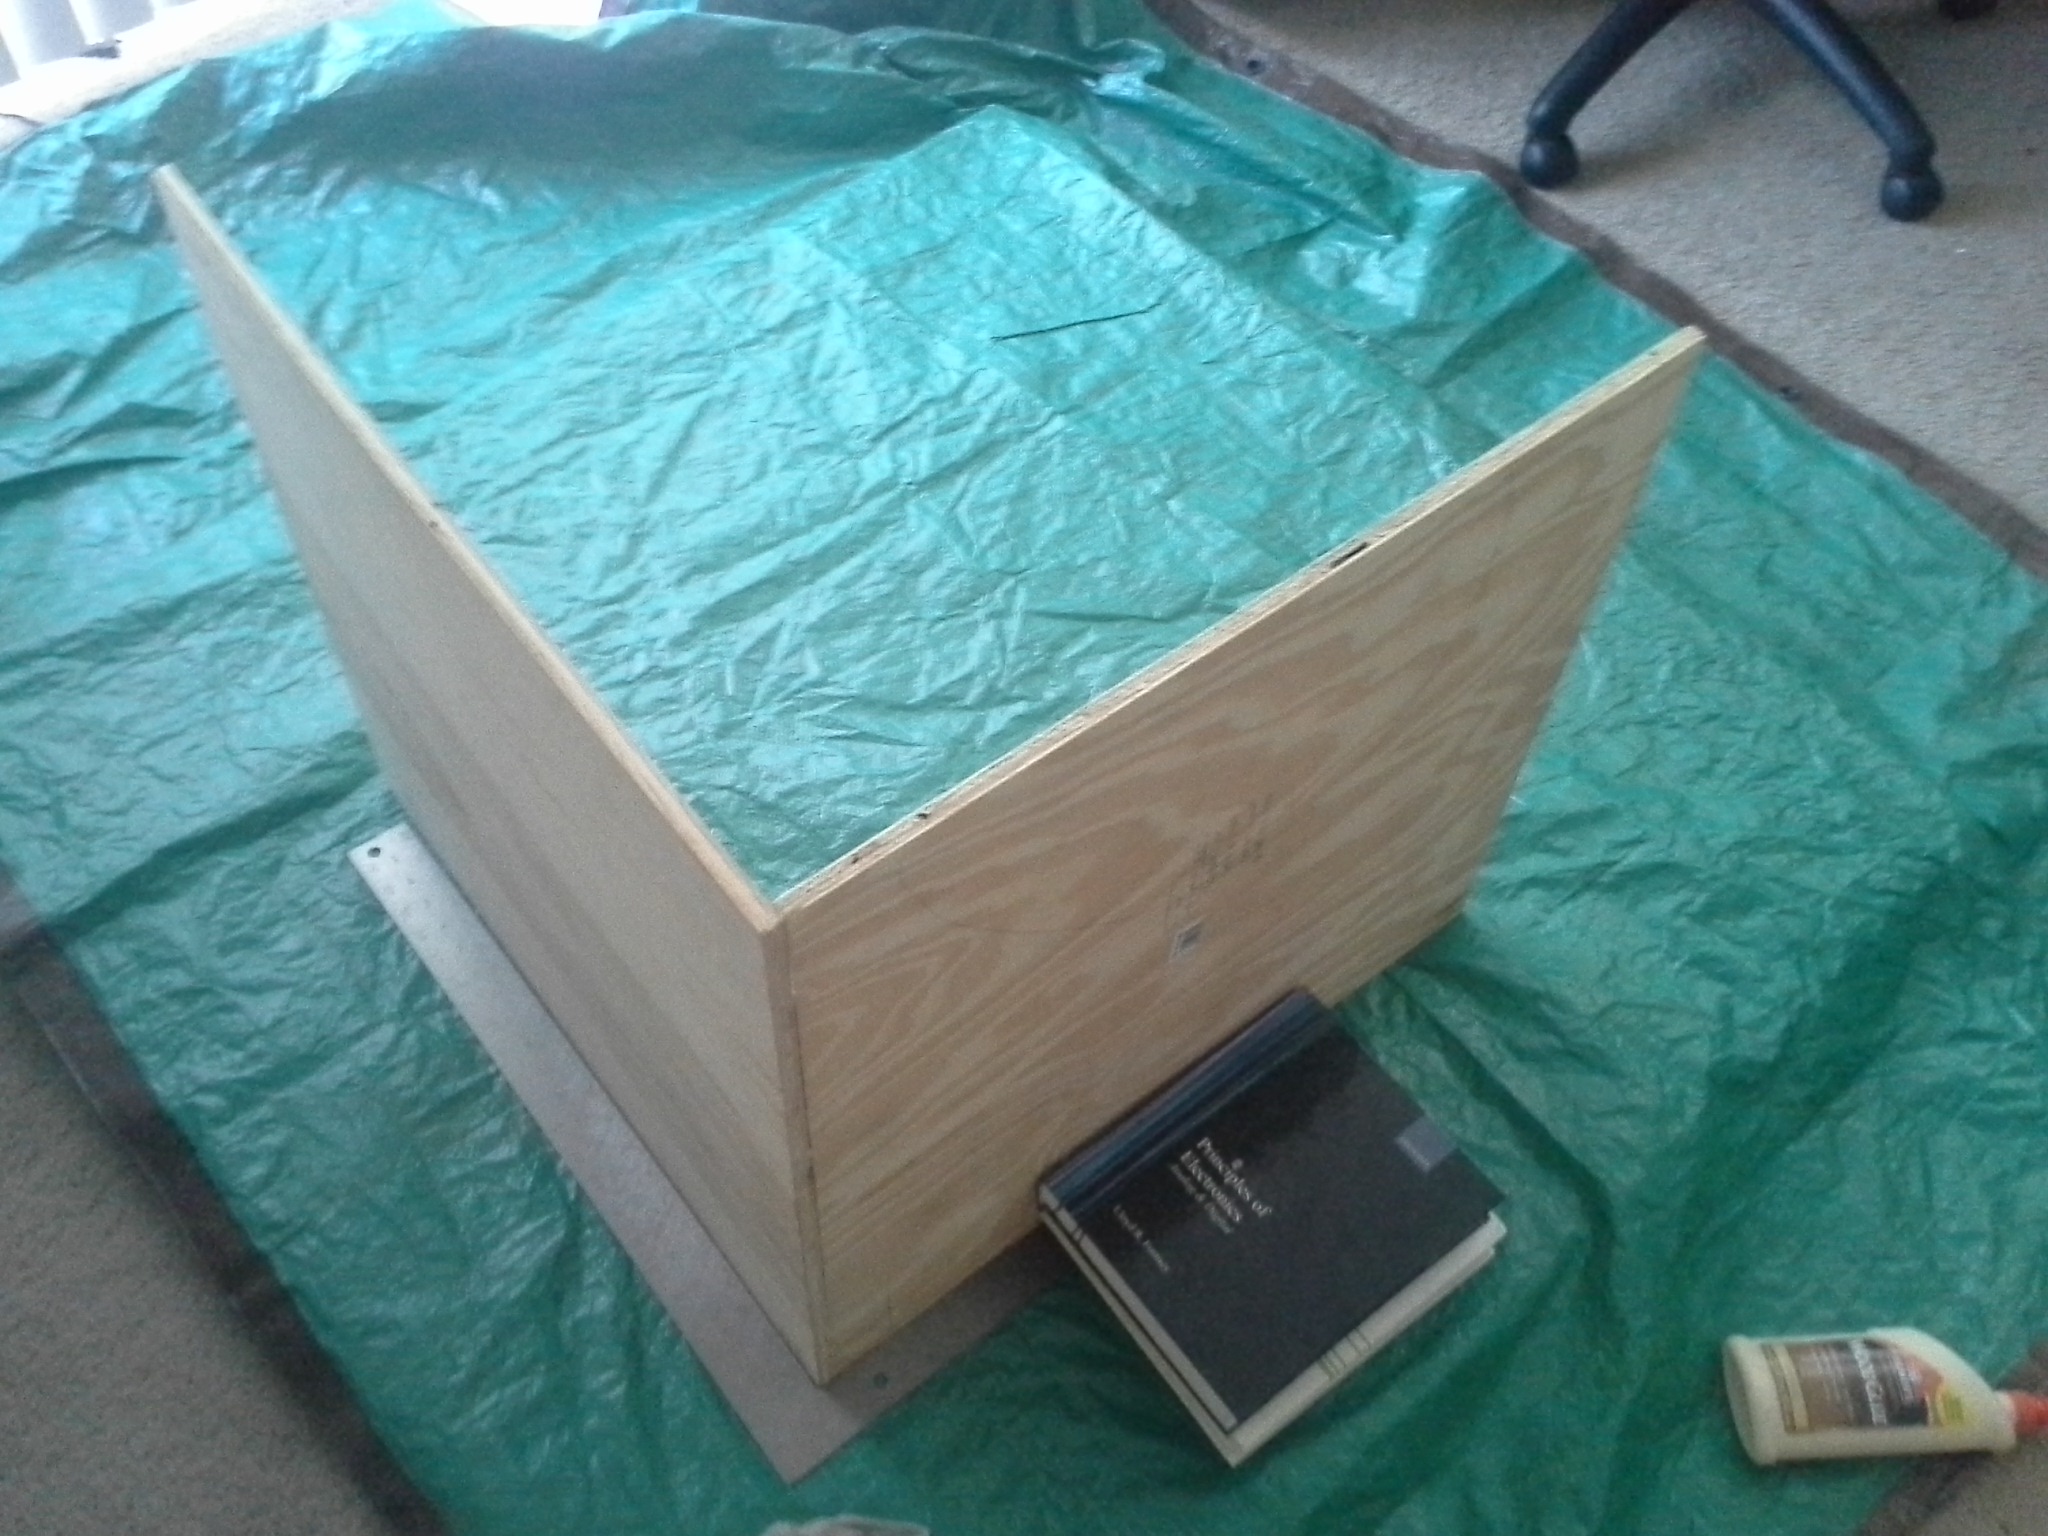
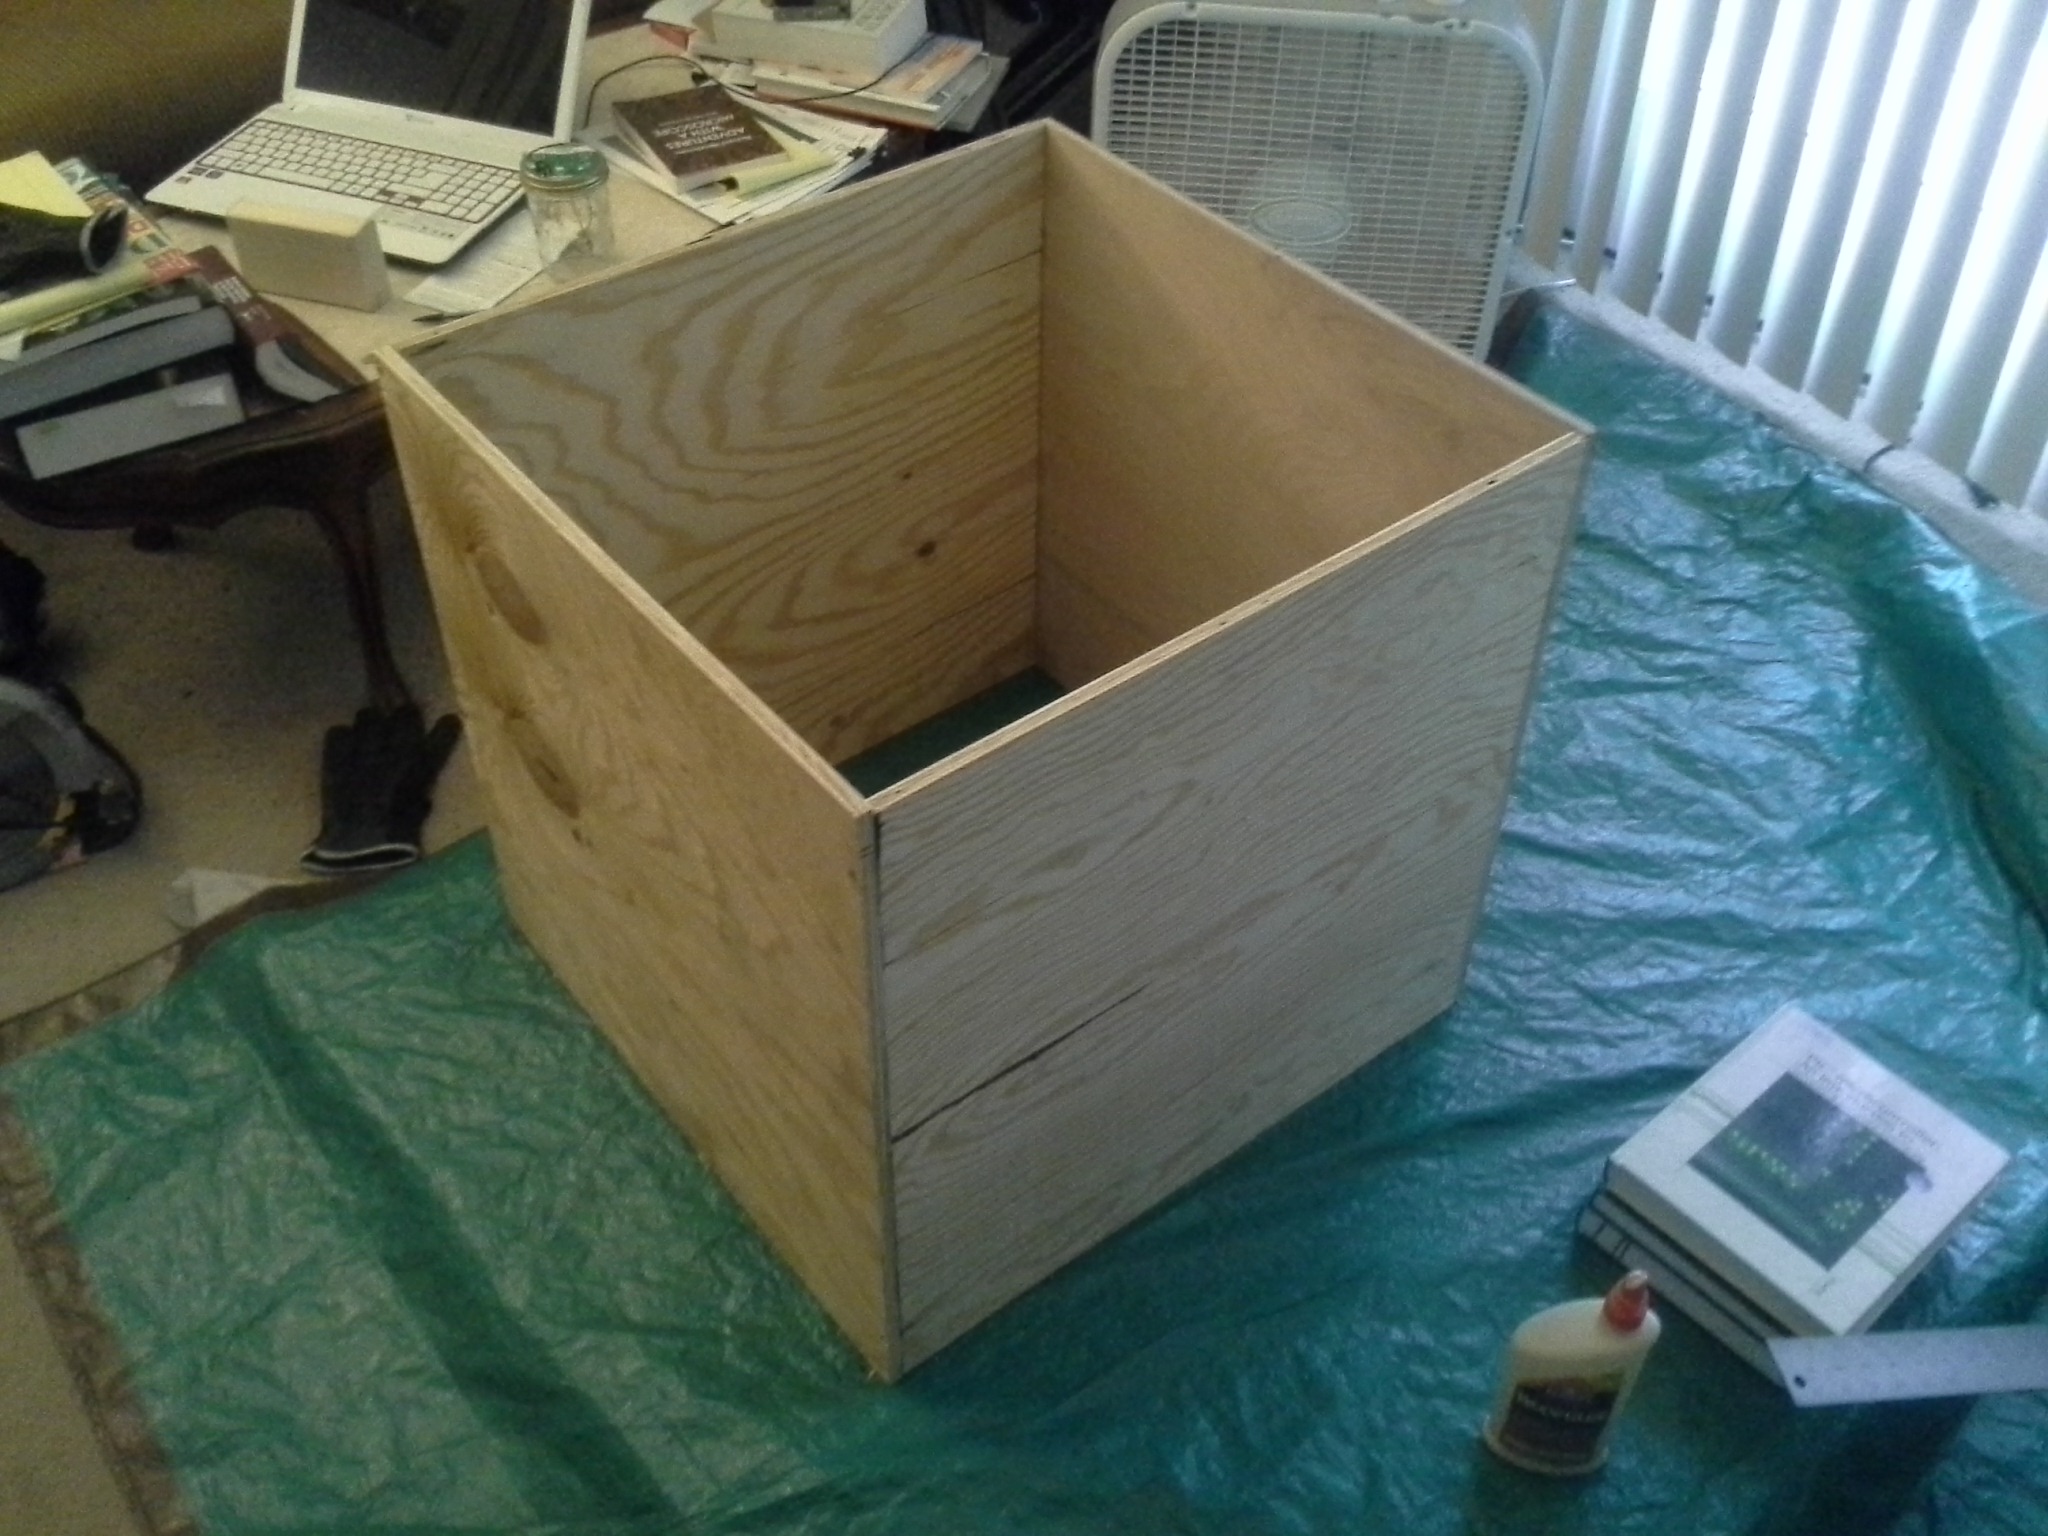
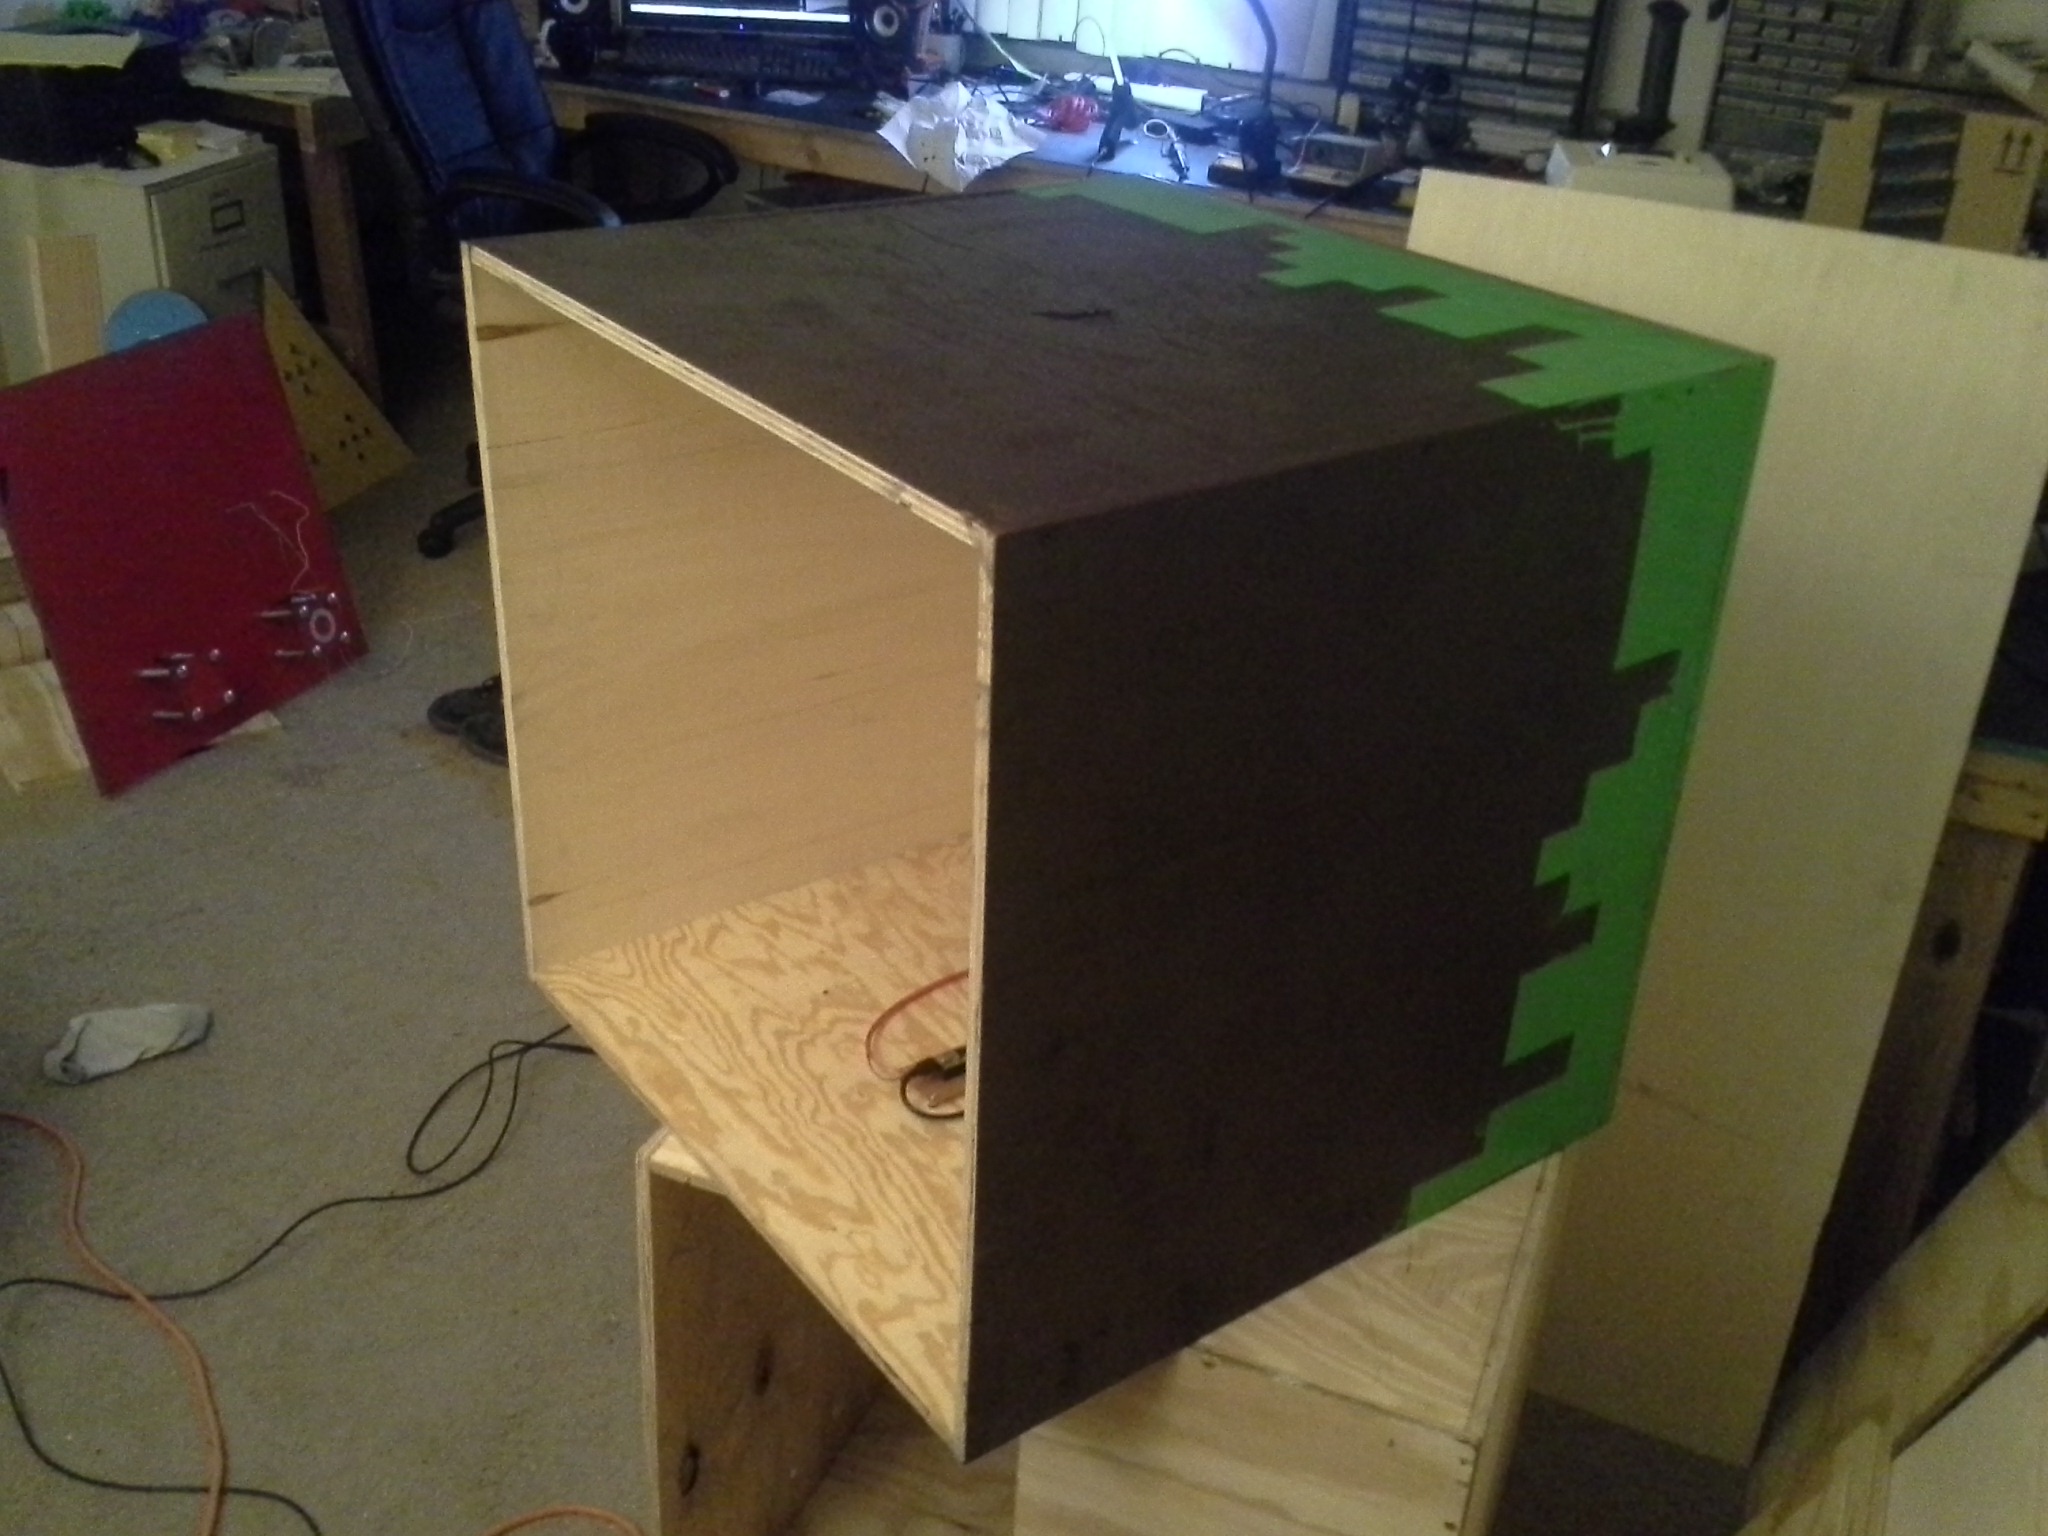
First I tackled creating the dirt block, which I envisioned as a 2x2x2′ cube made of plywood and painted to resemble an in-game dirt block. Seems simple enough, right? And with access to proper tools, space and work surfaces you would be completely correct. But at the time I did not really have access to any of that, so I had to MacGyver a solution in my tiny apartment using books, wood glue, screws and patience. Believe it or not it actually came together pretty quickly and sturdy, though I could’ve saved myself a lot of effort with some large clamps, a table saw and maybe a miter saw!
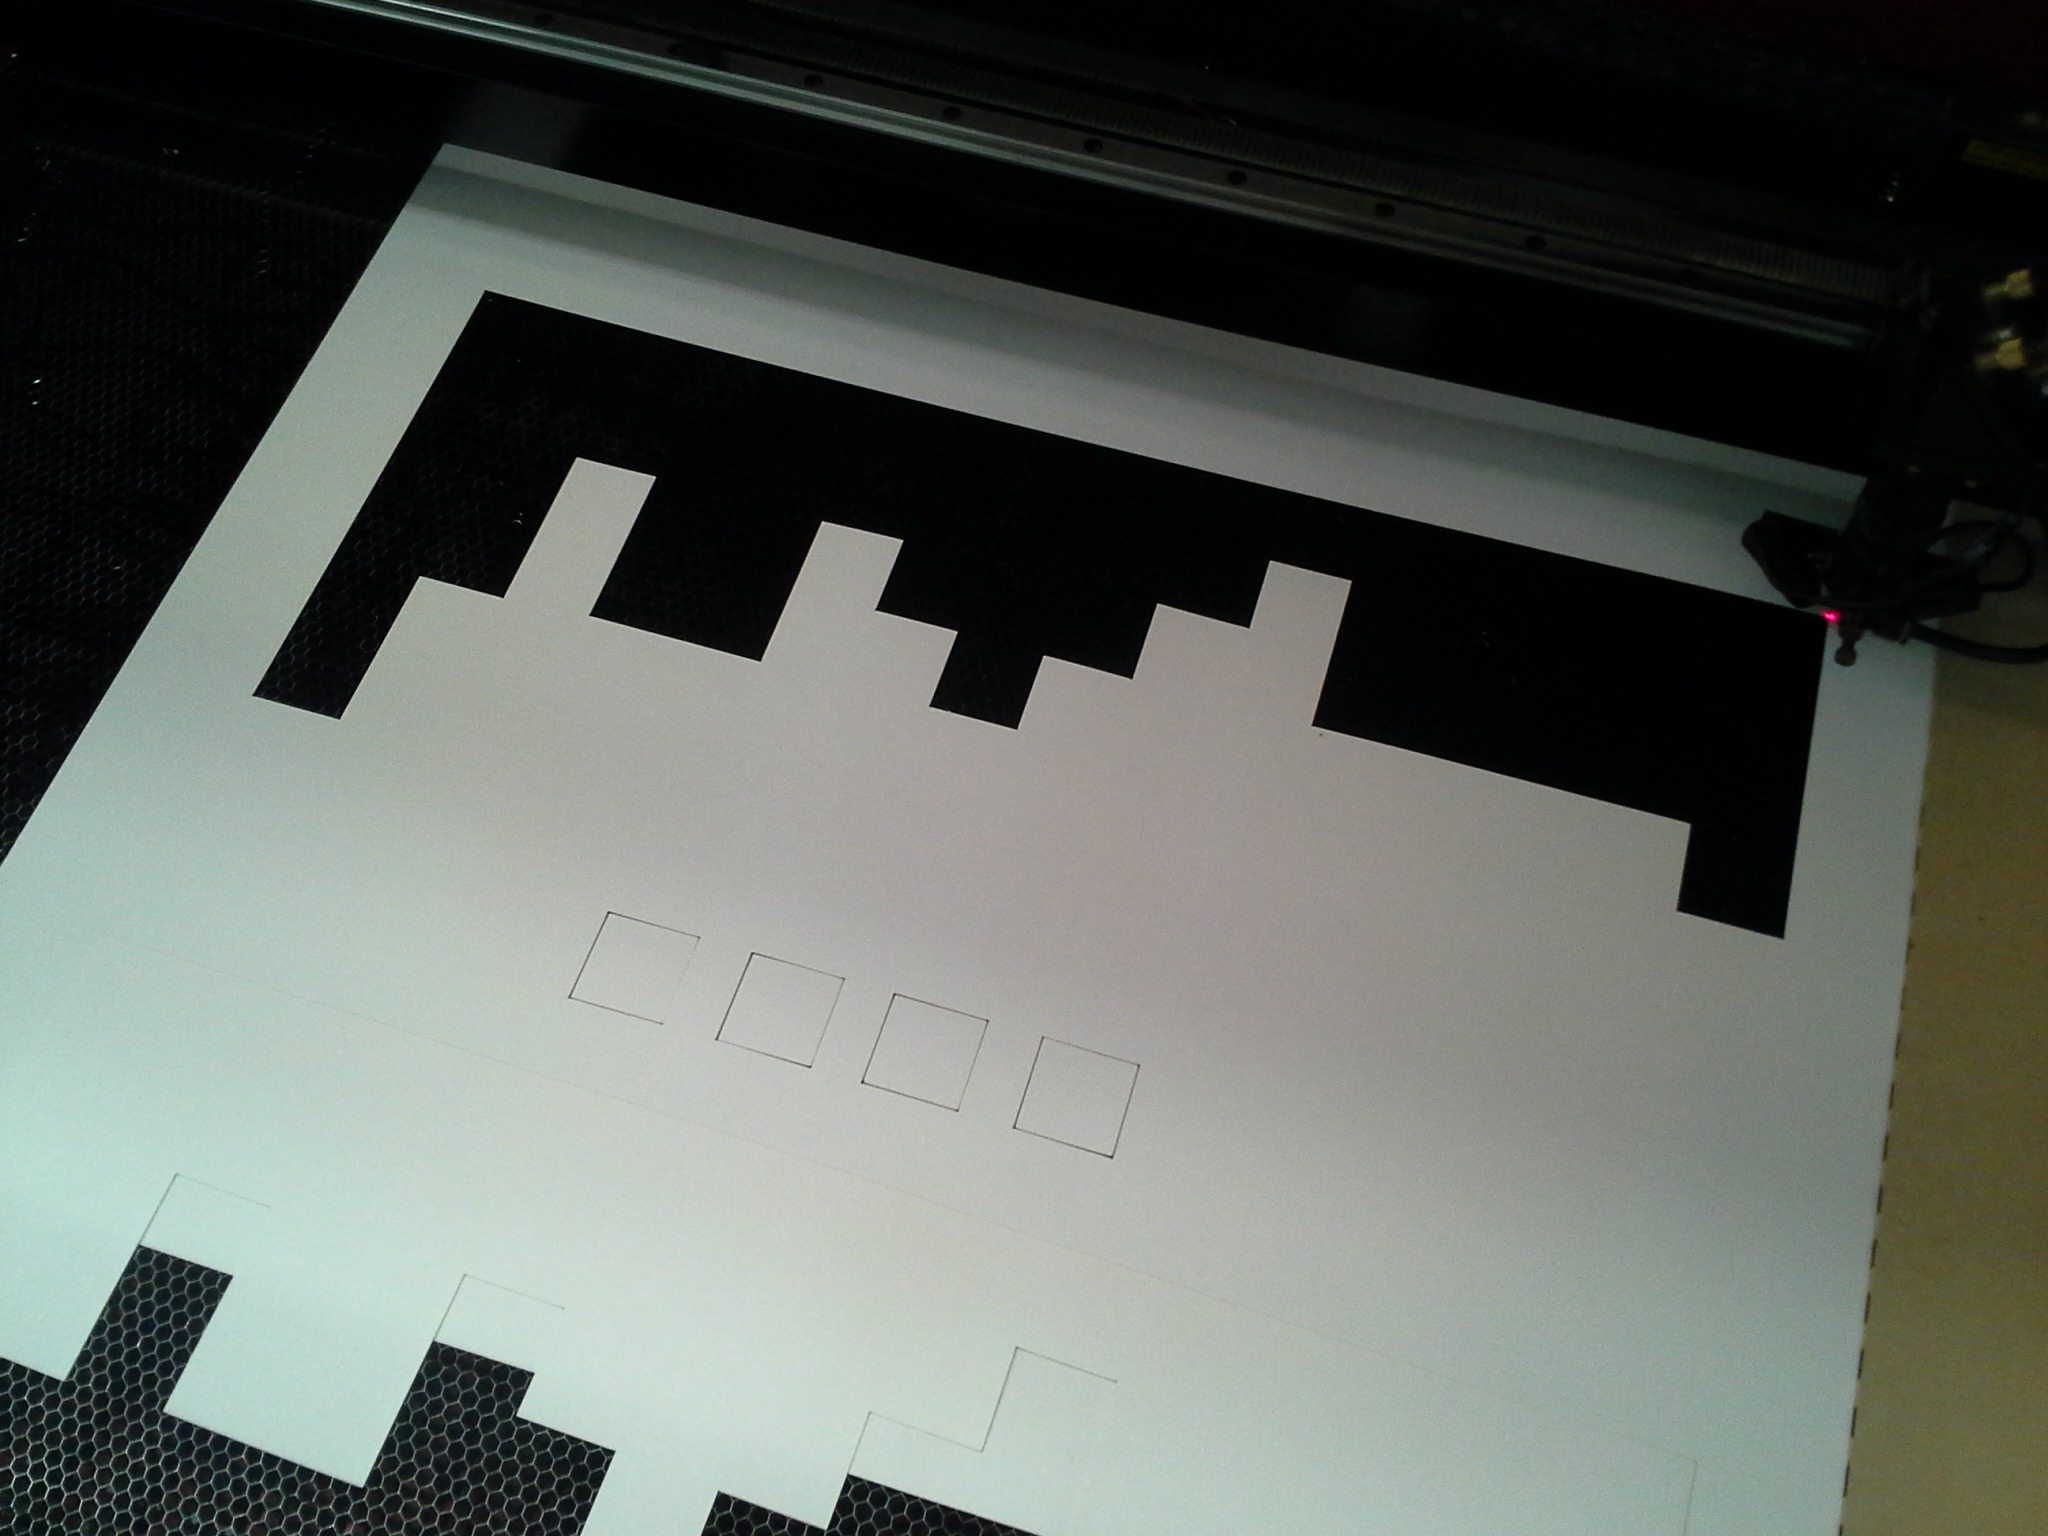
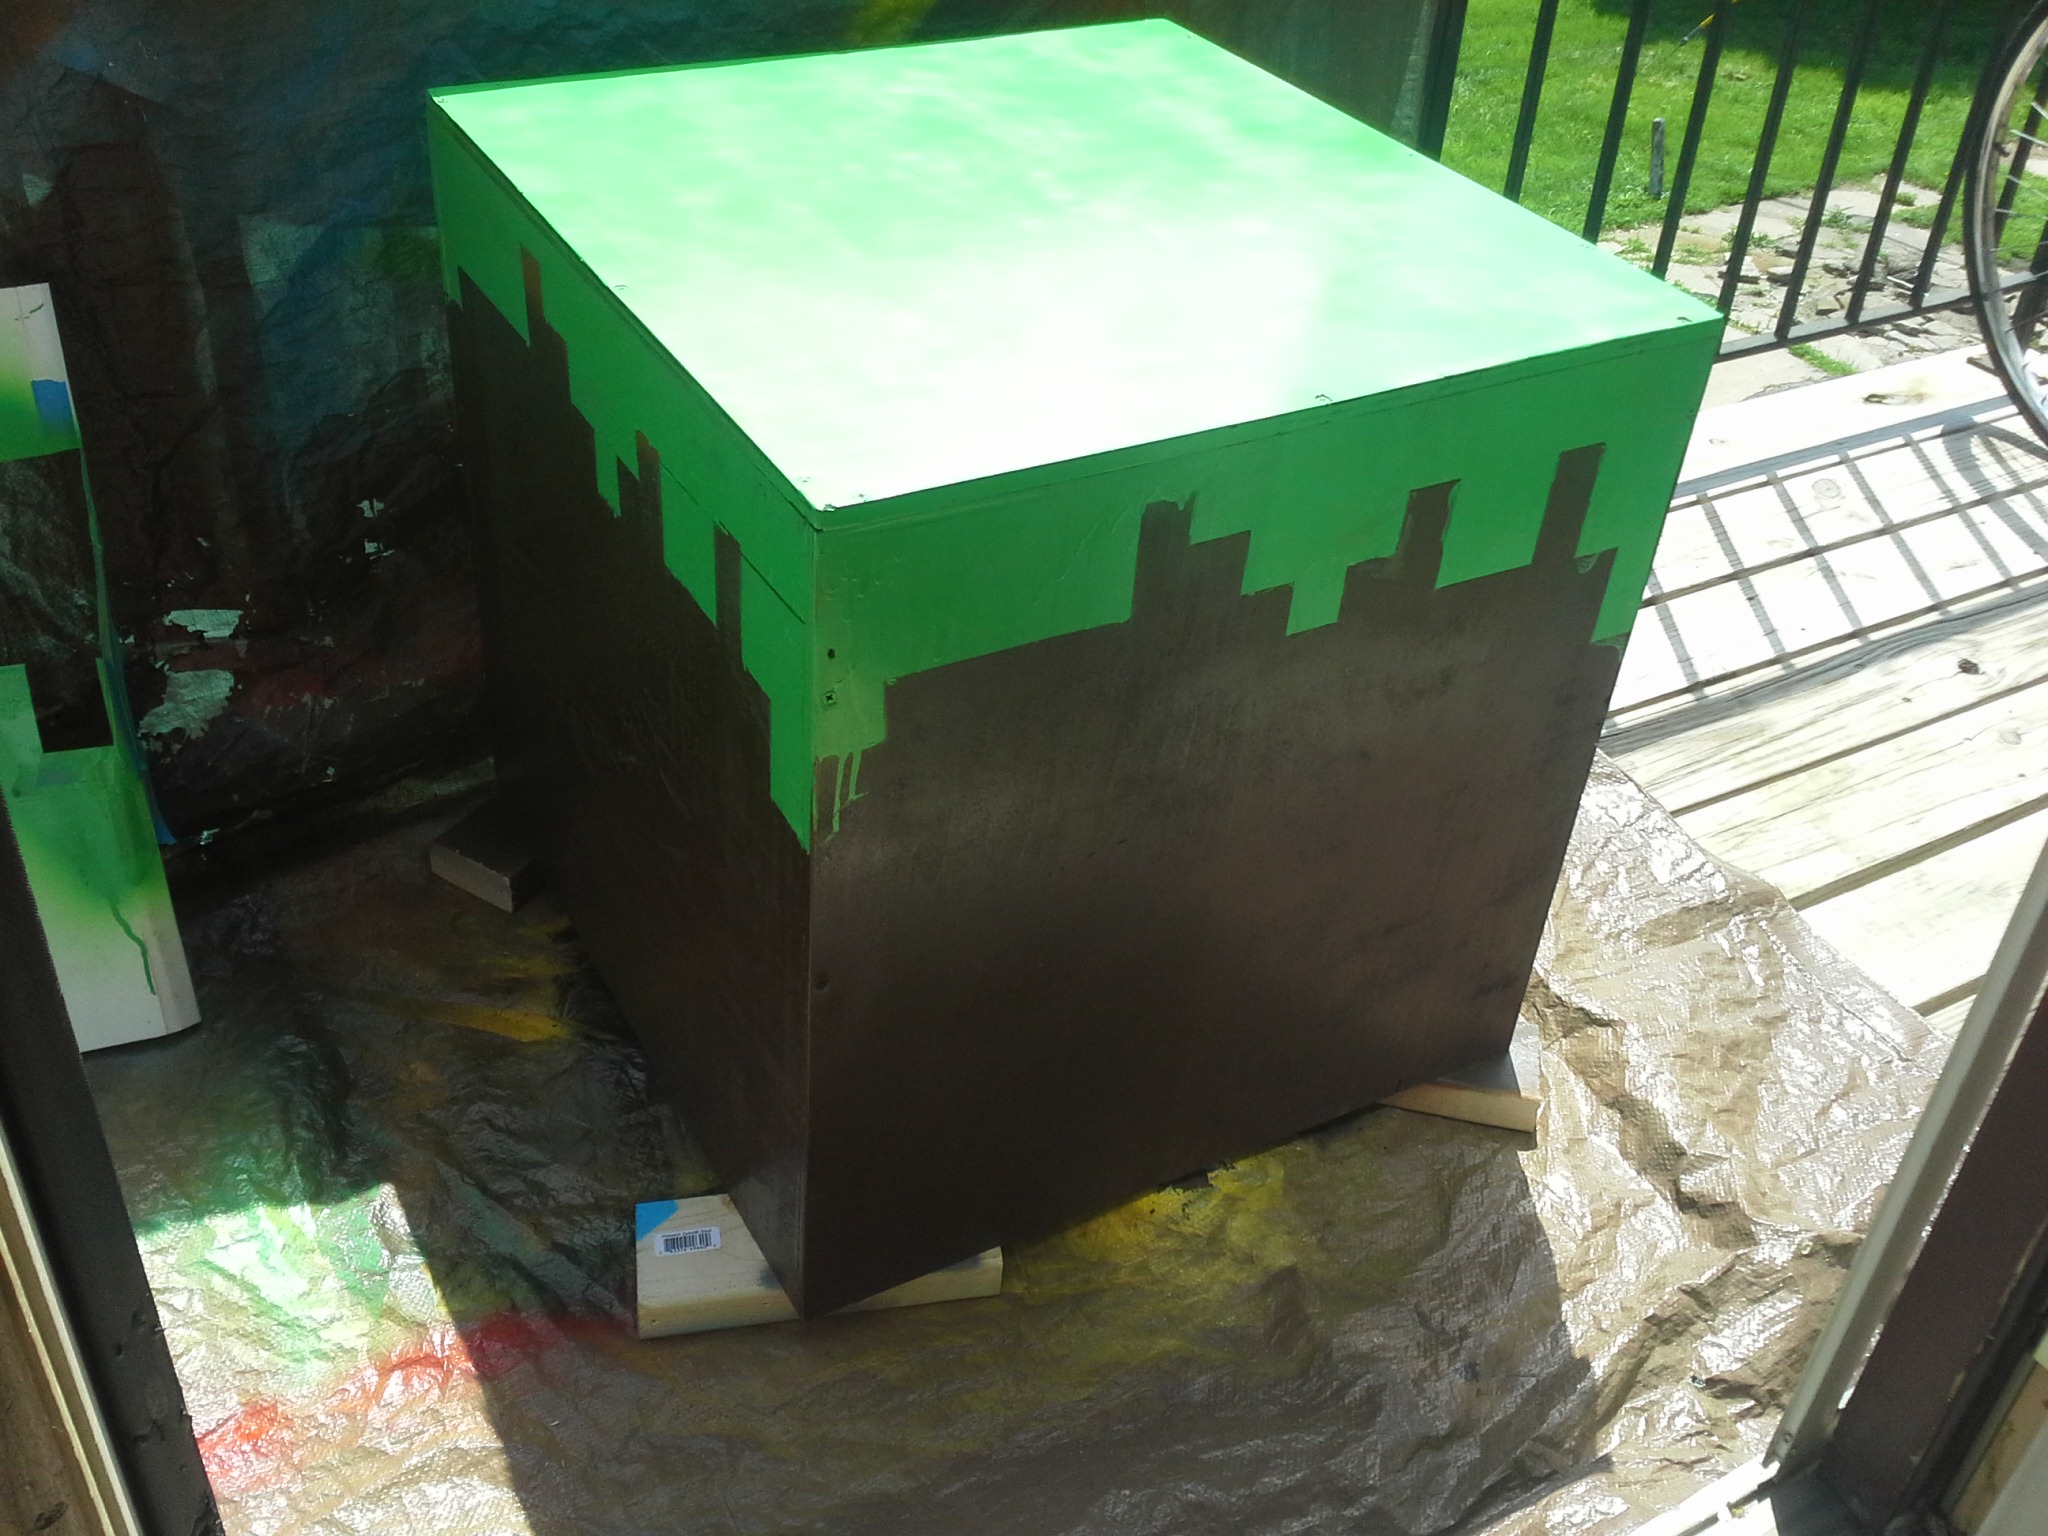
To apply the paint job I designed a stencil in Illustrator using the in-game dirt block as a reference, then laser cut the stencil out of a stiff card paper at my local FabLab. I could then simply tape the stencil to each side of the box, one side at a time, and spray paint the design I needed.
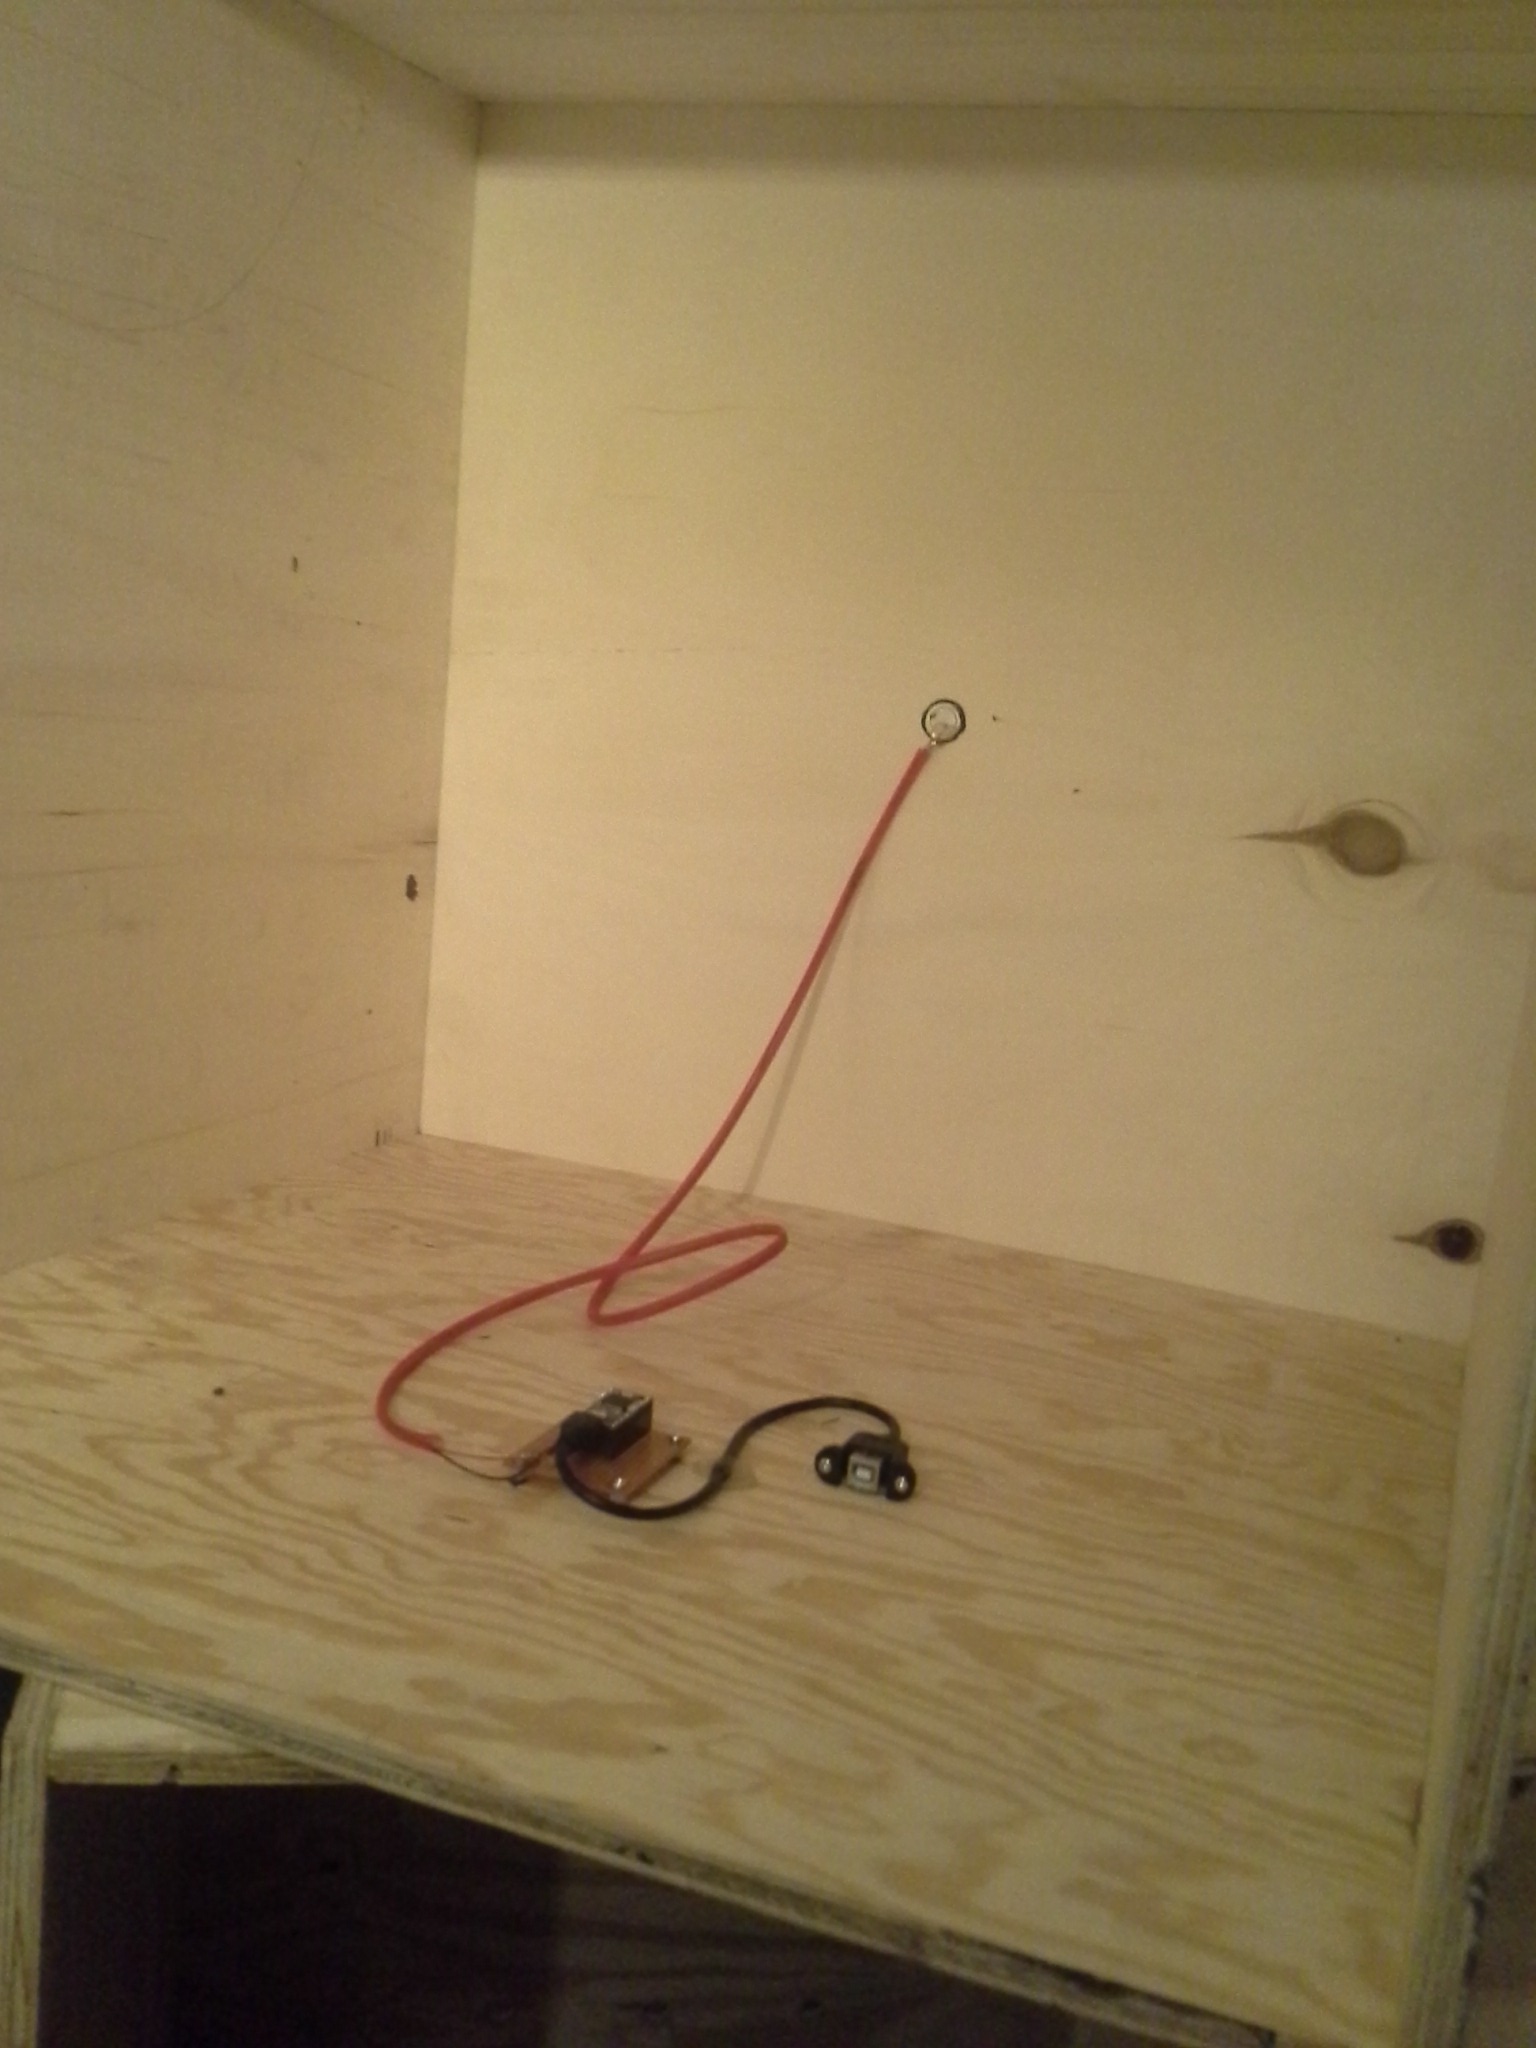
Last but not least I epoxied a single piezo sensor directly onto the inner side of one of the walls to detect sharp vibrations caused by visitors striking the box from the outside. The sensor was wired up to a Teensy microcontroller, which was programmed with custom firmware that processed signal spikes from the piezo sensor and triggered a left mouse click for the computer.
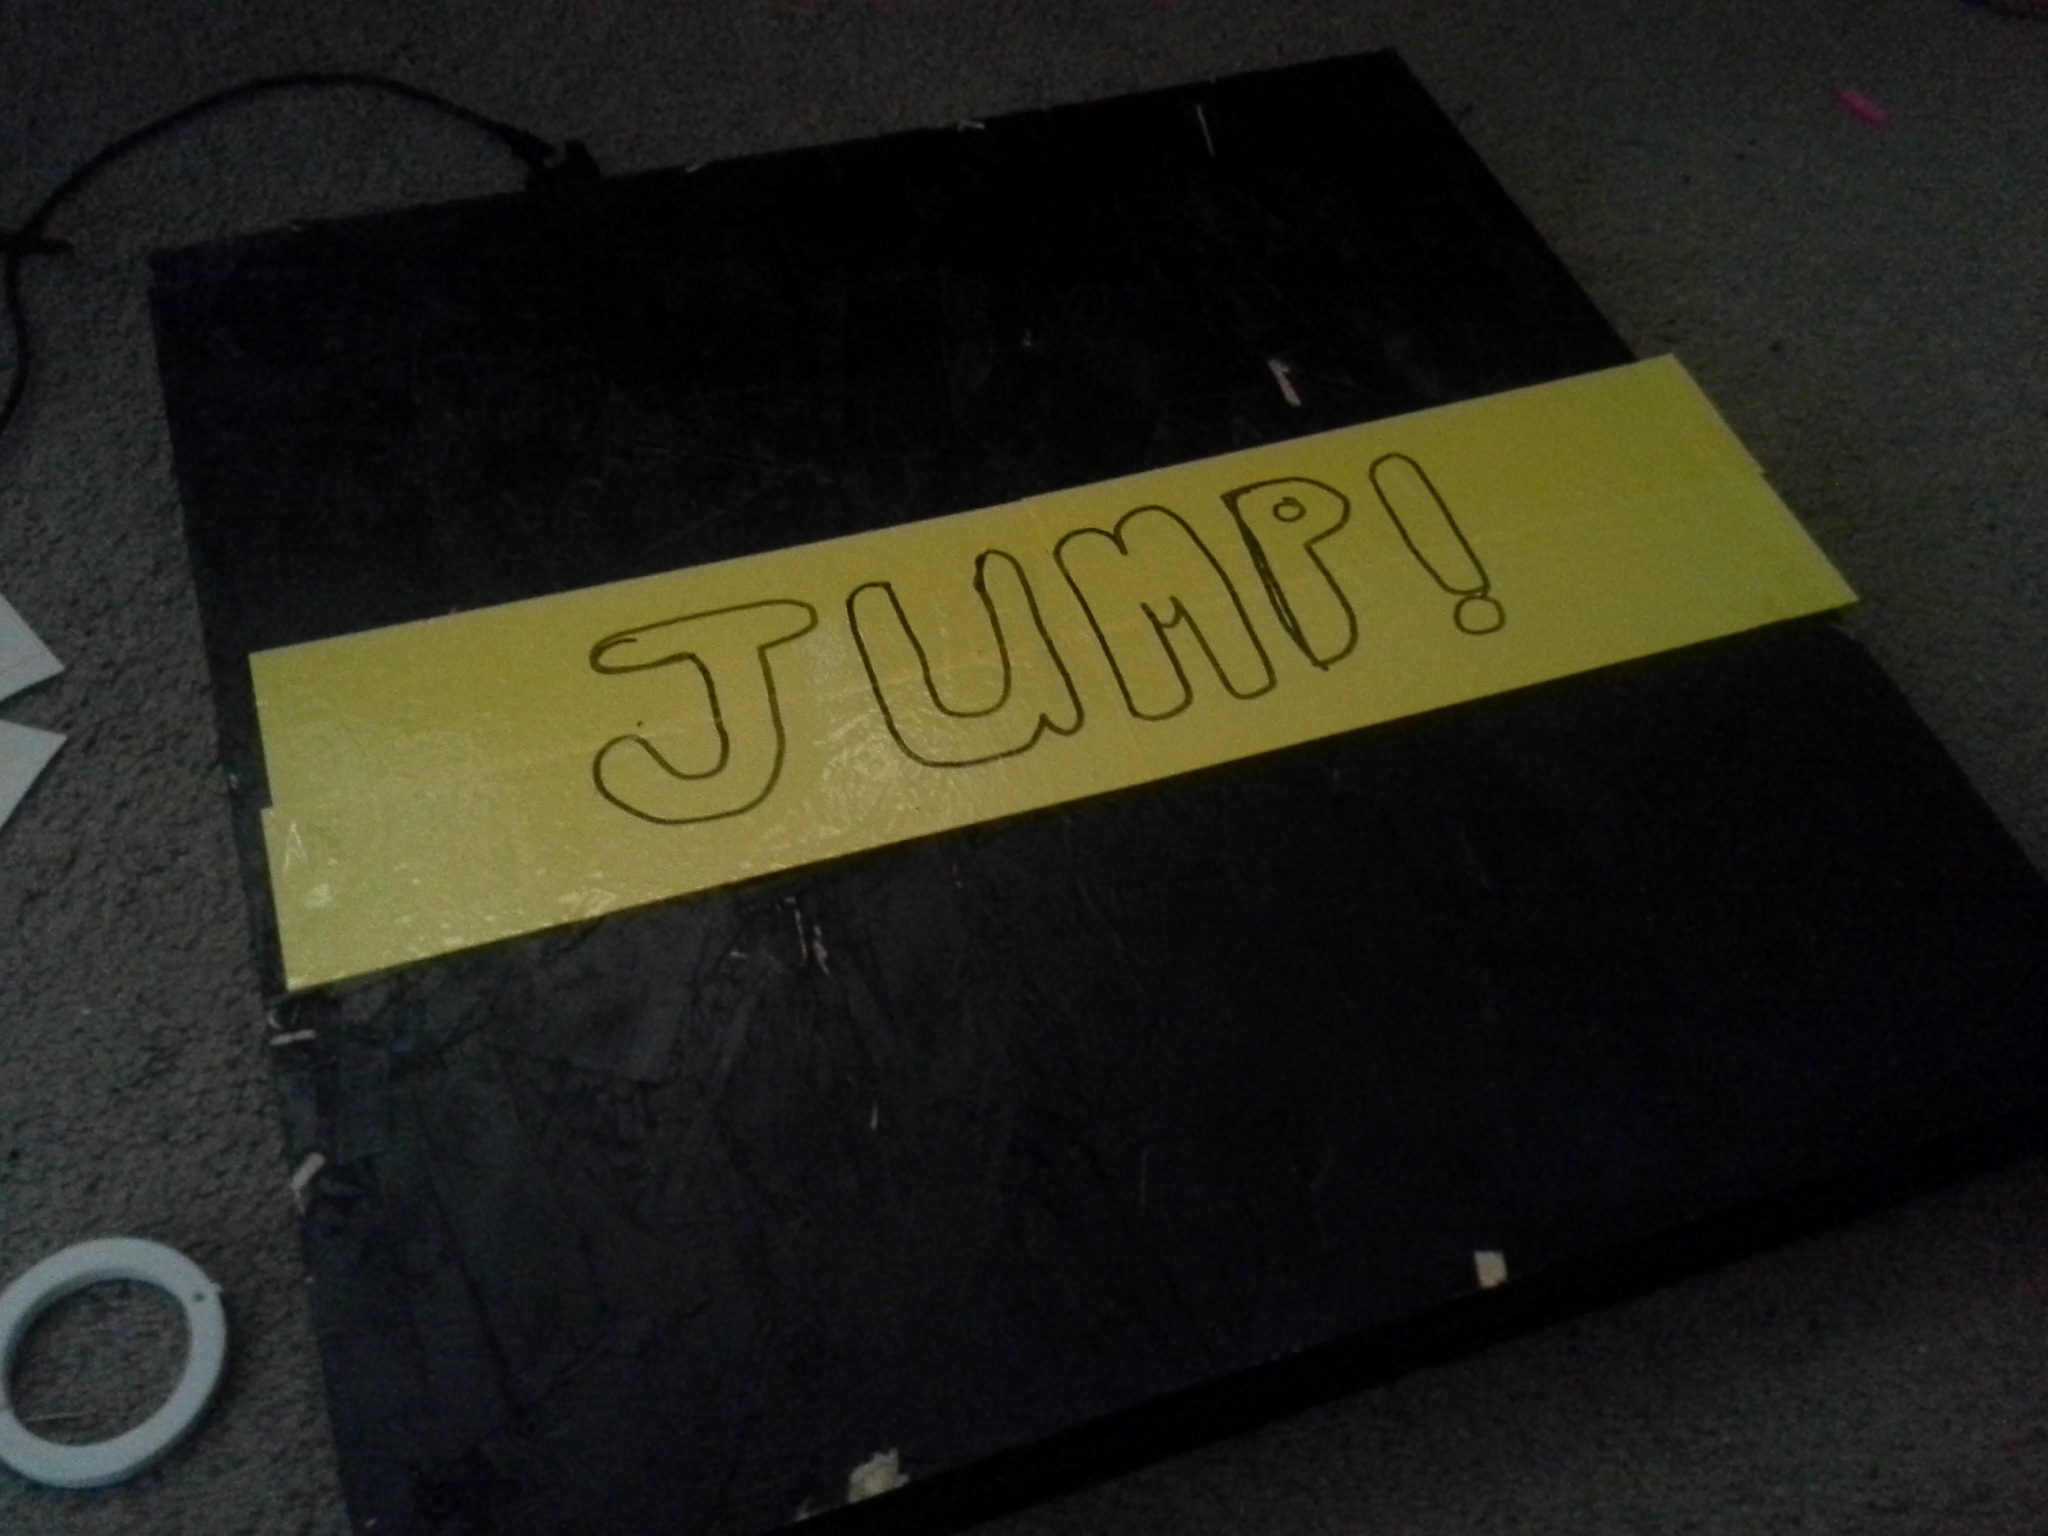
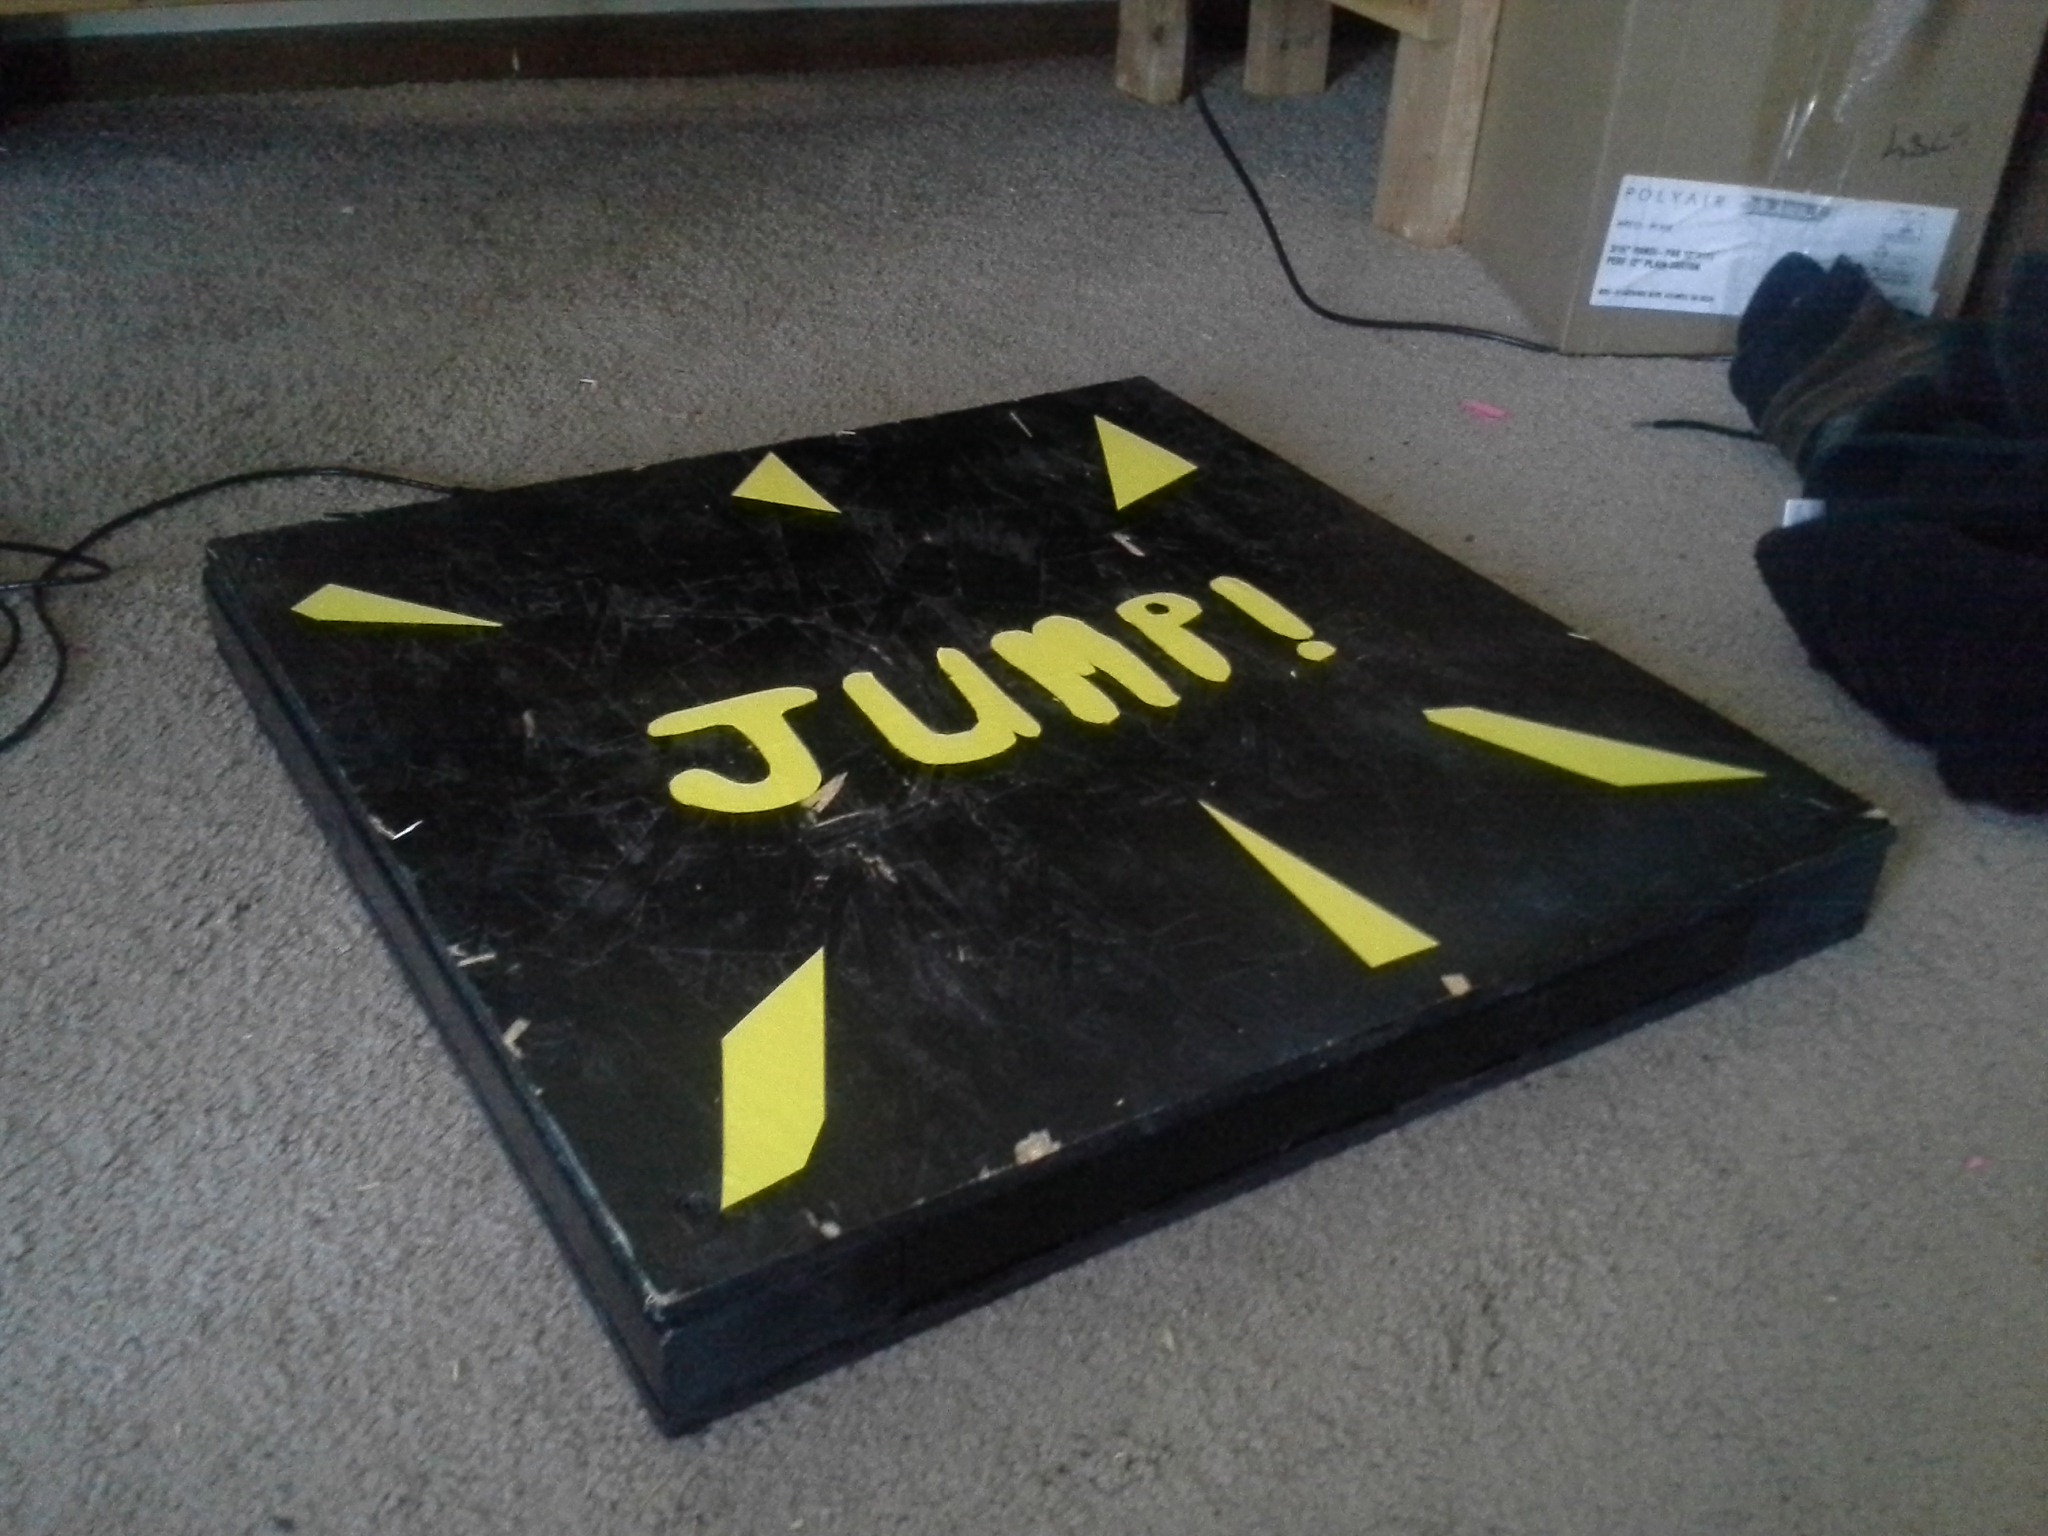
Jump pad
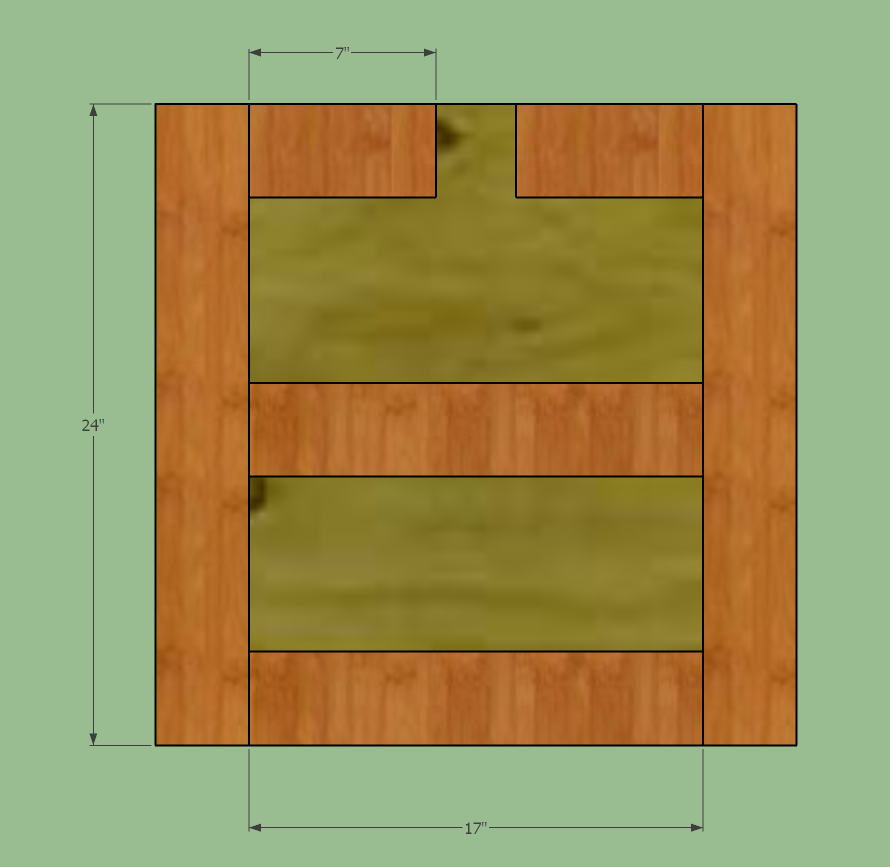
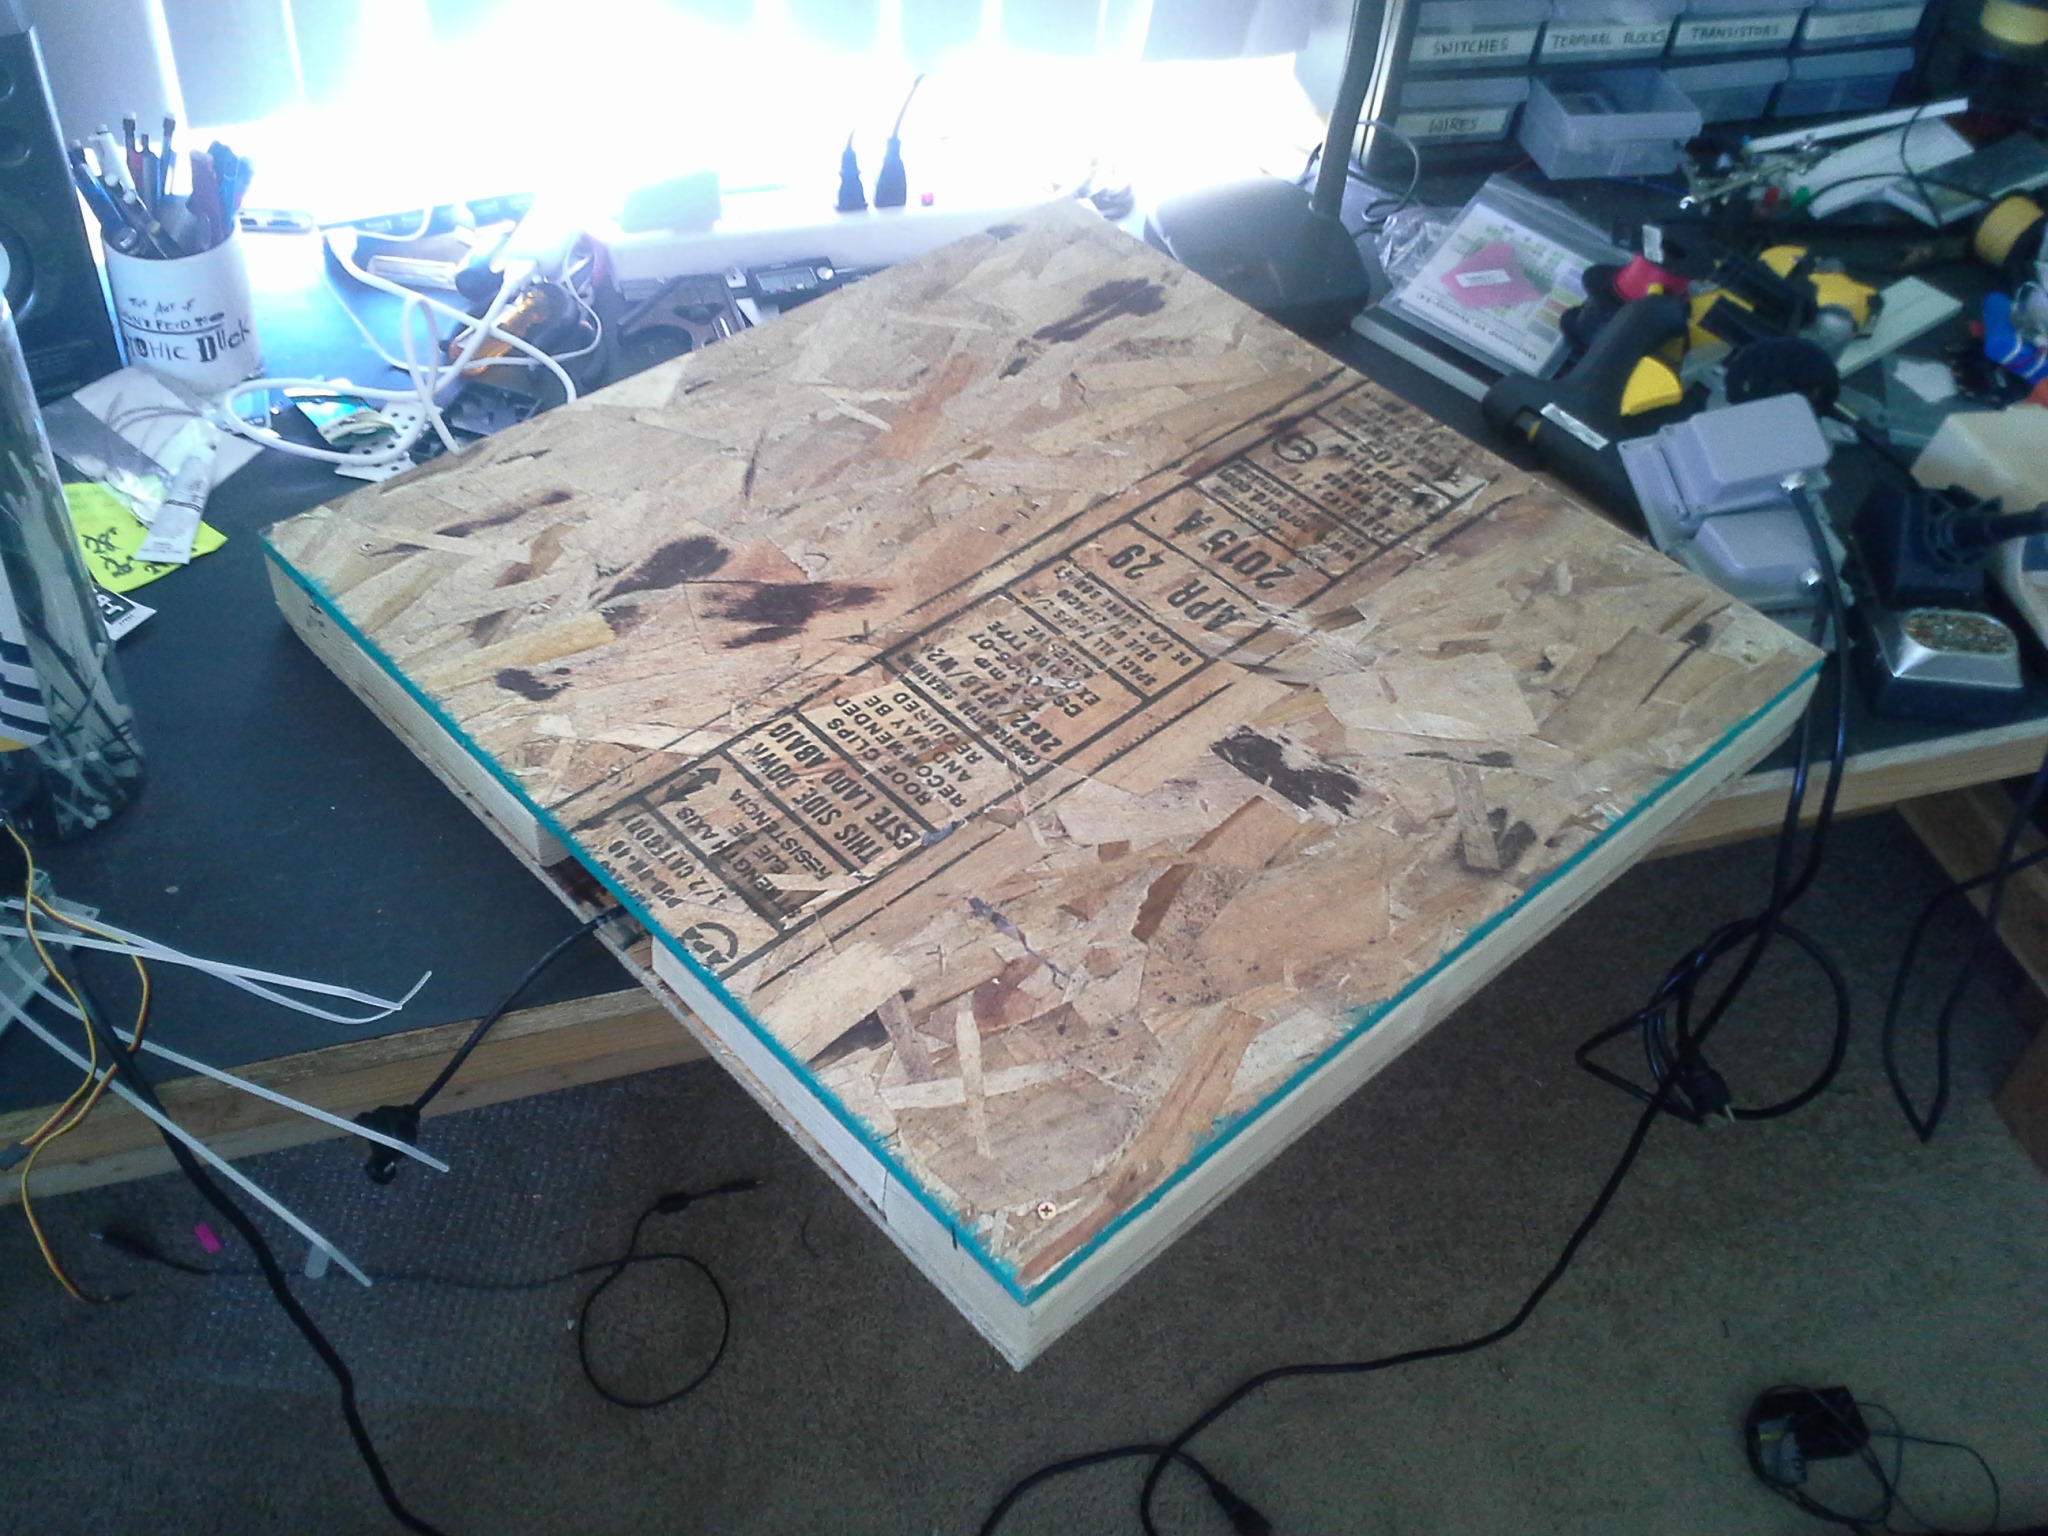
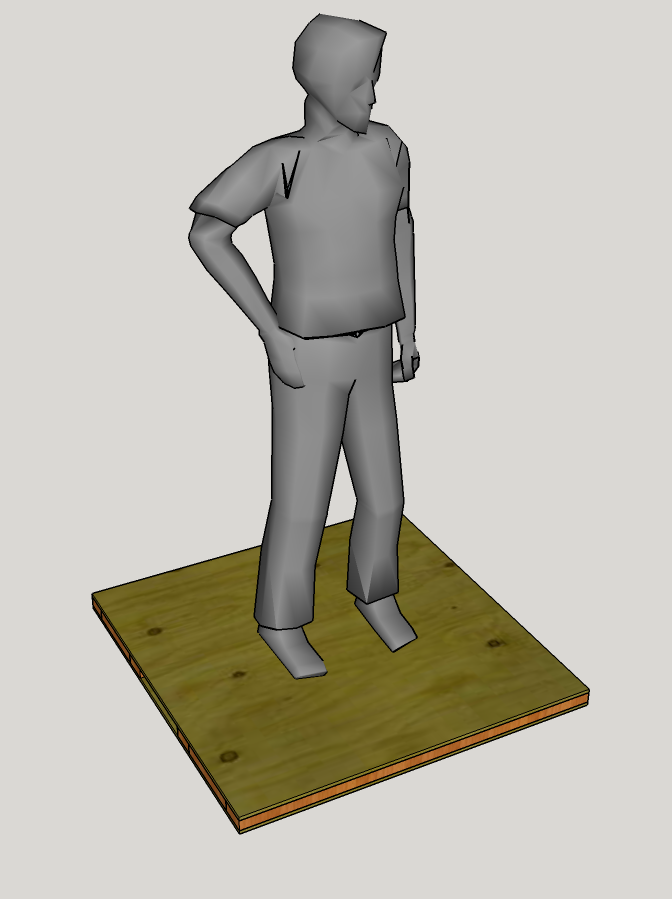
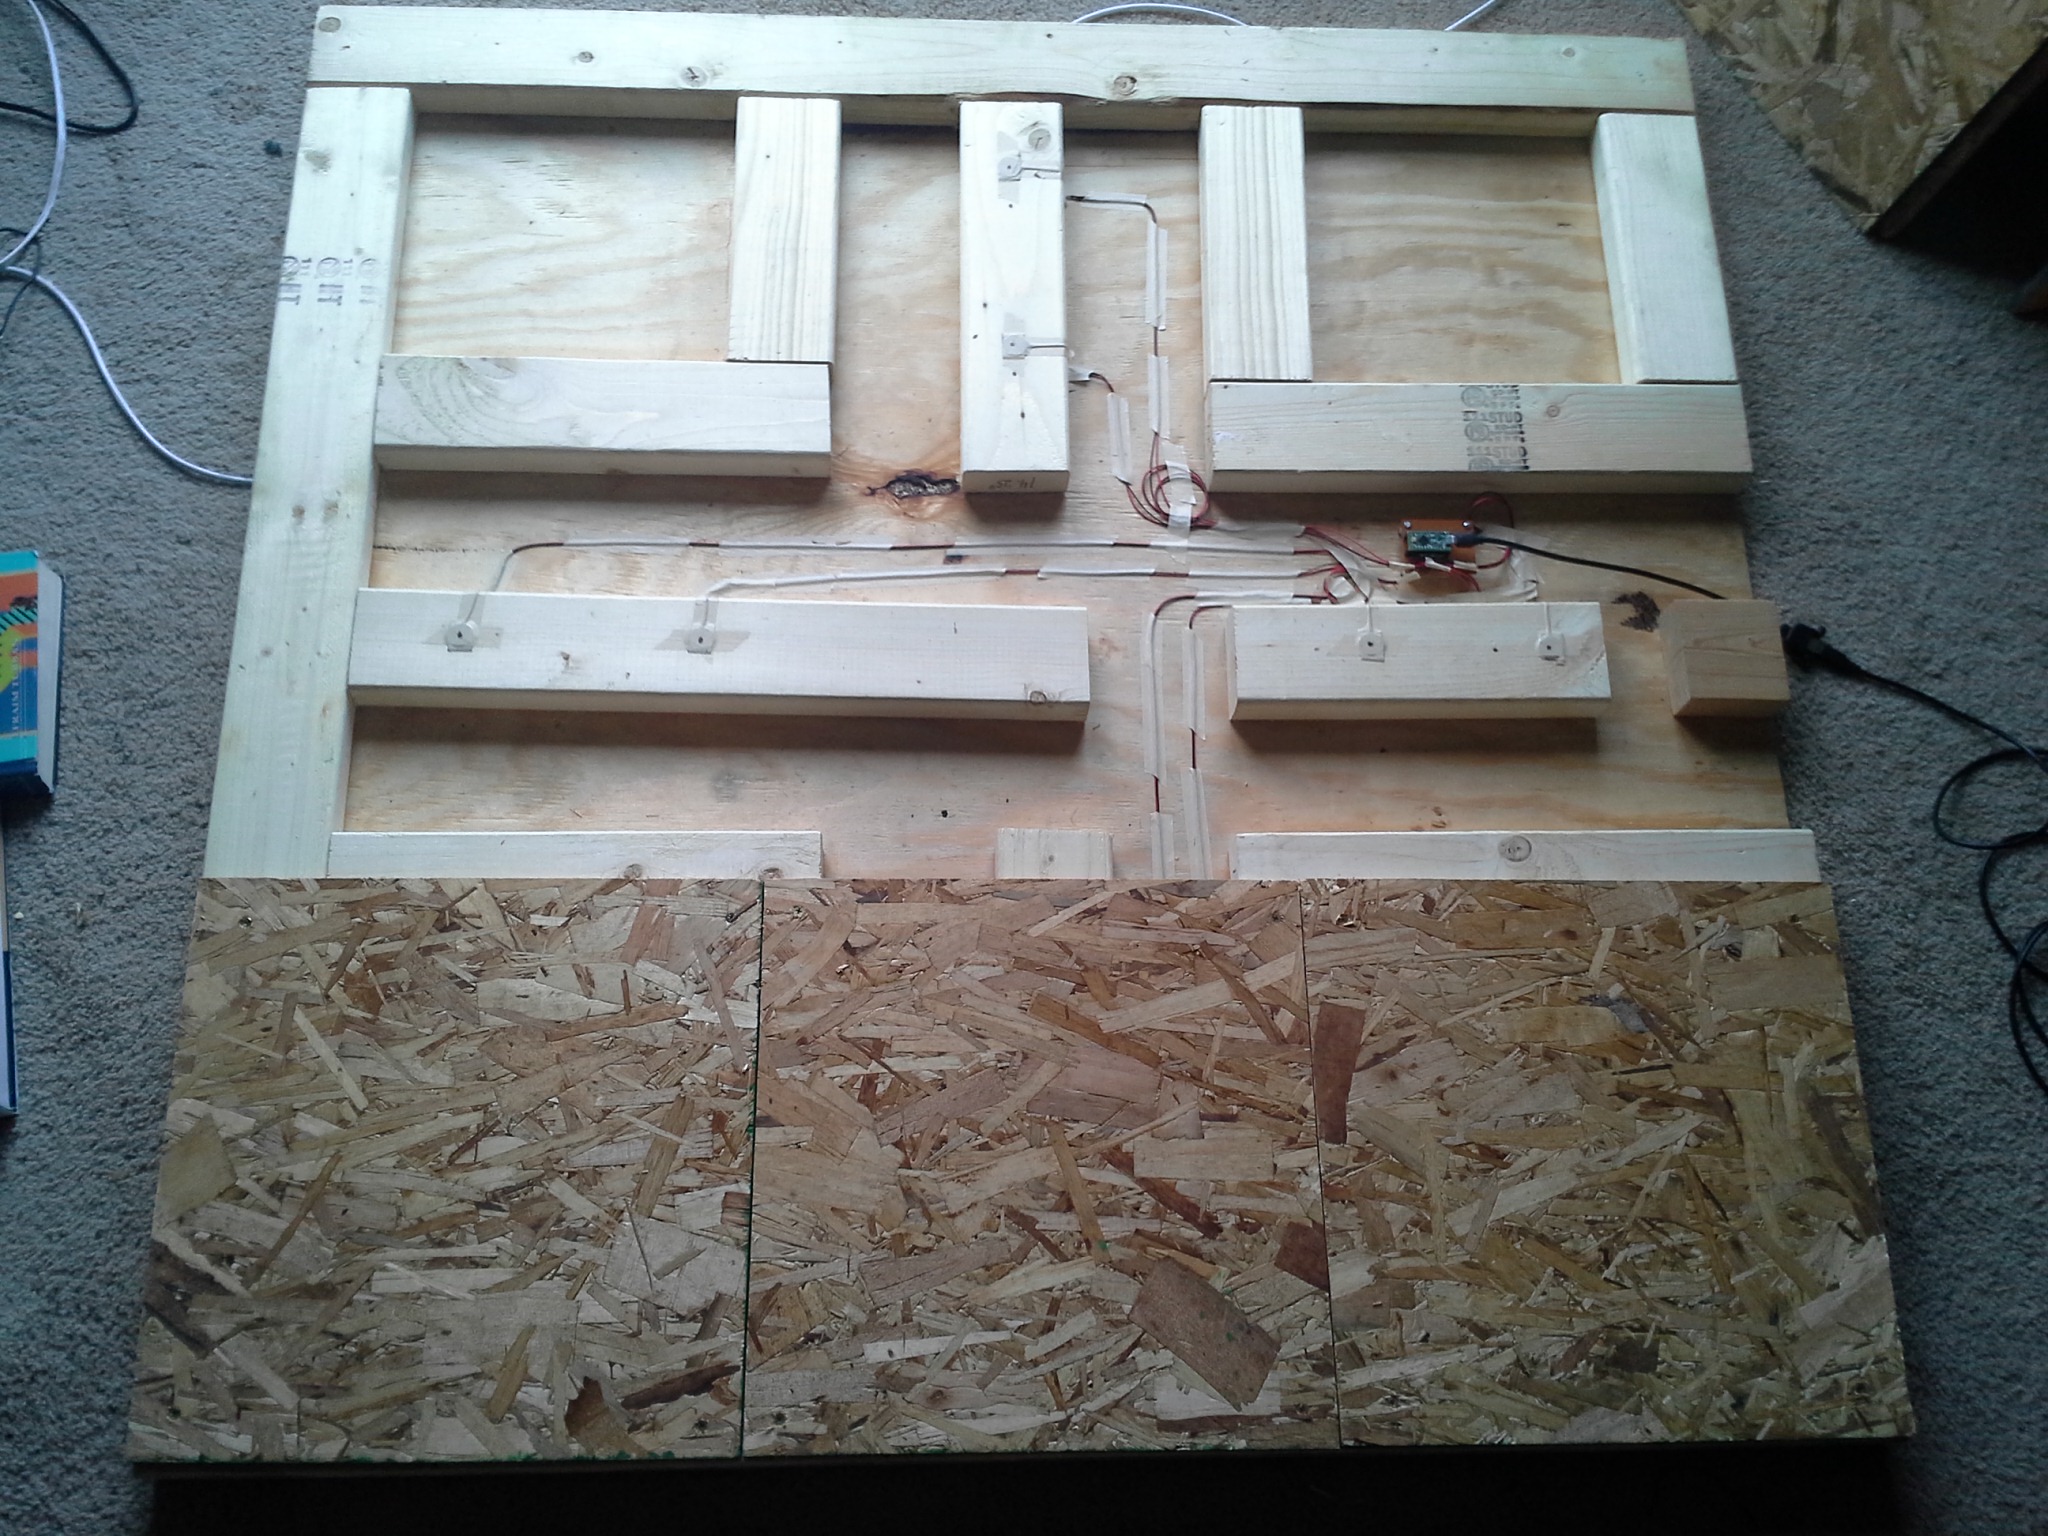
Next up I designed and built a small 2×2′ wooden pad for visitors to physically jump on top of to cause the in-game character to jump. I knew this would need to stand up to a lot of force from visitors over the course of the three-month exhibition while also being as cheap as possible to produce, so intuitively I knew I’d want to use off-the-shelf construction-grade materials like 2×4′ studs and plywood for the basic construction.
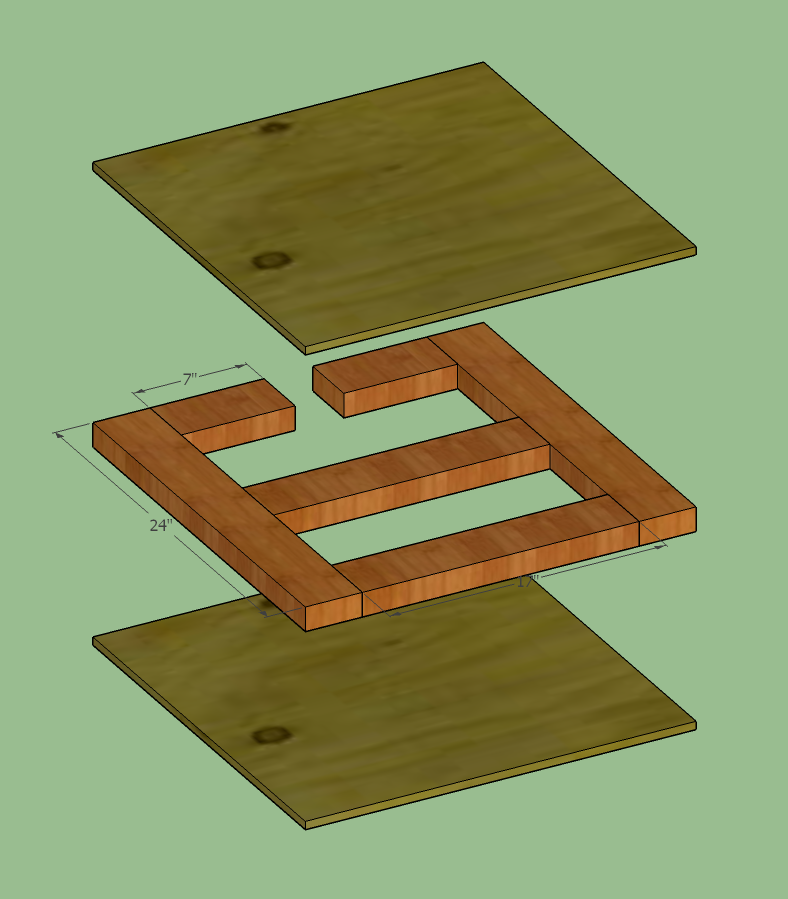
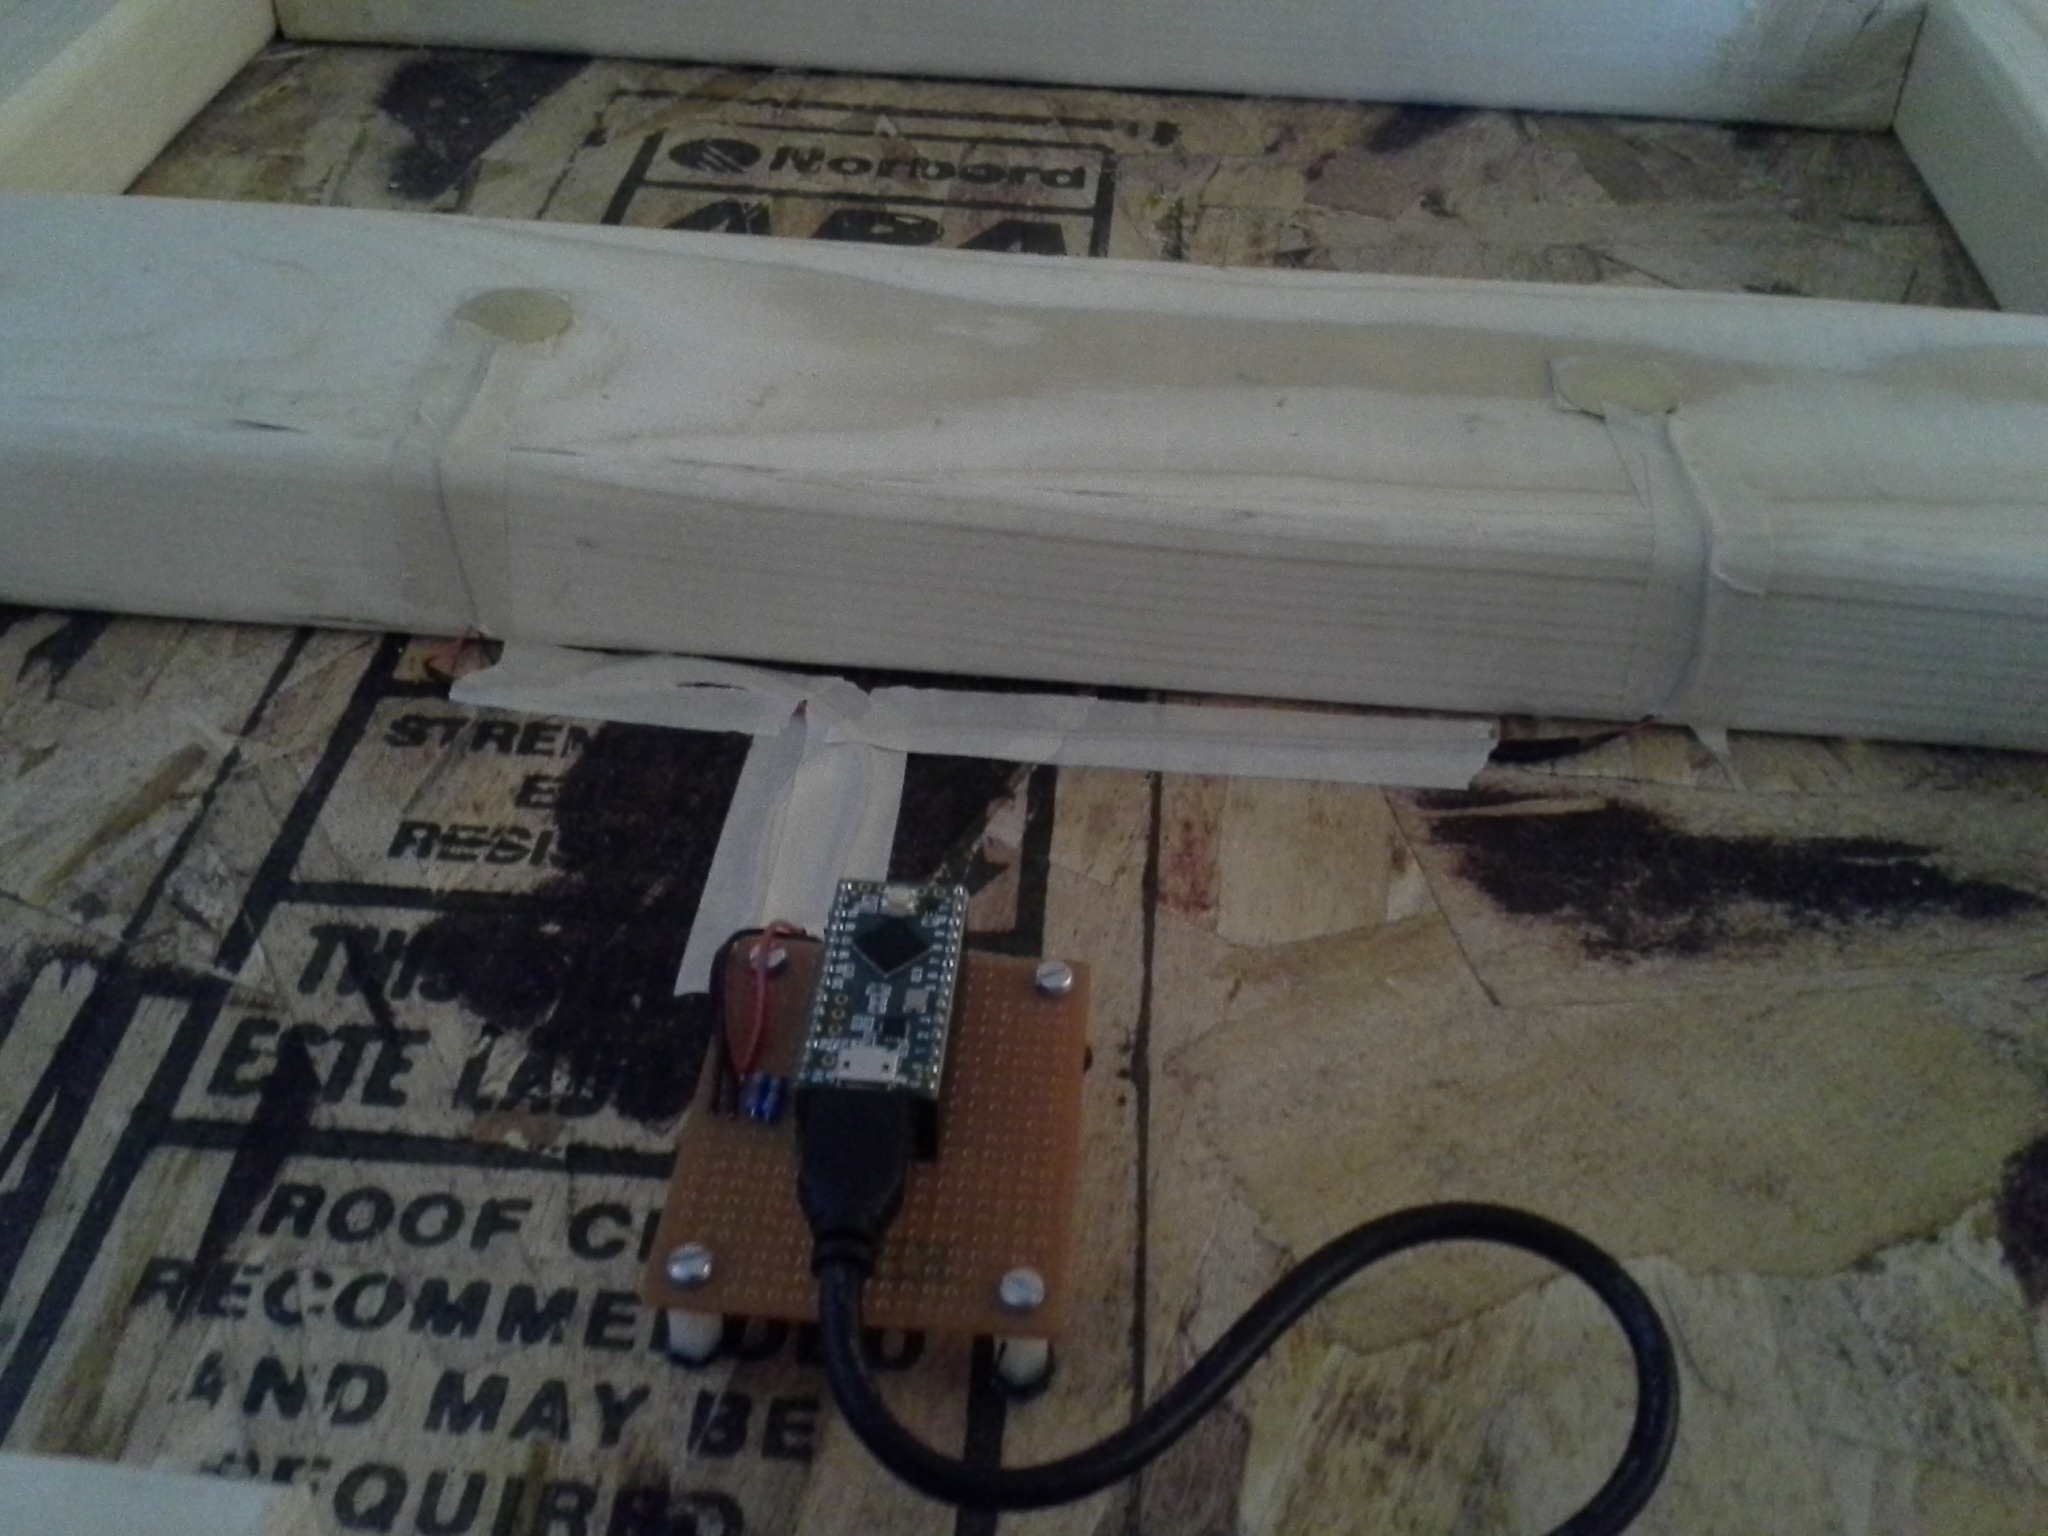
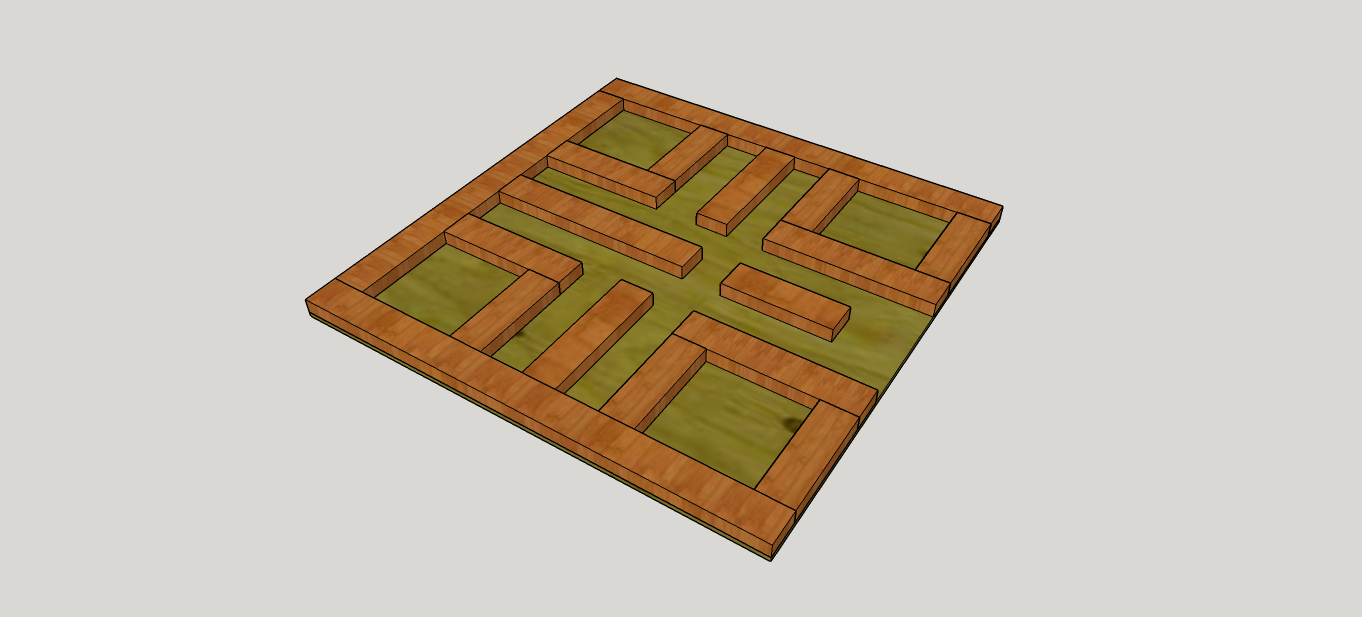
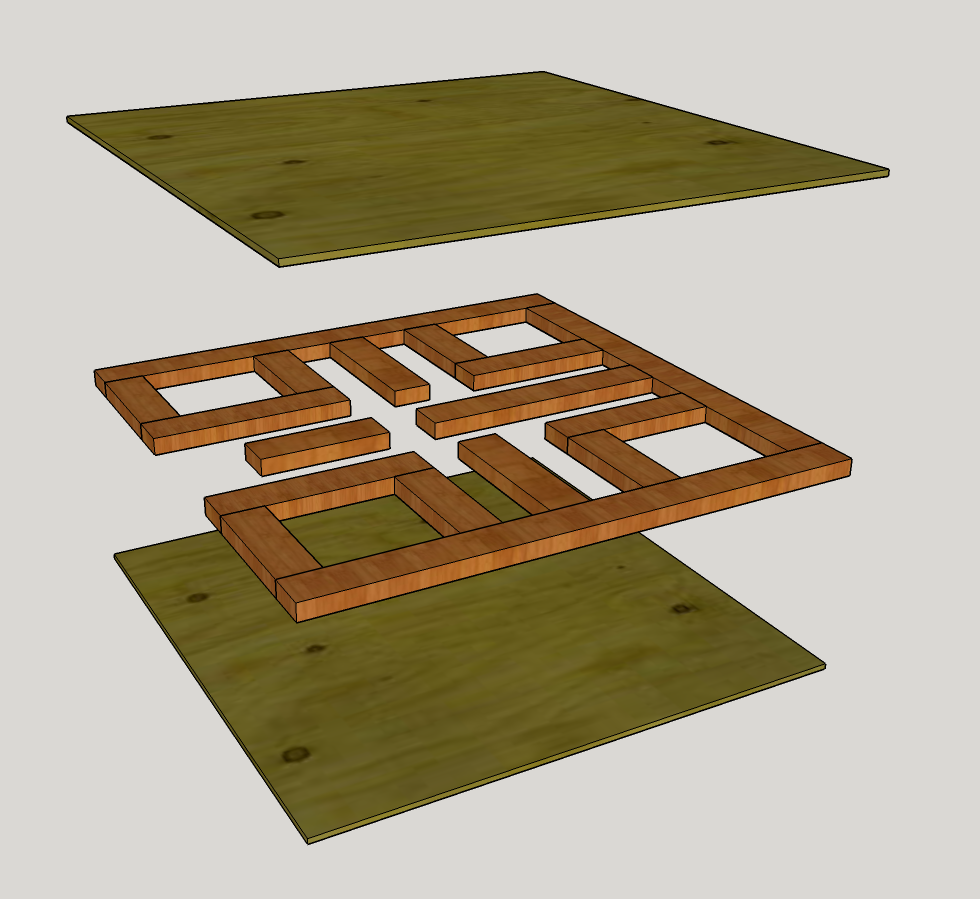
To make the pad interactive I rigidly mounted two piezo elements on a length of wood in the center of the pad. The top layer of plywood is only secured at the corners and along the edges, allowing for a slight amount of flex near the center when a bit of force is applied (like a person jumping). The natural stiffness of the plywood allows it to straighten back out as soon as the force is removed.
When a person is standing or jumping on the pad the center of the top plywood panel flexes downward ever so slightly, applying a compression force to the piezo sensors. This force causes a significant spike in voltage generated by the piezo sensor, which is read in by the Teensy microcontroller and turned into a keypress of the “space” key.
Design
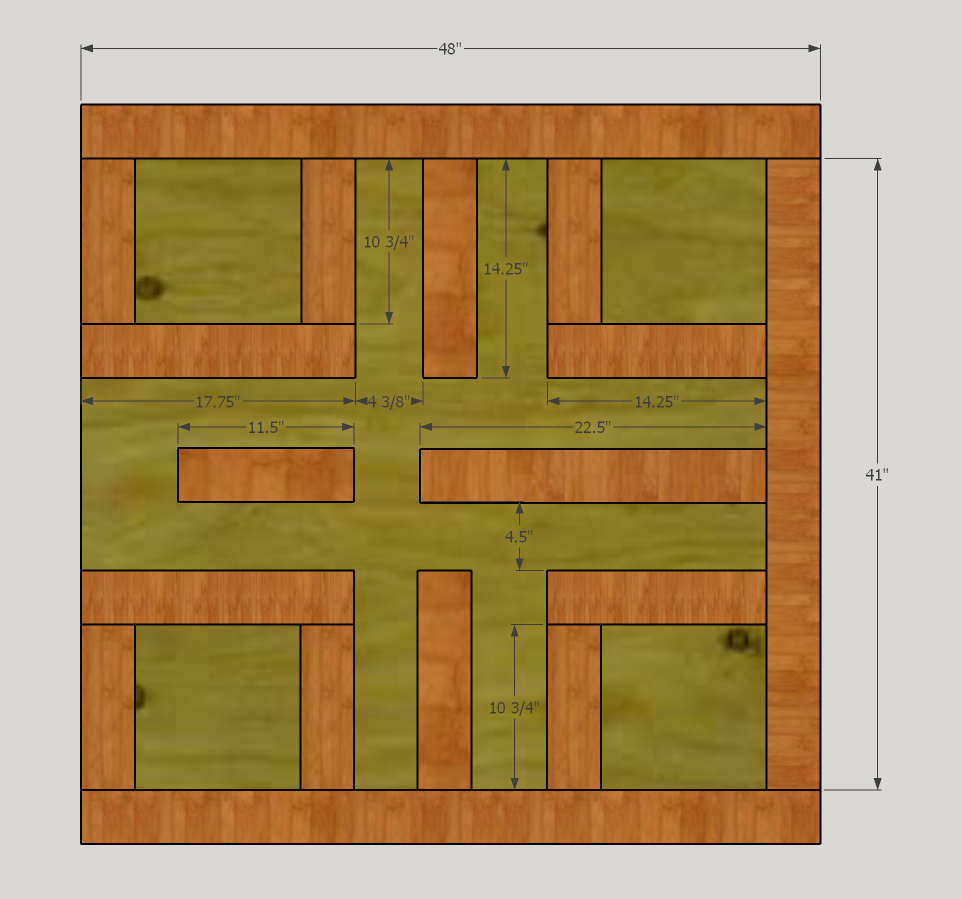
Using Sketchup I planned out the overall dimensions of the pad, as well as the internal framework of 2×4″ wooden stud pieces that I needed. I knew that plywood was readily available in 2×2′ sheets, so that seemed like a great place to start.

Fabrication
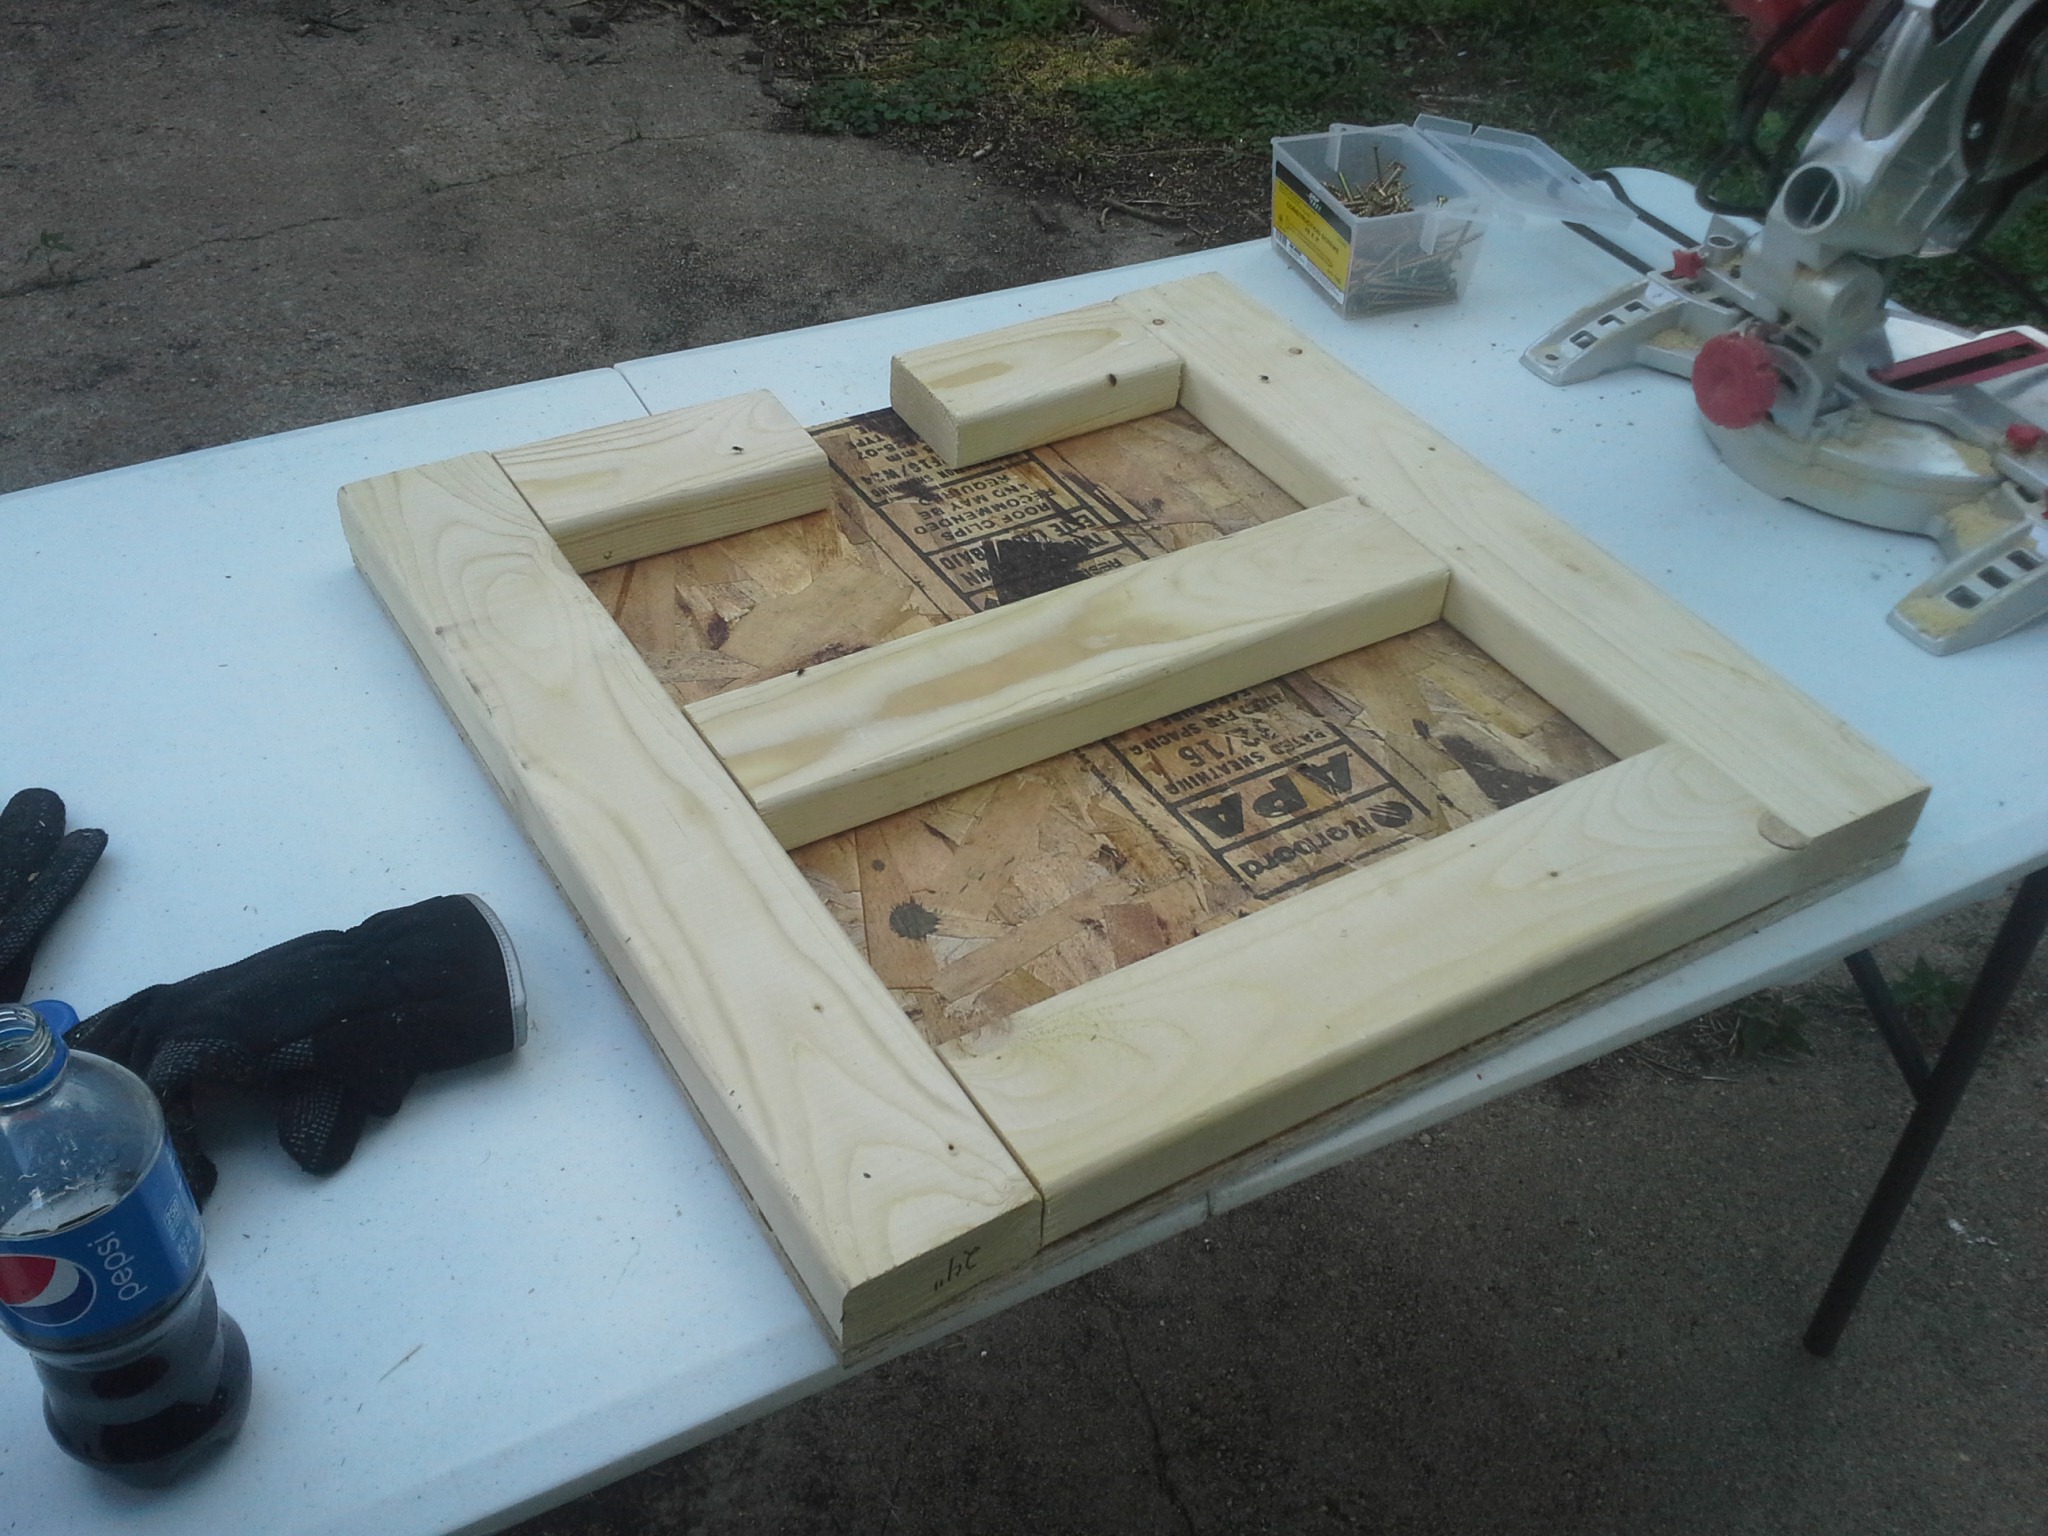
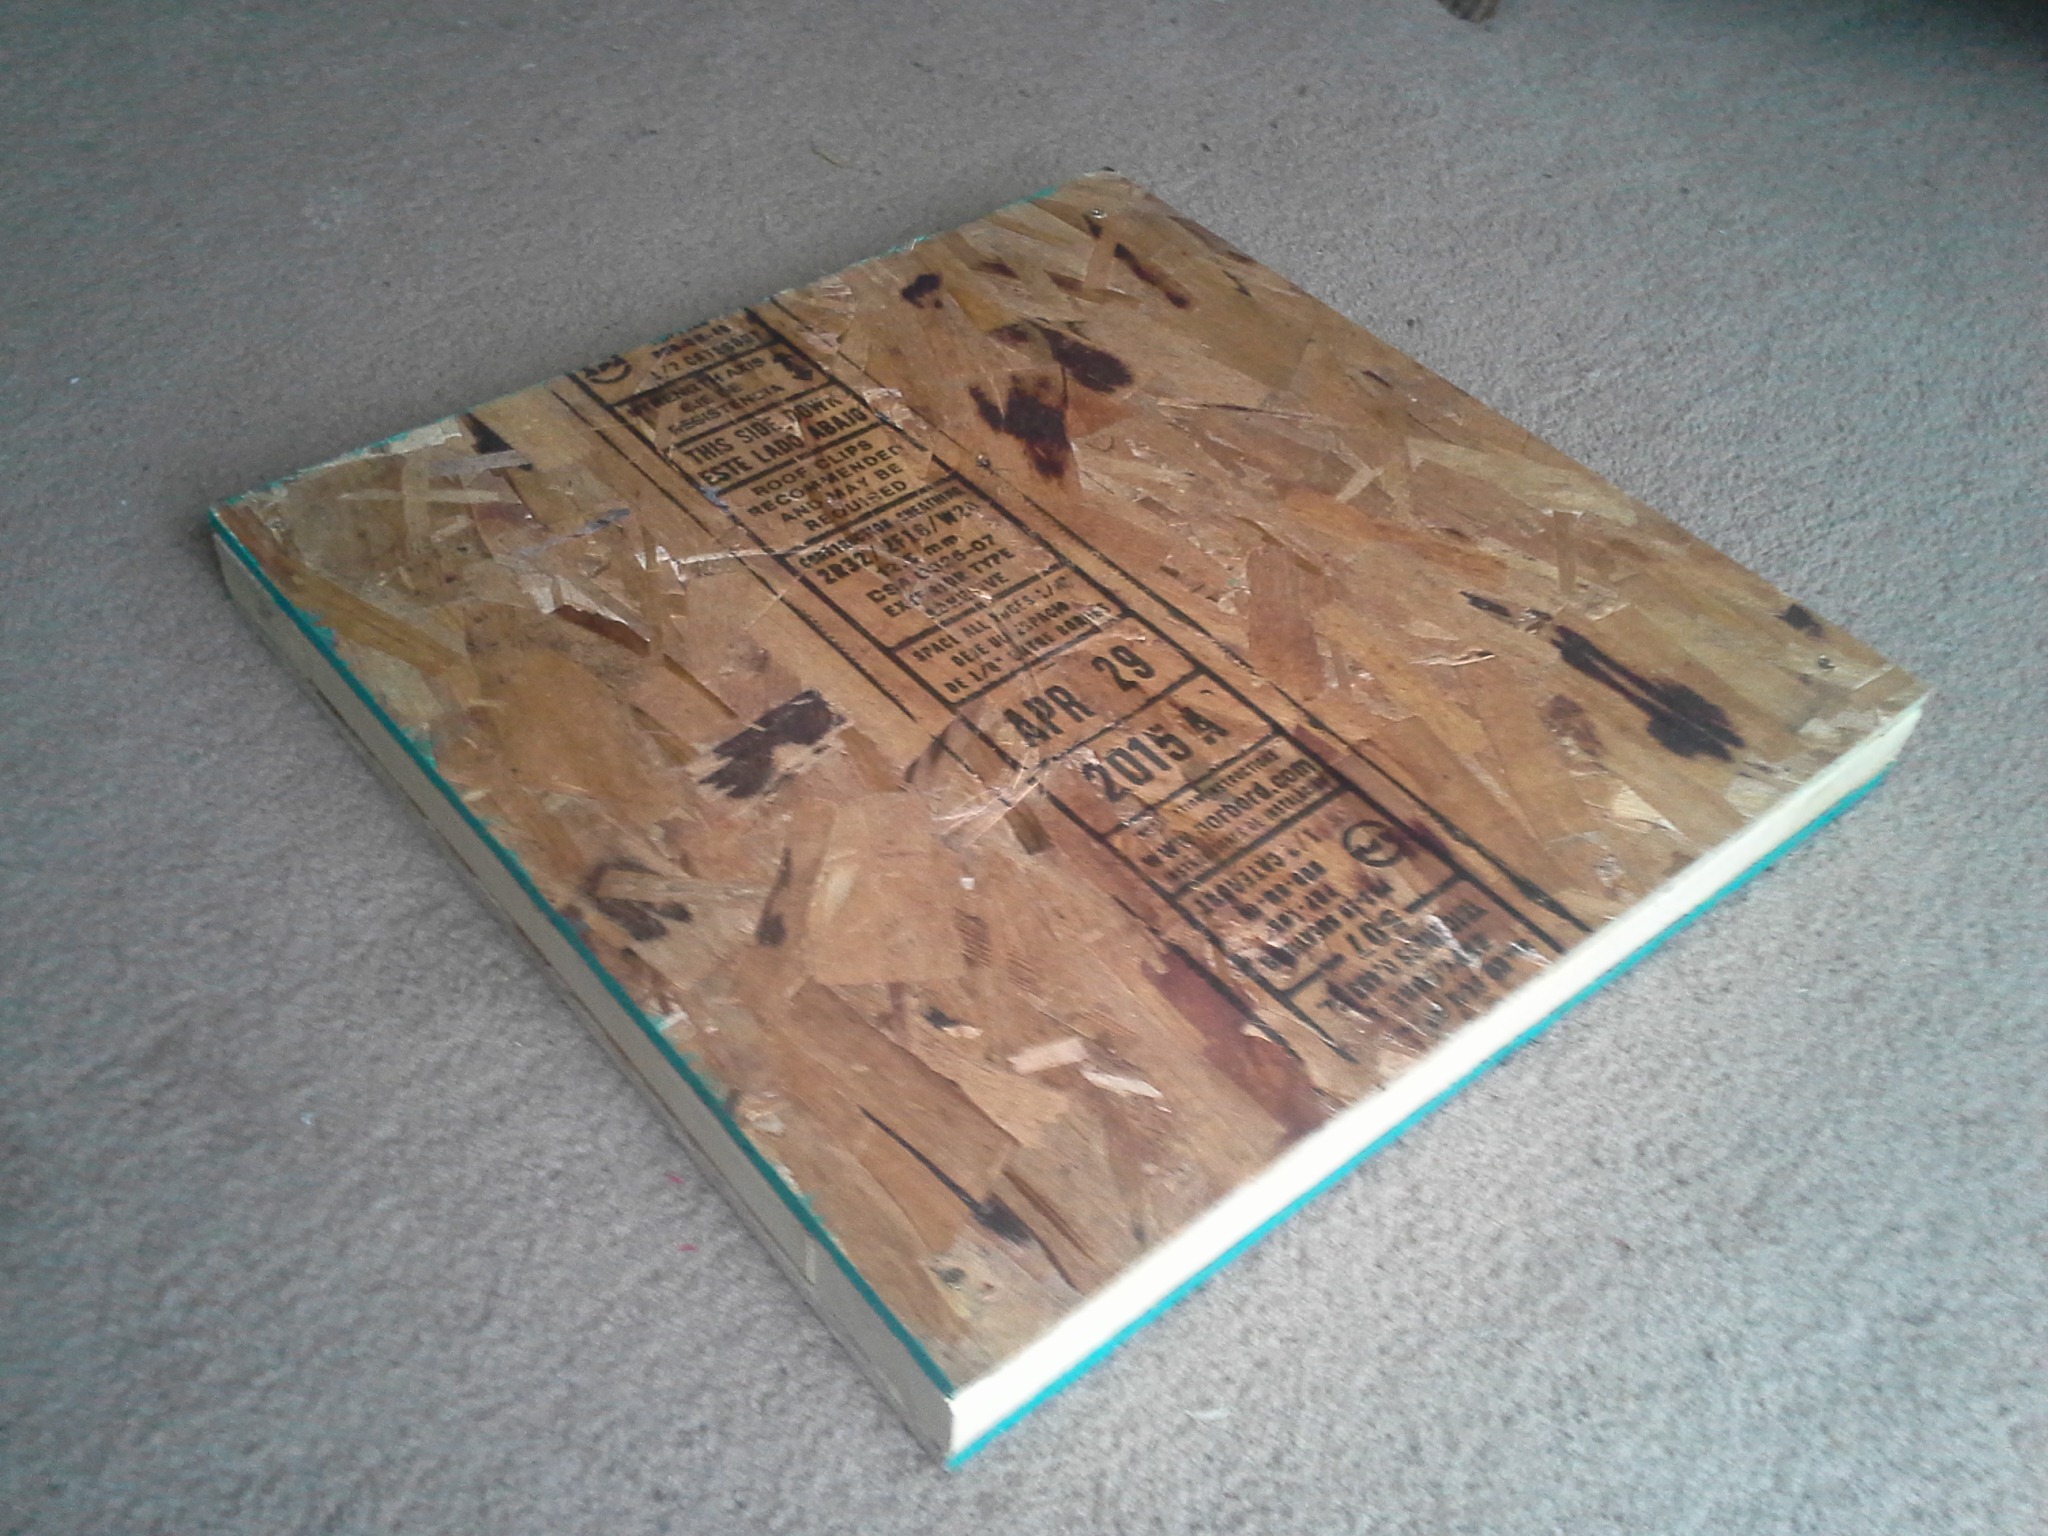
From the Sketchup model I made a list of all the materials and cuts I needed to do and spent a couple hours getting it all together. I used a combination of wood glue and construction screws to hold it all together for that extra bit of durability.
The piezo sensors were mounted with a good amount of masking tape, which turned out to work quite well. Once the exhibition was finished I removed the top layer of plywood to check on all the innards and found it all to be exactly as I left it!

Movement pad
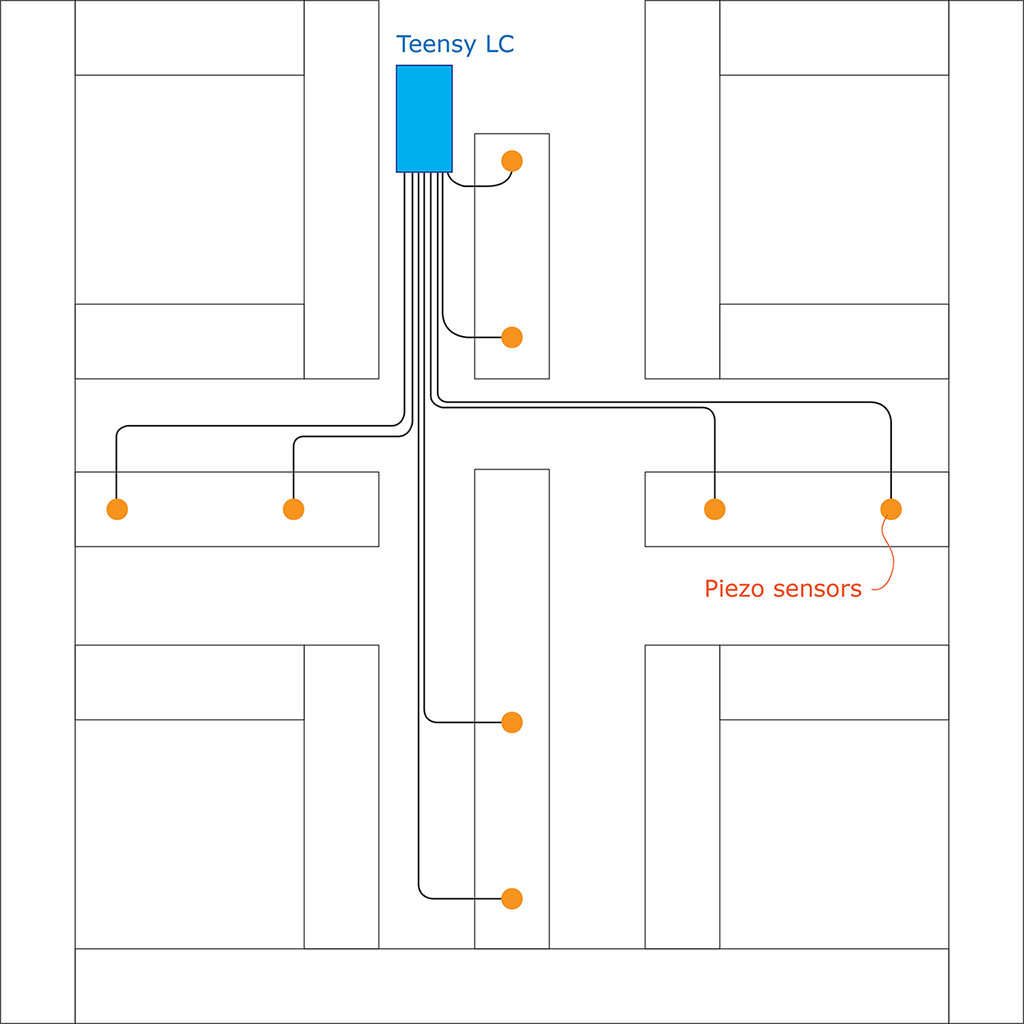
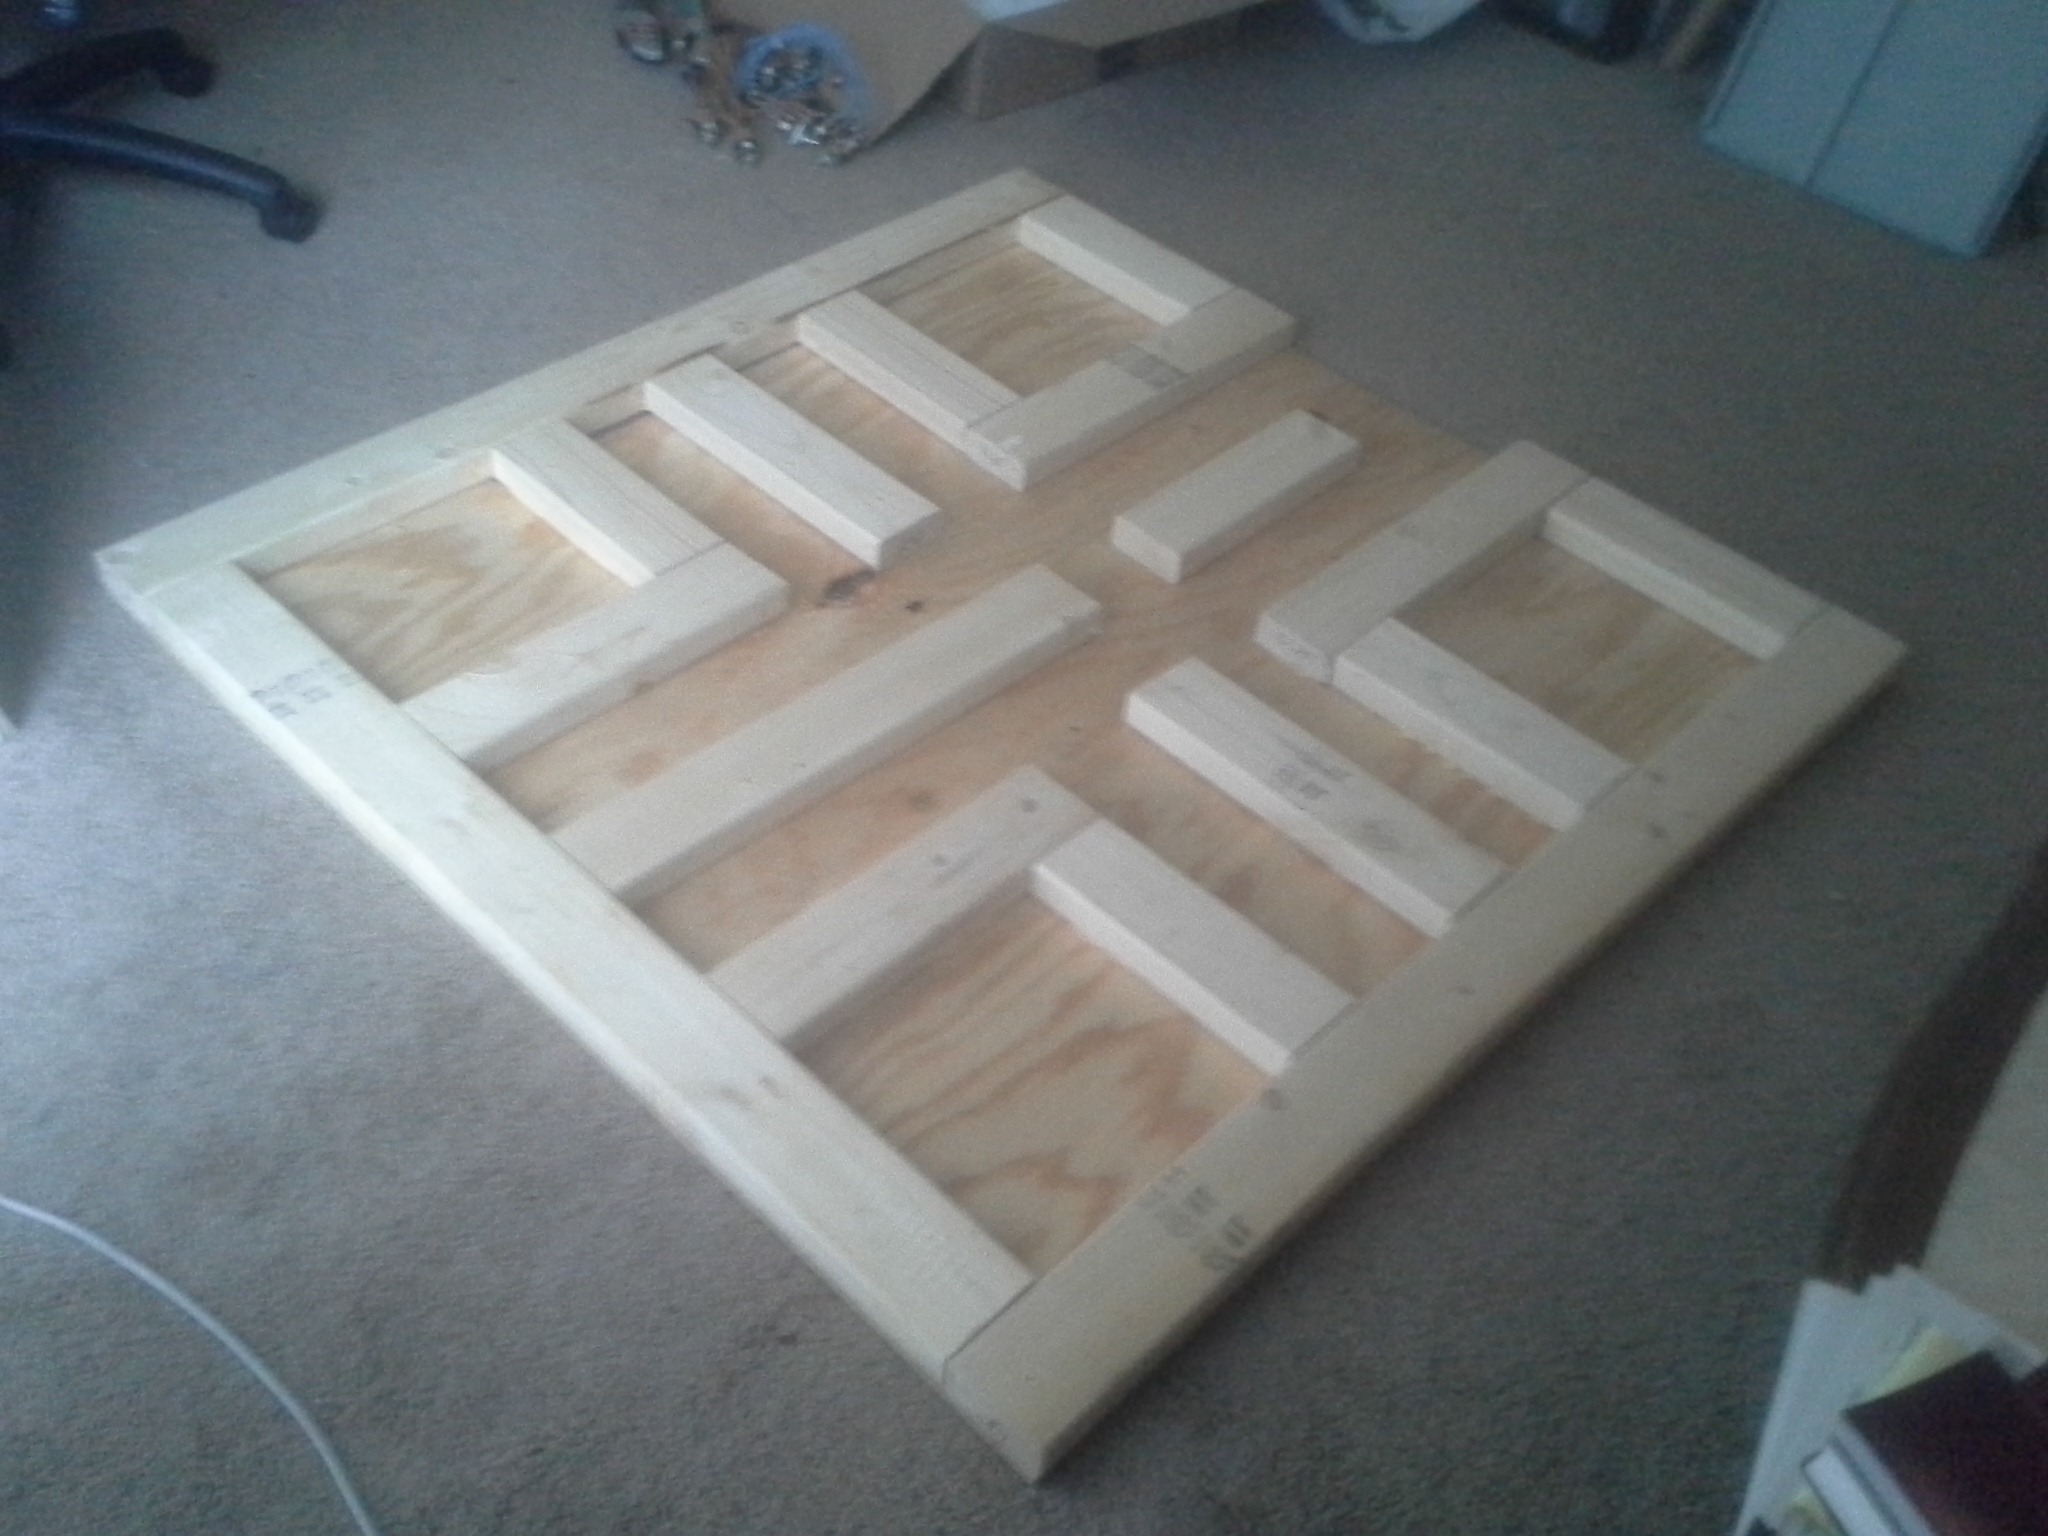
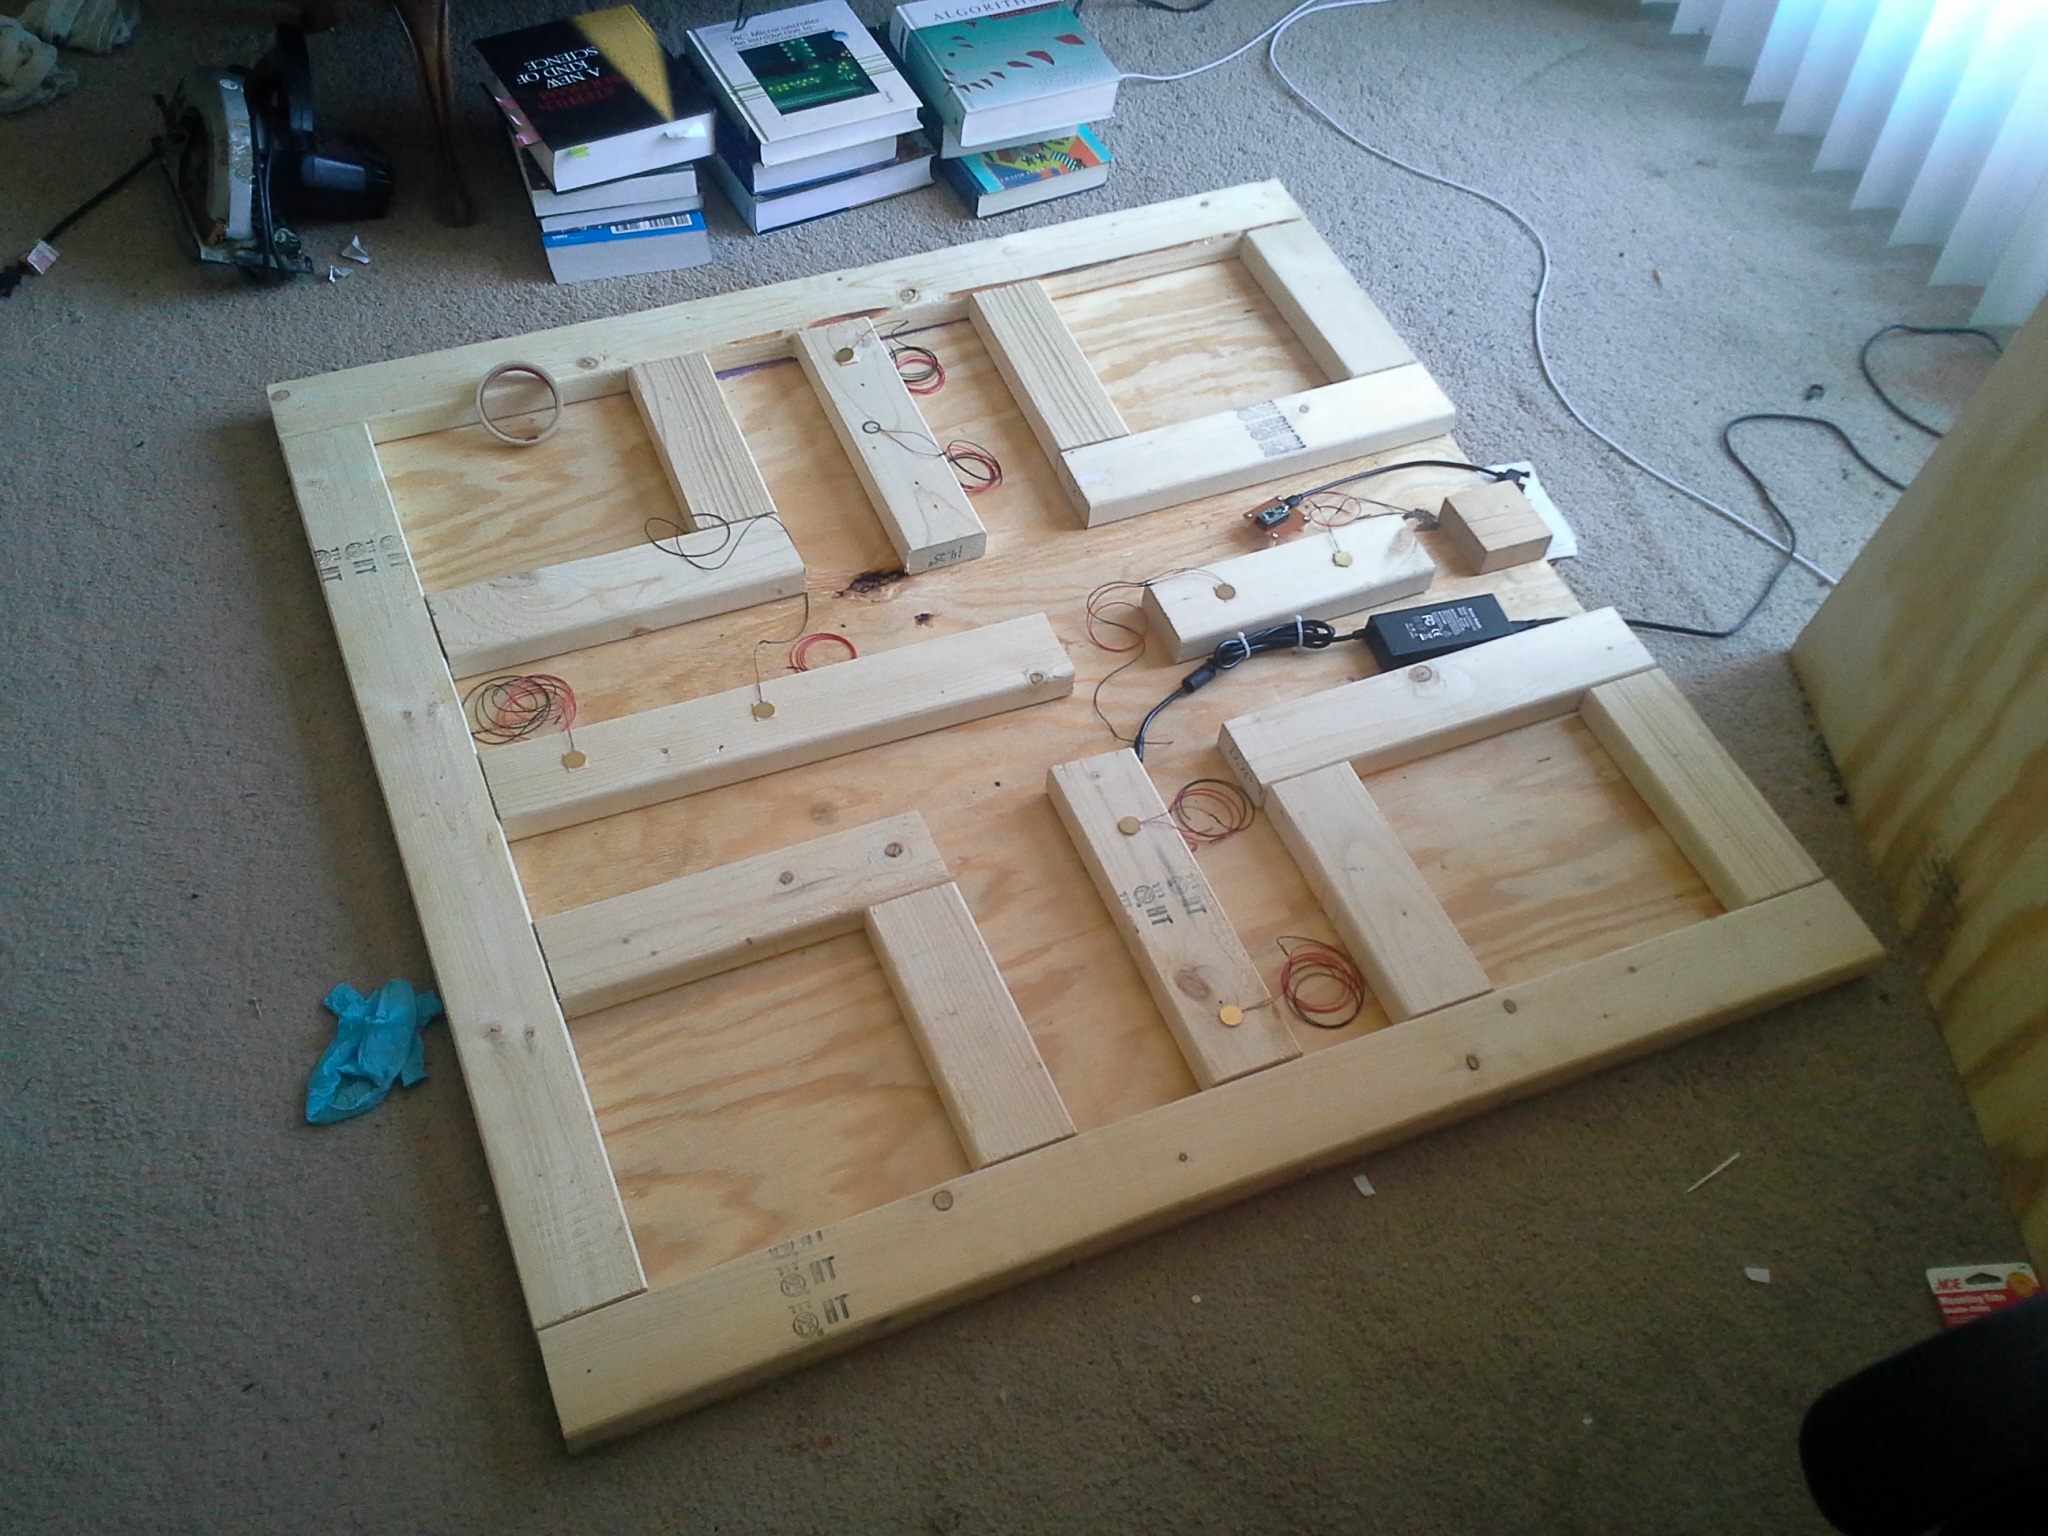
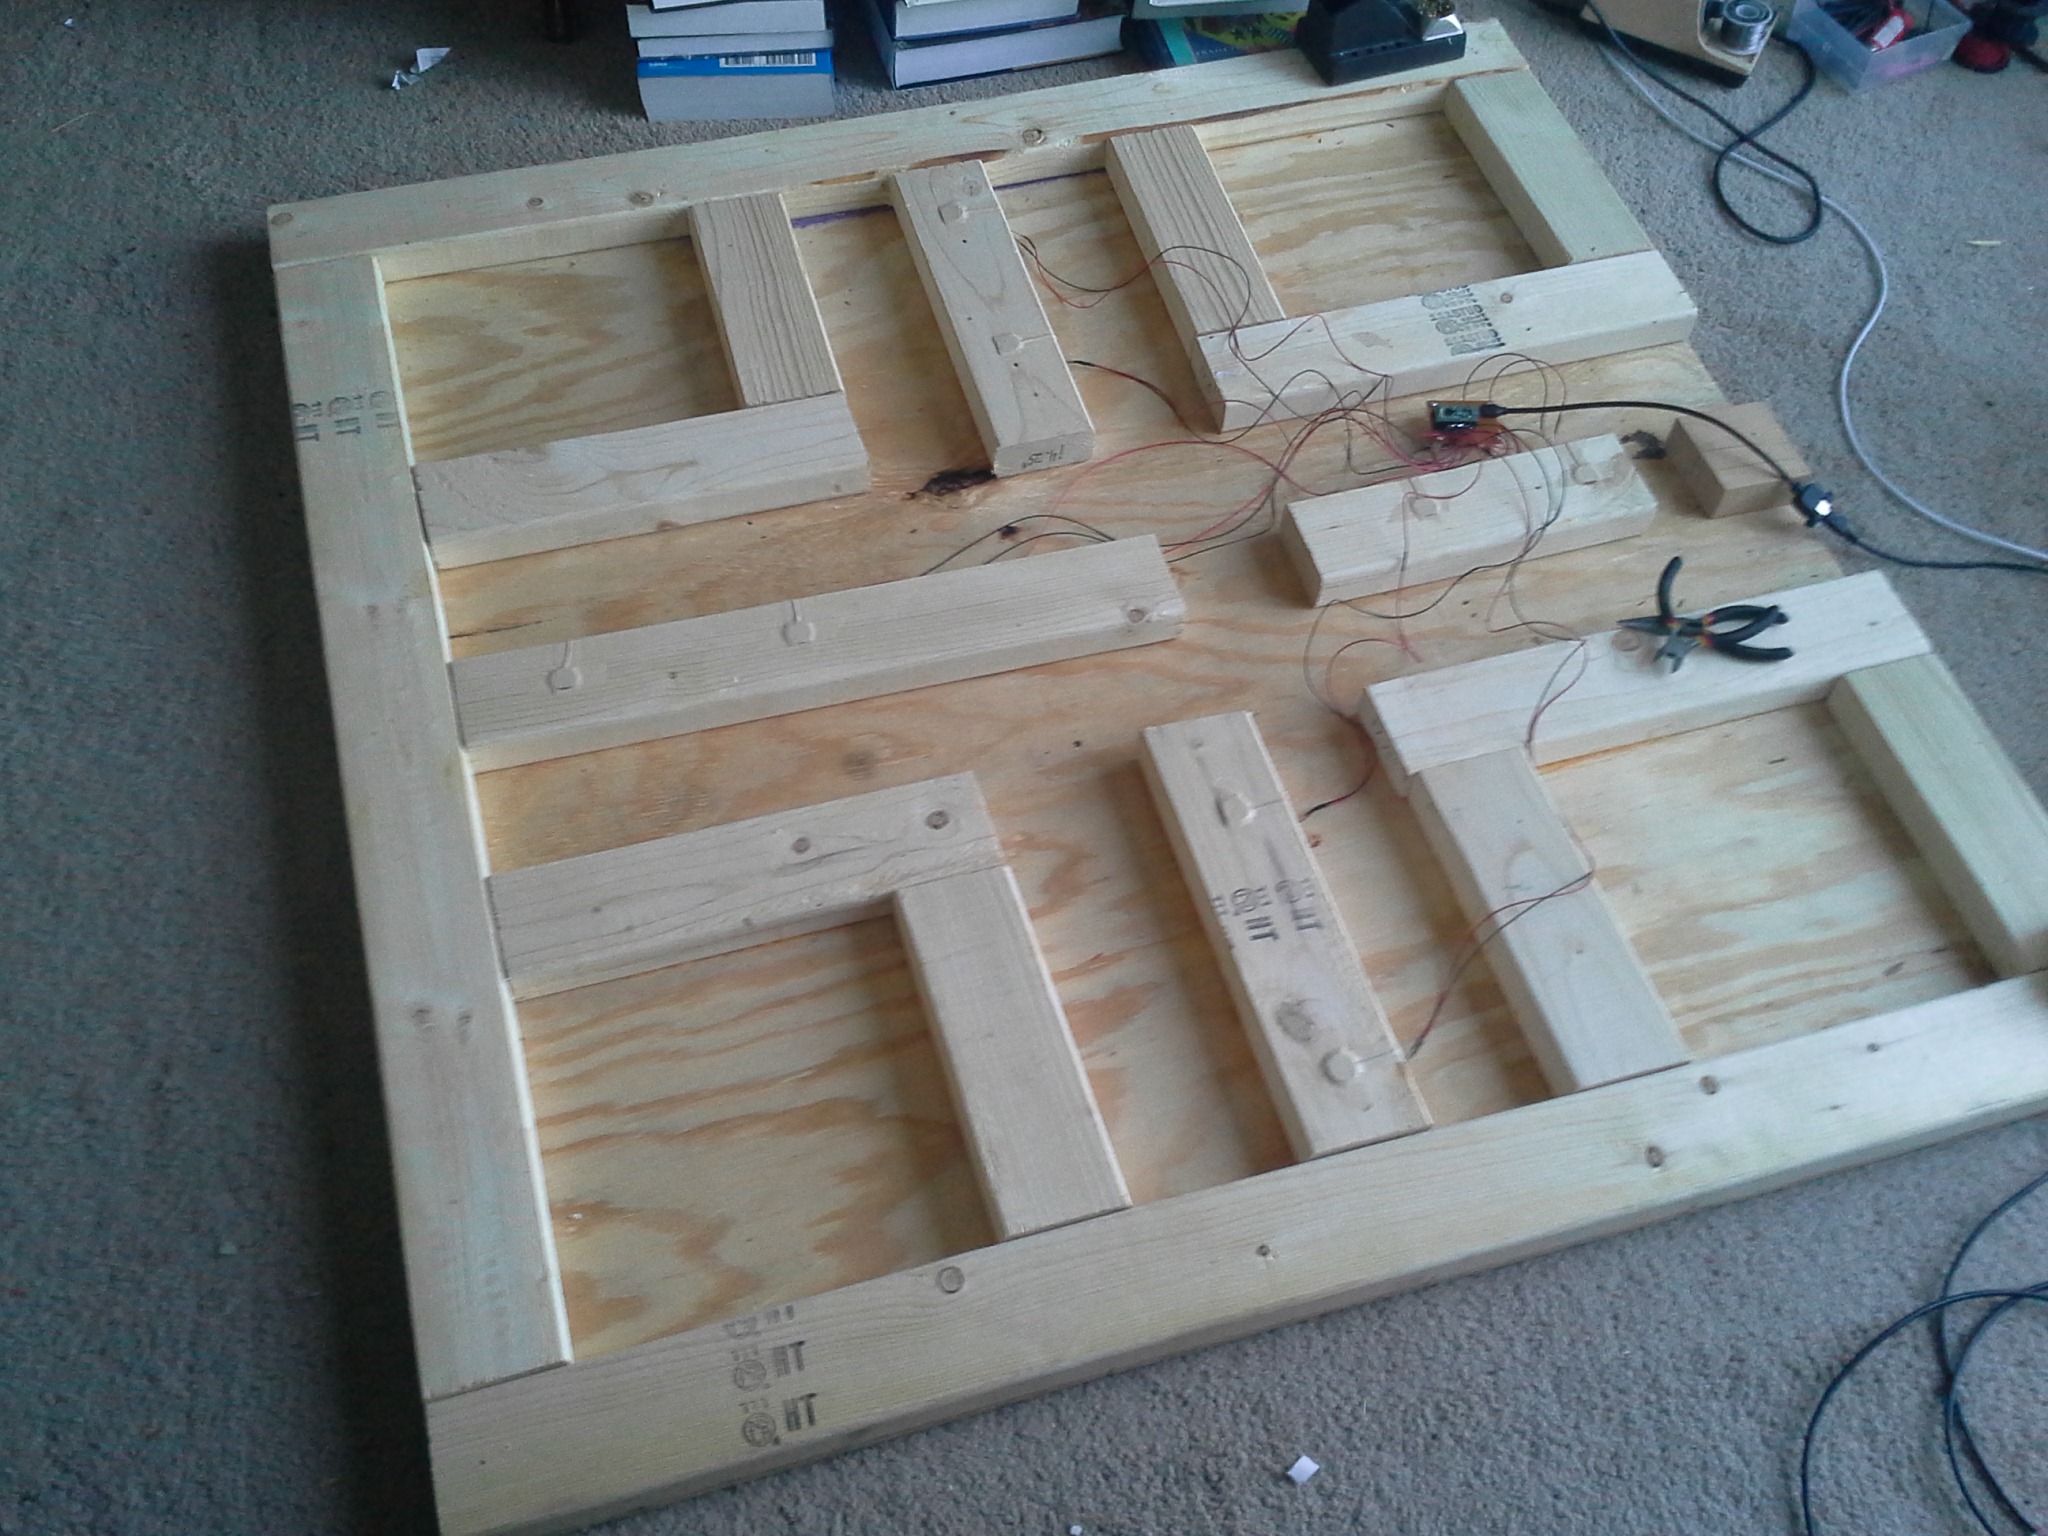
Based on the same theory of operation as the jump pad, I designed and built out a large 4×4′ wooden pad containing nine equally-sized squares. Each of these squares are kept completely isolated so that when someone steps on one, they only cause that particular section of plywood to flex, and thus activate the relevant sensors underneath, without flexing any other sections. This means that each pad can be used individually and independently, reducing false positives in nearby sensors and allowing for multiple visitors to work together.
Only the squares in the center of each edge are wired up with sensors, leaving the corners and central square to be purely for support. Although the pictures don’t show this, I placed large, yellow, handcut vinyl stickers on each of the functional squares with an arrow representing the direction of movement that the square would make the in-game character move in.
Design
Again I used Sketchup to layout the plywood and the internal geometry of 2×4″ stud pieces that I would need, this time basing the overall dimensions on the standard 4×4′ plywood sheet size.
Fabrication
From the Sketchup model I created another cut list and got to work fabricating all of the infrastructure needed. Believe it or not, the most difficult part of this build was creating the nine squares of plywood! When I started this project I did not have any access to basic professional equipment, like a table saw. Luckily I was able to get my hands on one through a local community arts space, otherwise things would’ve looked a lot more goofy!


Aiming joystick
Being able to swing your weapon, jump and move in different directions is great and all, but if you can’t turn to face what you’re playing with or move towards specific things in-game, things get really old really fast! I felt that this action was so ubiquitous that it would be good for its interface to be easy to use and to pass around, even when visitors are actively engaging in the other interfaces.
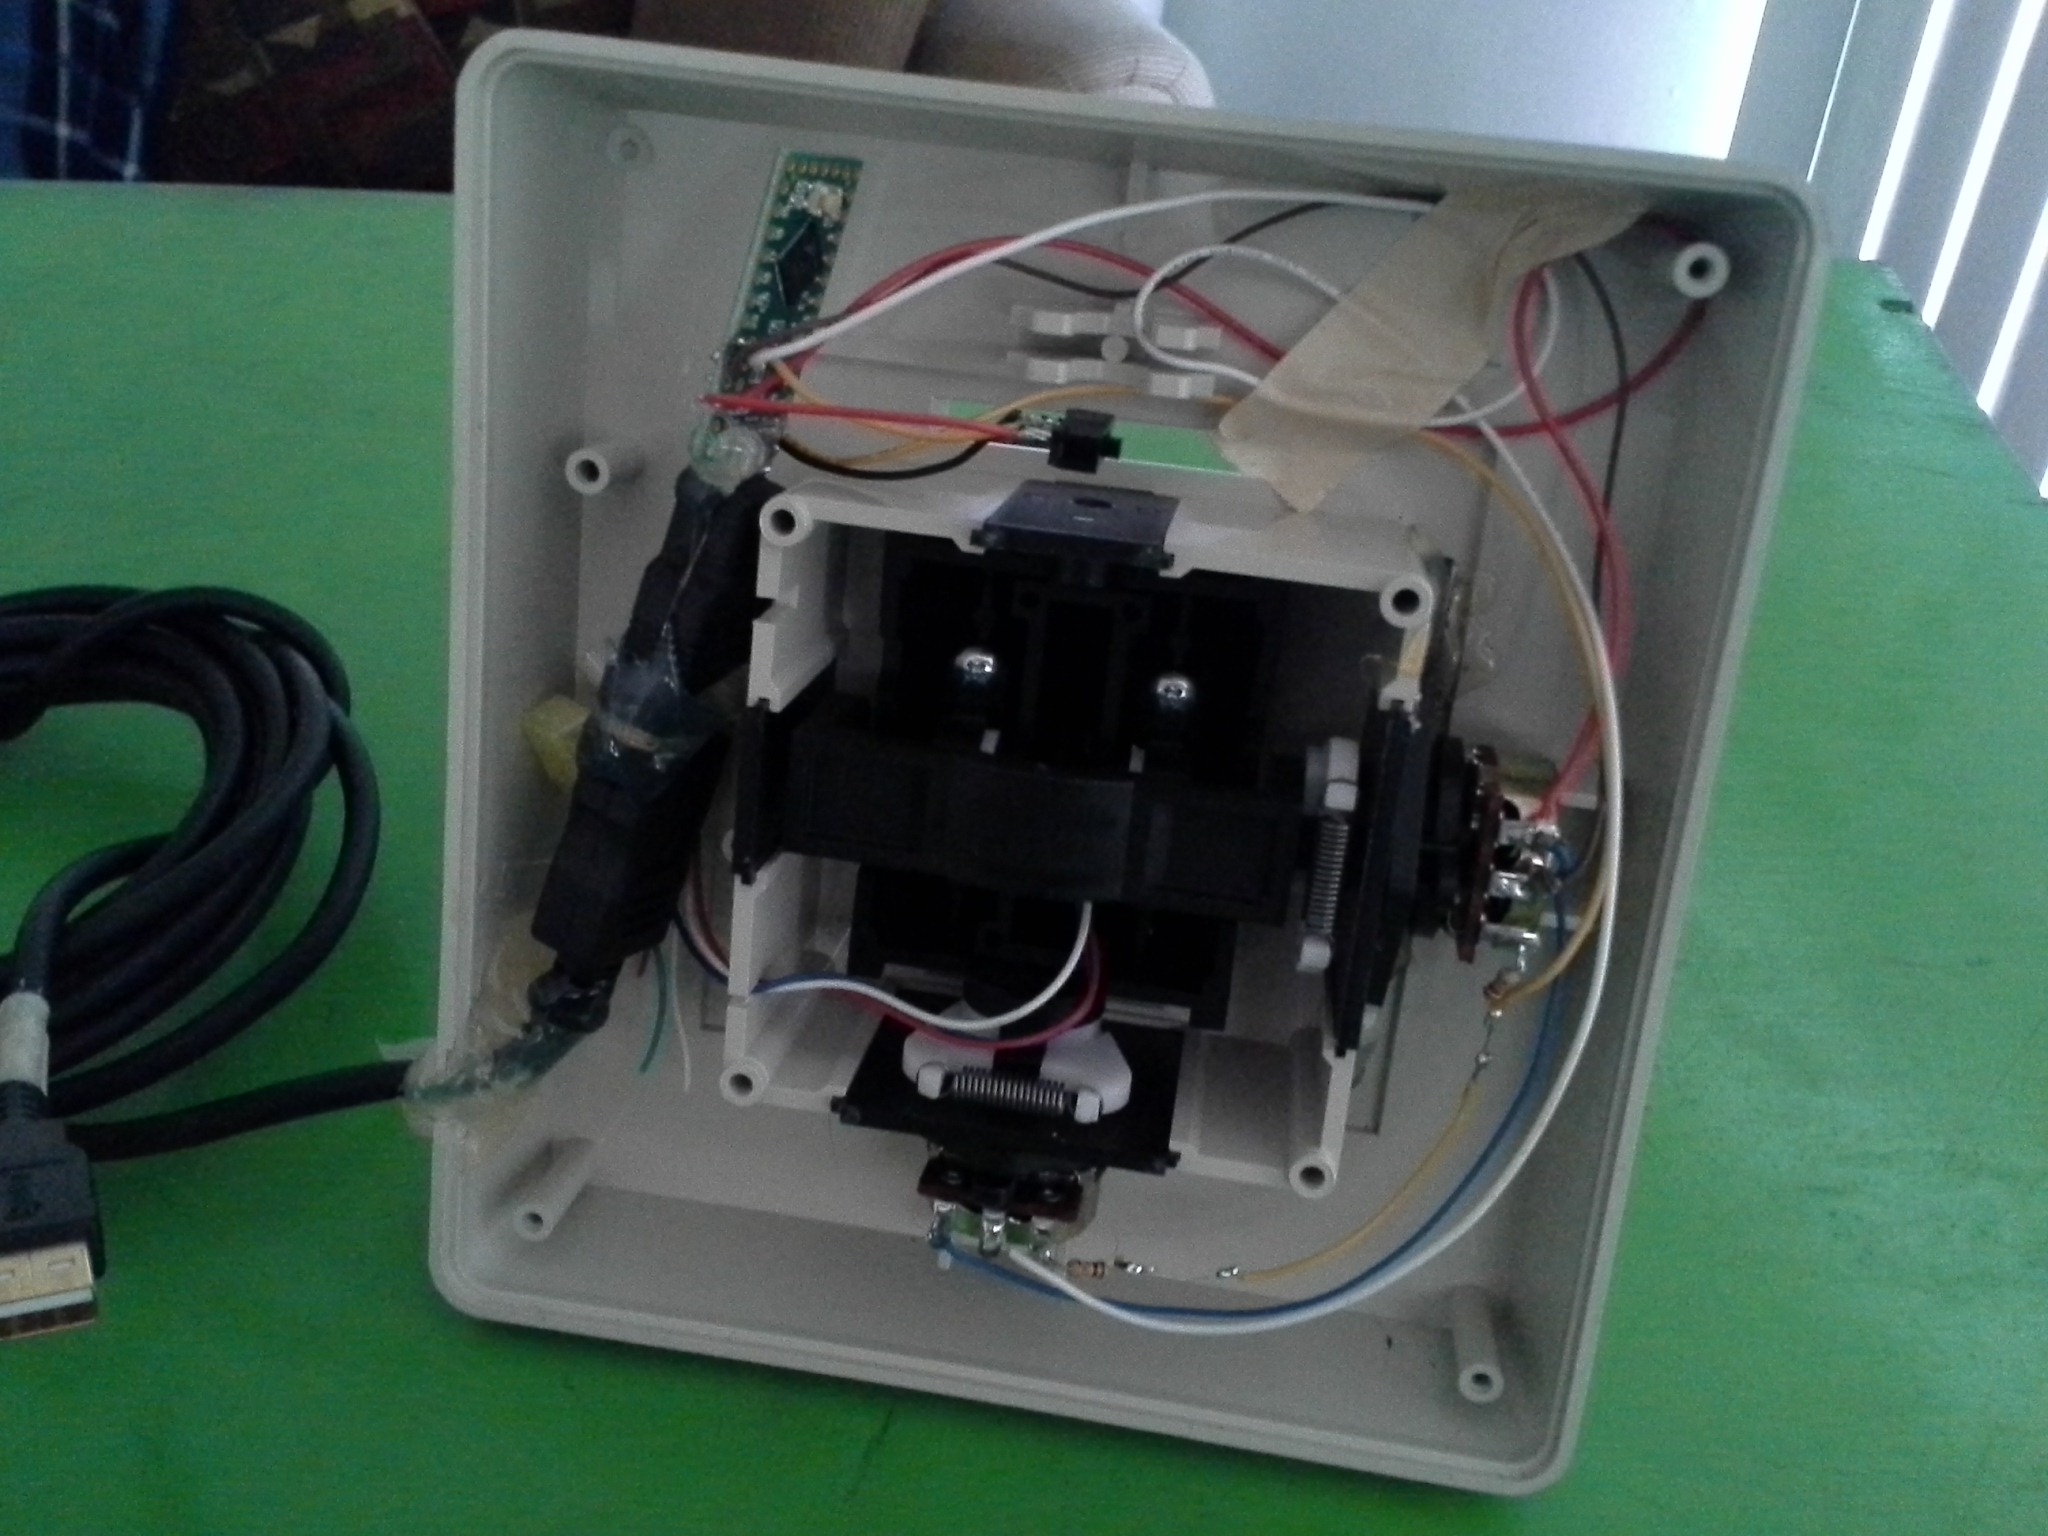
For this interface I took a classic video game joystick and embedded a Teensy microncontroller inside, wired up in such a way to allow visitors to effectively move the computer mouse up, down, left, and right just by tilting the control stick. To do this I wired up the two internal potentiometers to analog inputs of the microcontroller, then wrote custom firmware to map the effective range of the input signal to a range that felt “right” for both the up/down and left/right movements of the mouse.
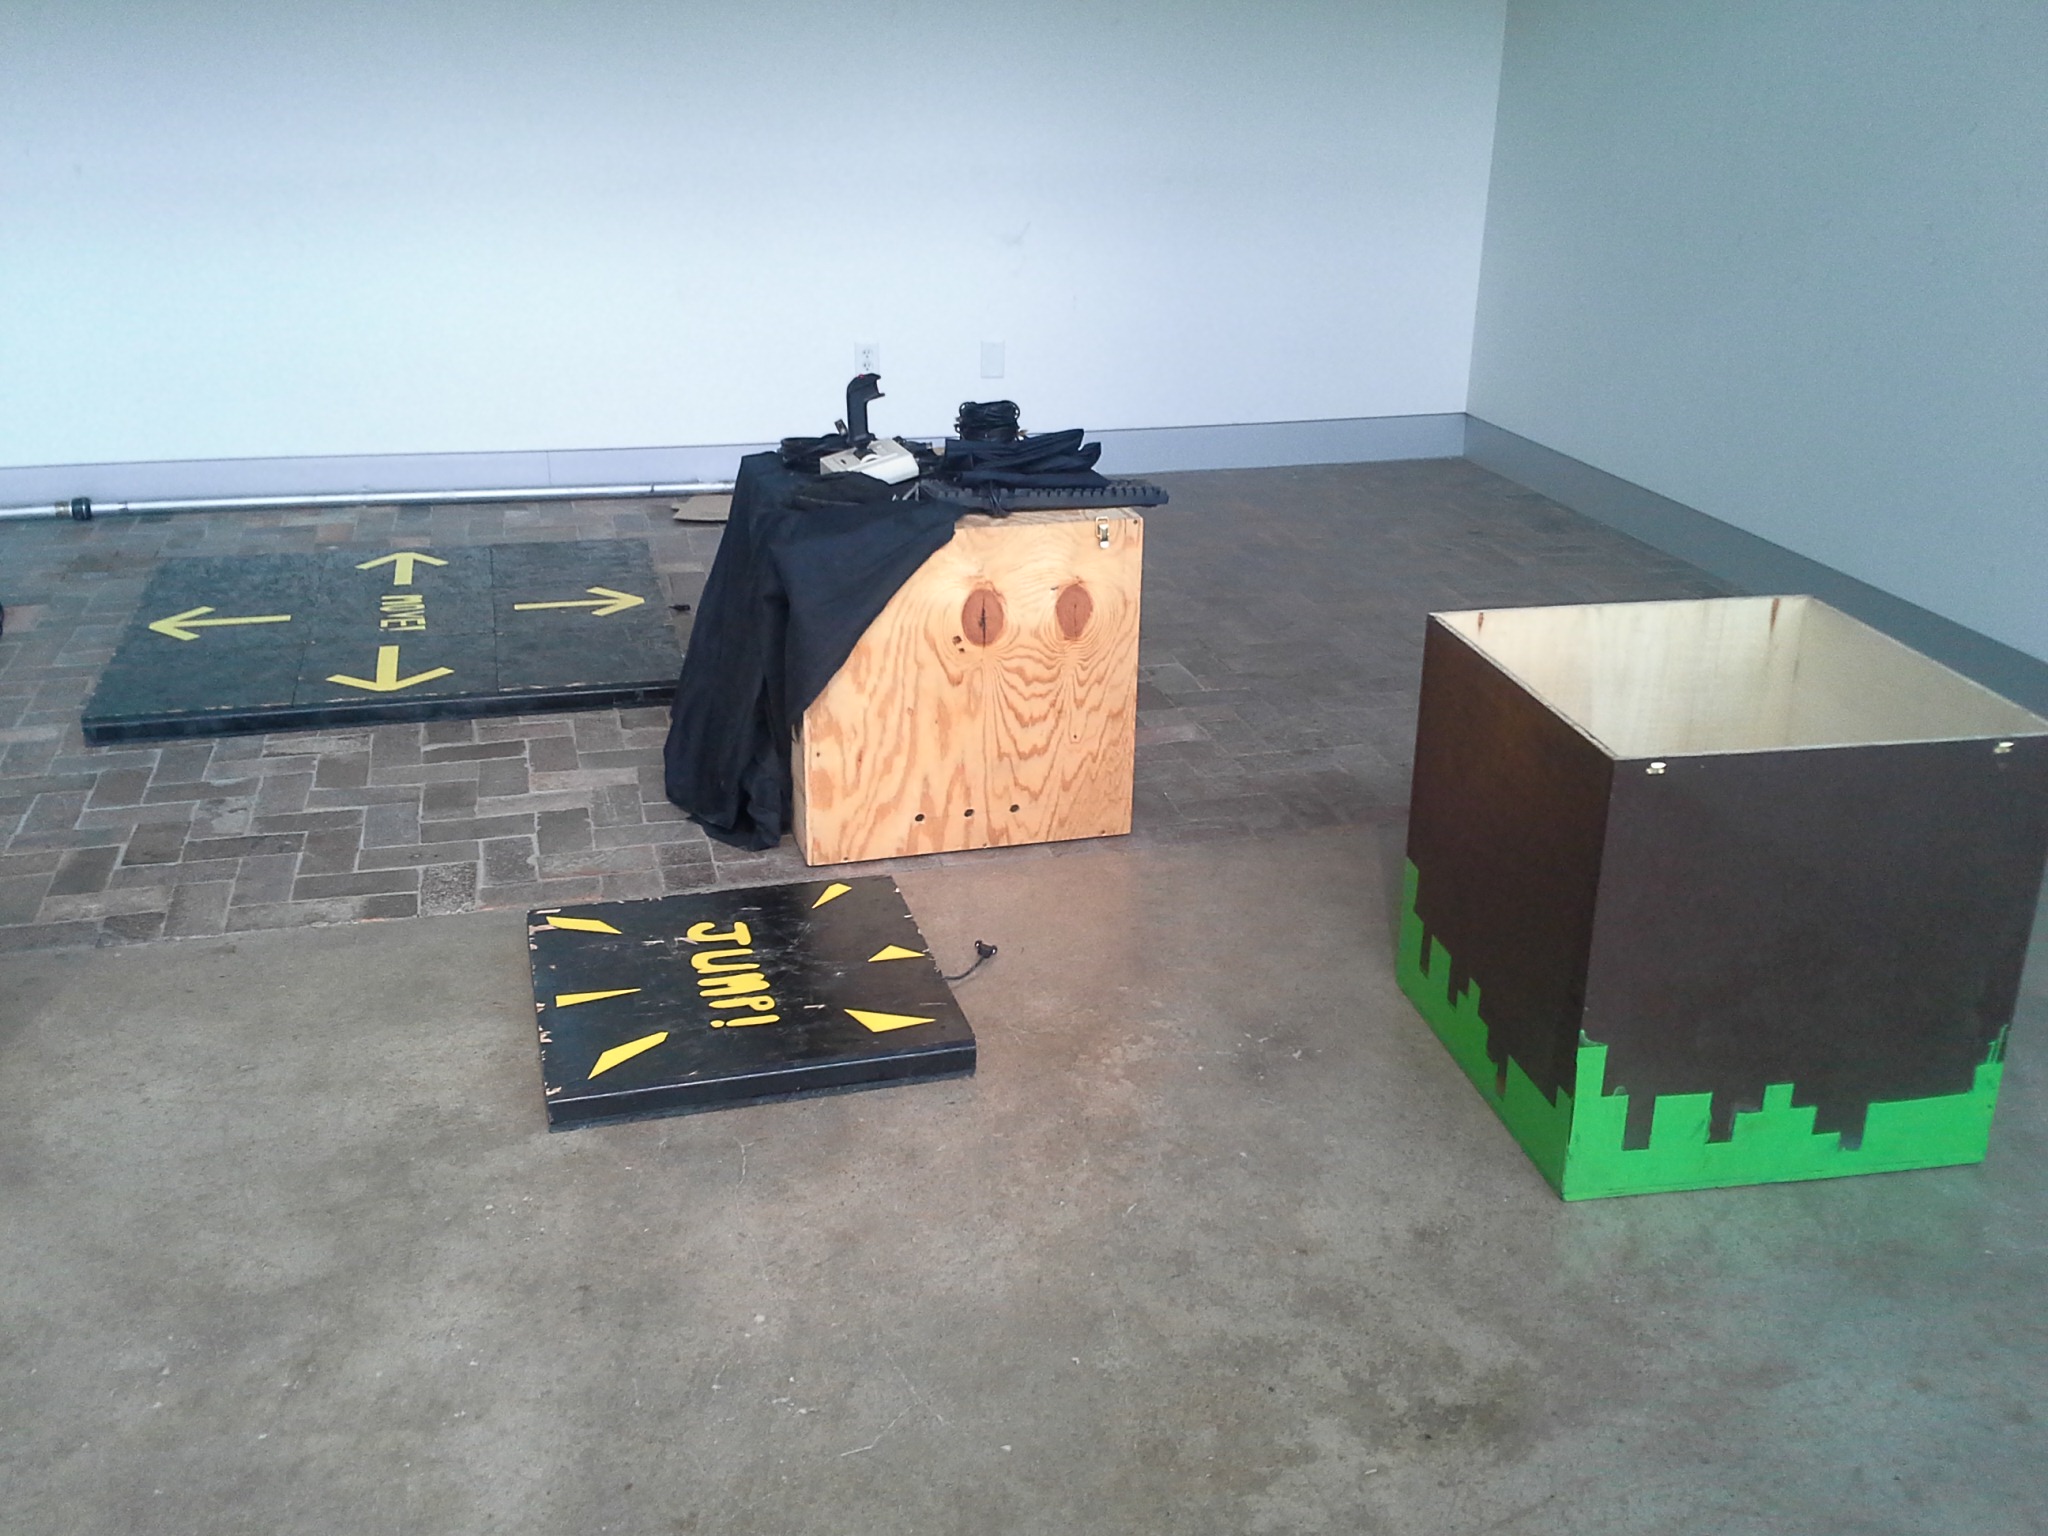
Installation
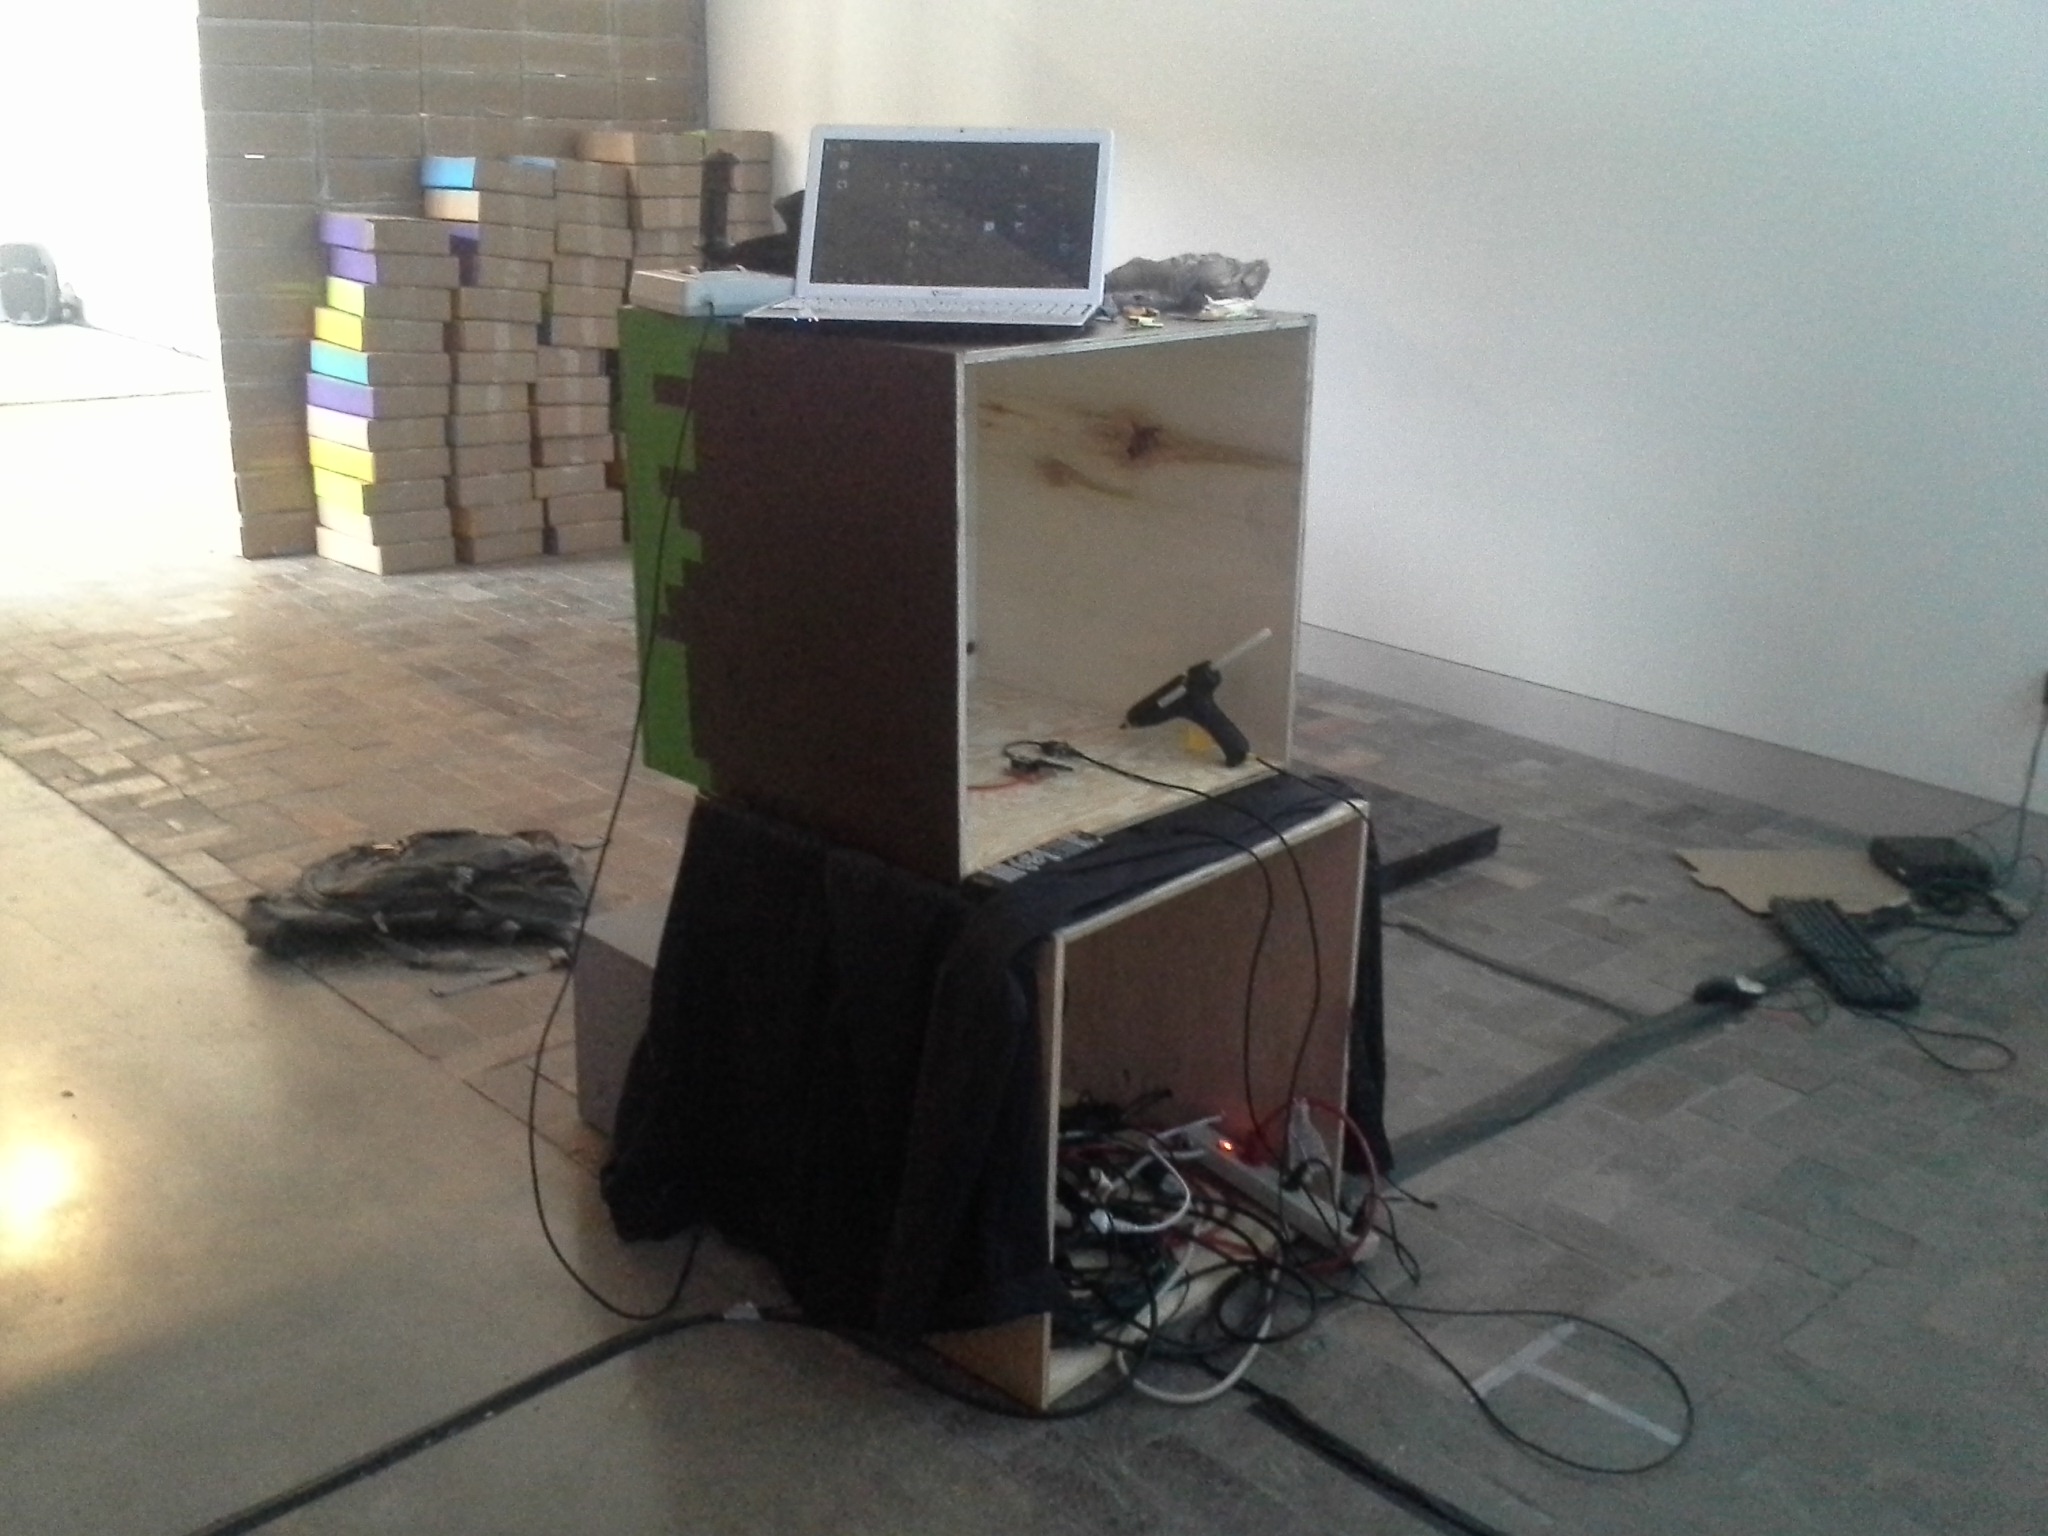
While I was building out all of the various interfaces above, the staff of KANEKO was hard at work preparing the exhibition space. They installed a projector and provided a basic PC to run the game and connect to all of my interactive interfaces. They also assembled several hundred small cardboard boxes to build up a unique room divider, isolating the space a bit from foot traffic and sunlight.
Installation went very smoothly – I just had to deliver all the various pieces and place them in the space, then run long USB cables from each device to a central USB hub for the PC. All of the wiring was neatly taped down and all of the important hardware was hidden away in a hollow pedestal built for the interactive dirt block.
Once everything was installed I just had to sit back and hope that everything survived the opening night and the full three months of the exhibition. And believe it or not, everything worked throughout the duration of the show with only a couple hours of maintenance total! I’m very happy with how this all turned out, and I’m looking forward to doing more work like this in the future!