Design and early progress on Burning Man artcar control panel
Some time ago I was asked to collaborate on a spaceship-themed artcar that is being built for next year’s Burning Man, and I accepted in the invitation with pretty much no hesitation. For me, this is a perfect project – equal parts art and engineering, carried out in direct collaboration with other people that know what they are doing. I’ve had a blast working on the project so far, and have quite a bit of progress to share!
The artcar will be called the OMEGA-2, and will essentially be an interactive spaceship that sits on top of an electric cart driven by a team member. Visitors at Burning Man can simply hop onto the spaceship and feel like they are in complete control of a moving, fully-functional spaceship complete with joysticks, buttons, knobs and tons and tons of lights. Their interactions with the control panel(s) I am building will be relayed to the hidden driver of the car so that the visitors actually have a sense of control over the entire ship.
The panel that I am currently working on is intended to be a modular component of a much larger collection of panels as a kind of prototype or proof of concept. My duties in this project are to design, fabricate, assemble, program and test the panel(s) and deliver them to the project headquarters in LA for integration into the artcar.
Designing the panel
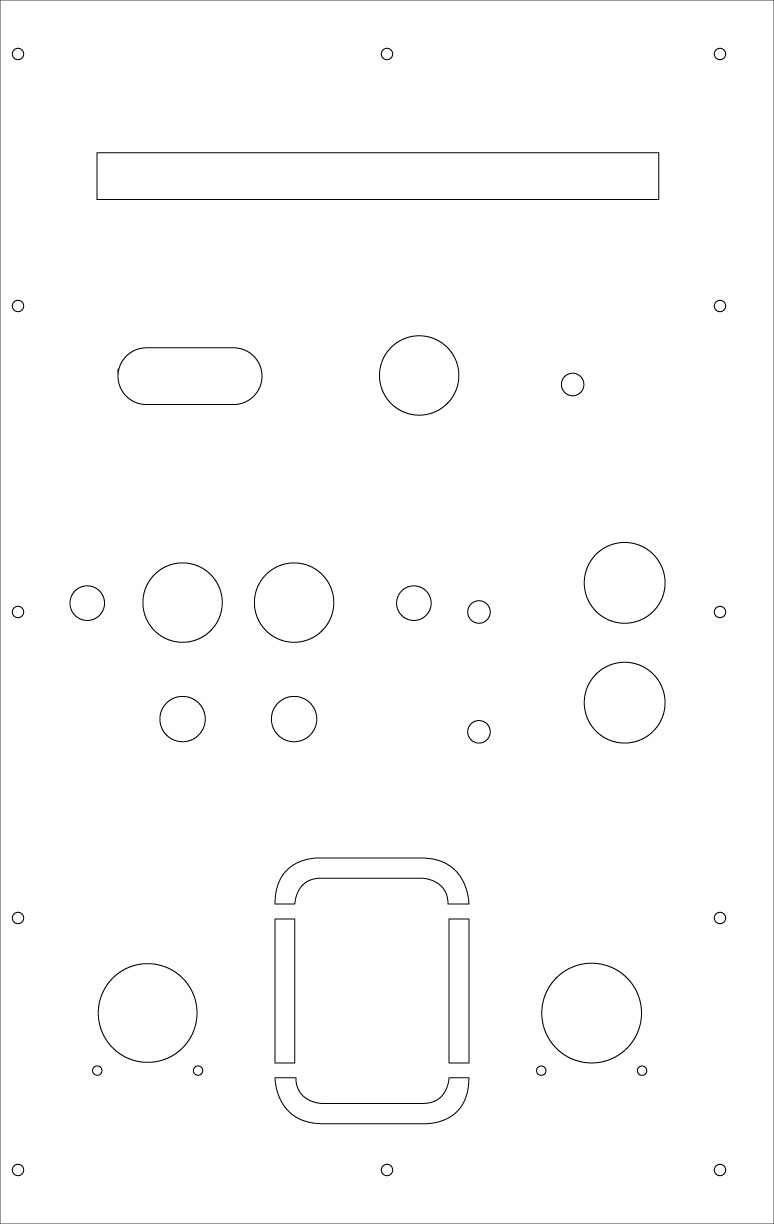
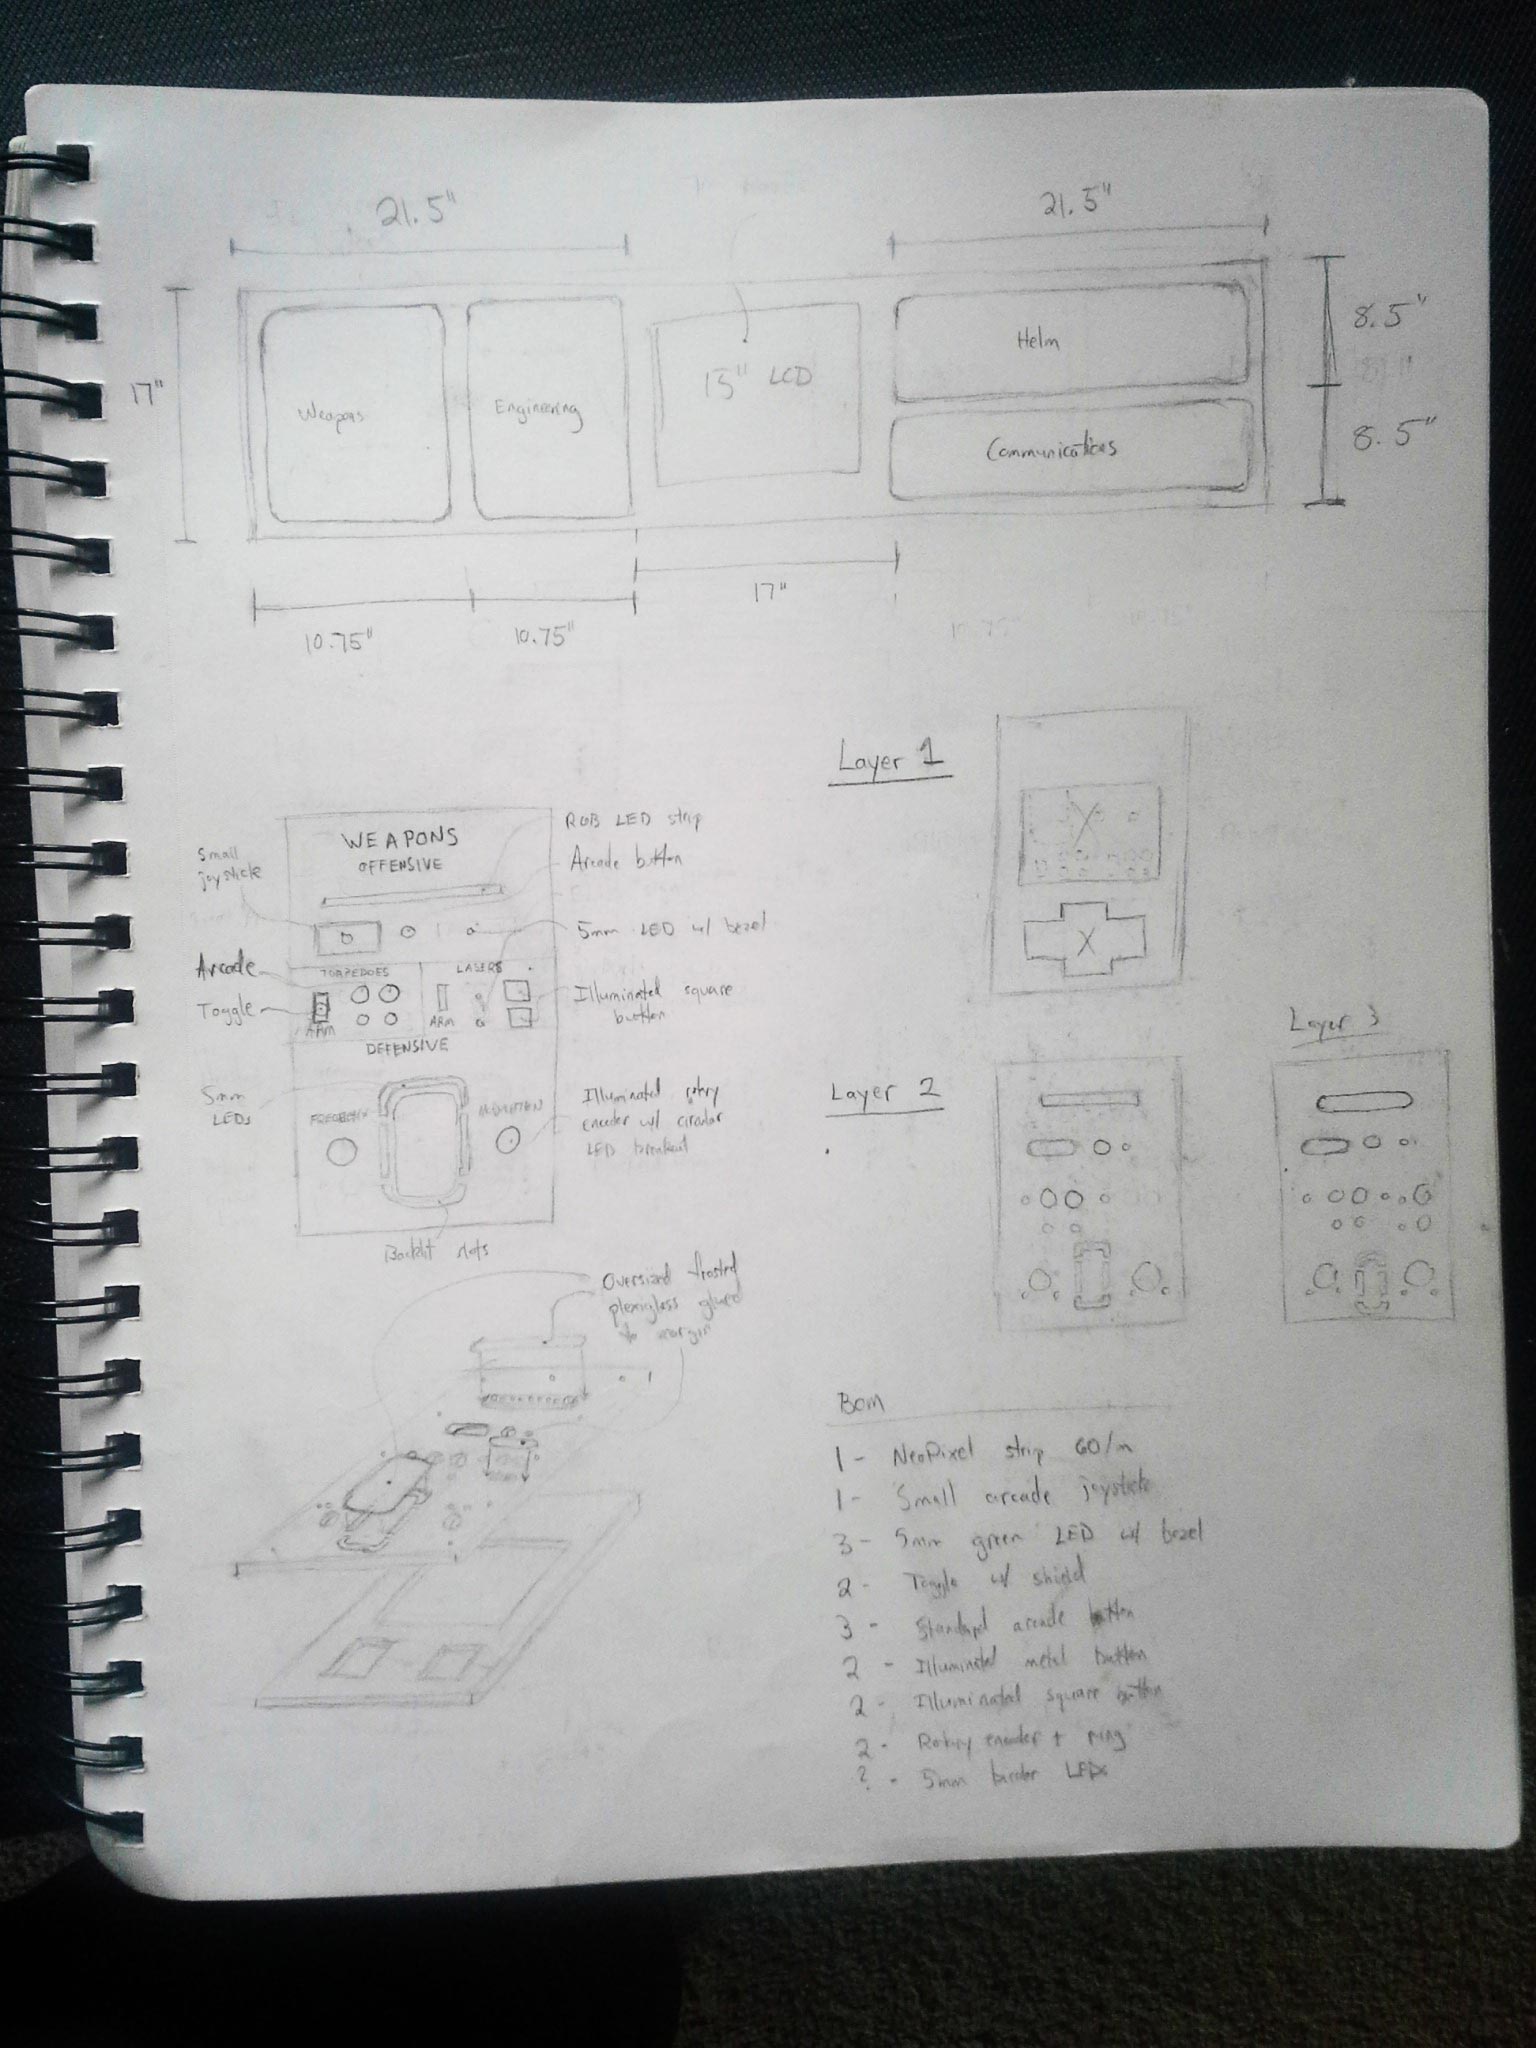 I began by deciding on an overall size for the panel, based on expected dimensions from the other team members. It was decided that 10.75×17″ would be best, so I got to work sketching out ideas for functionality.
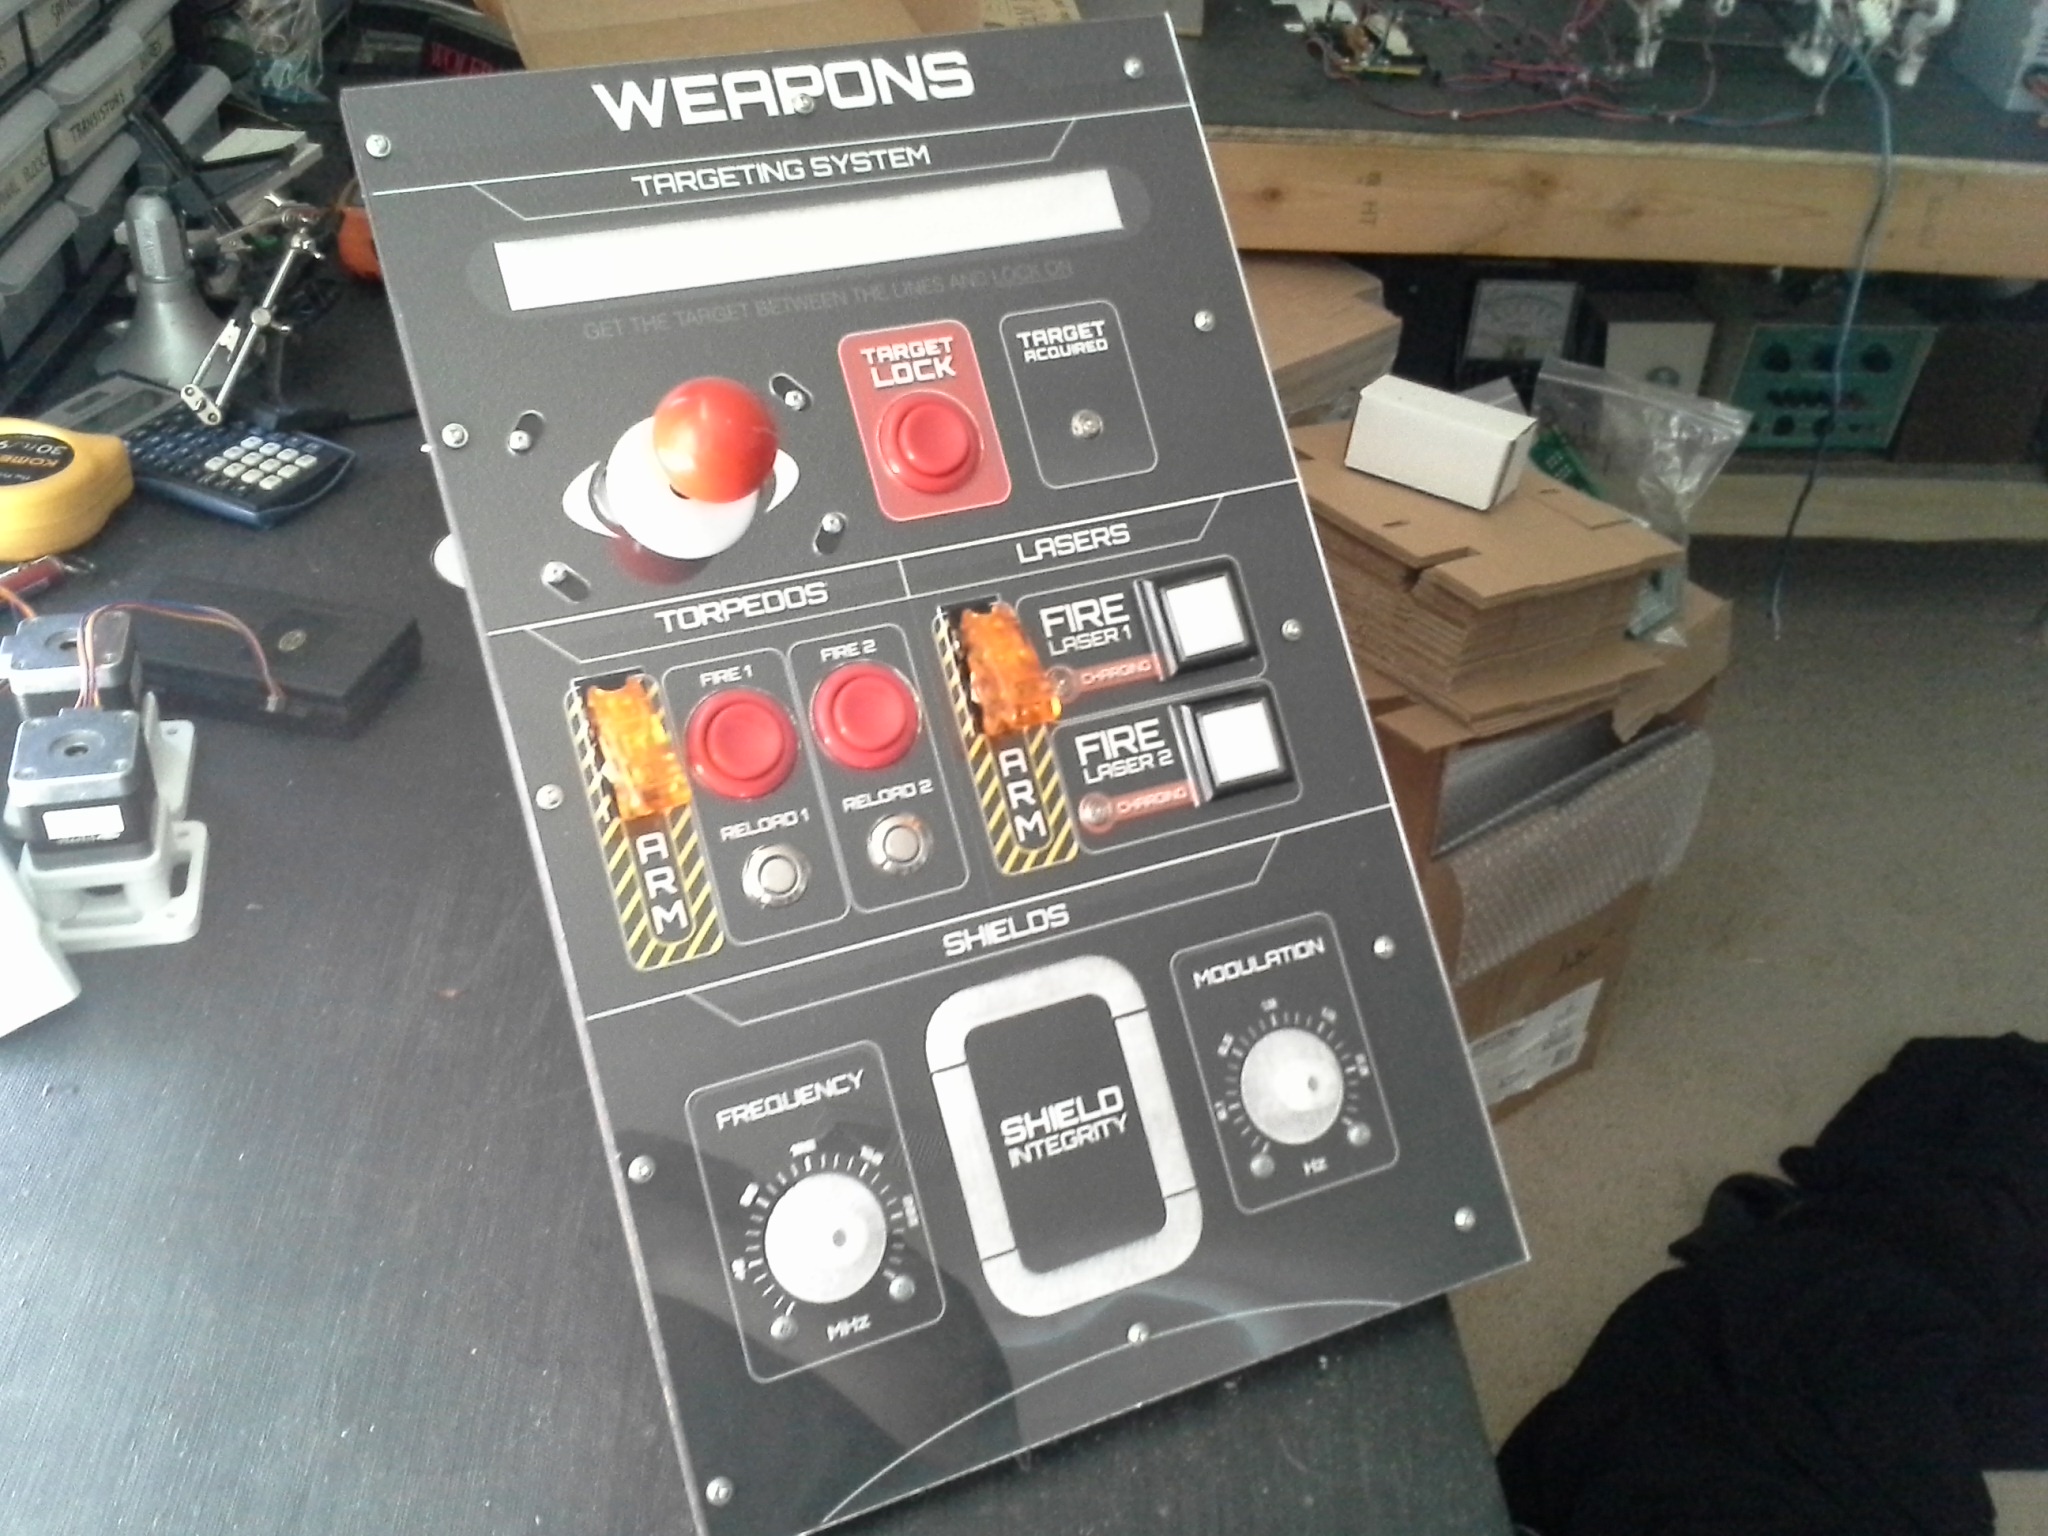
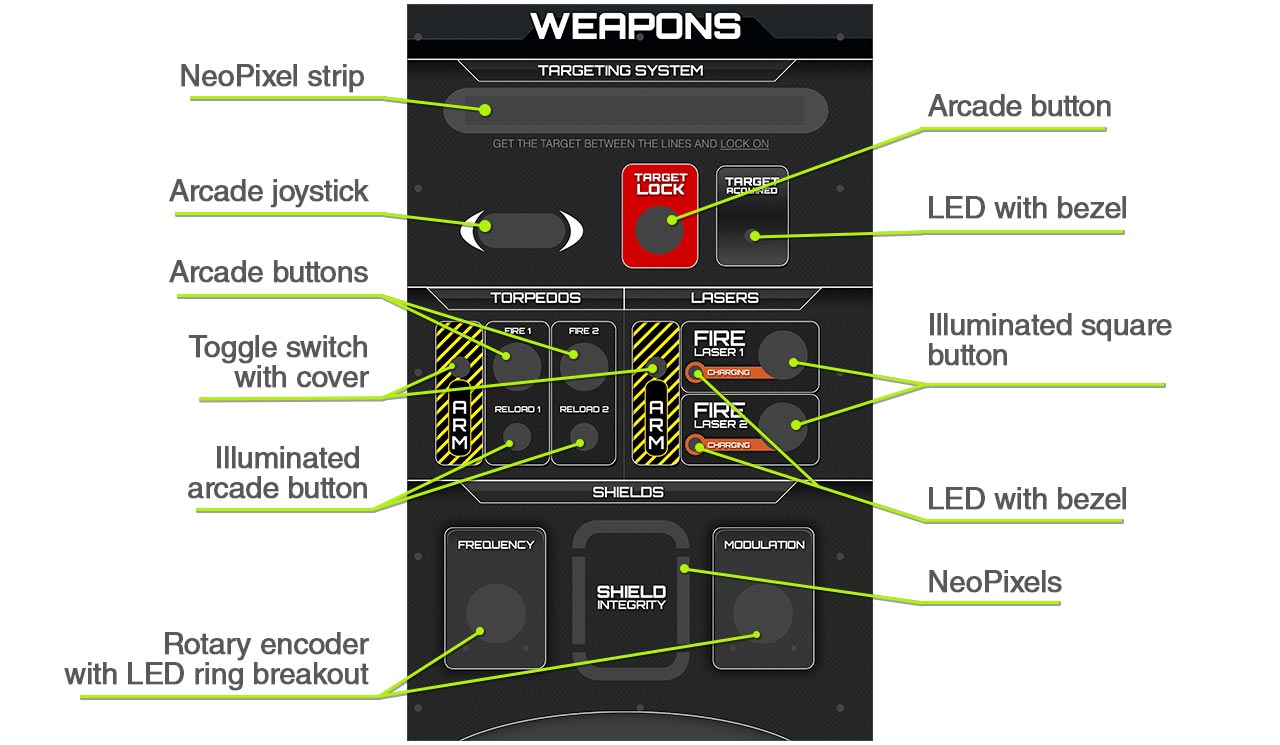
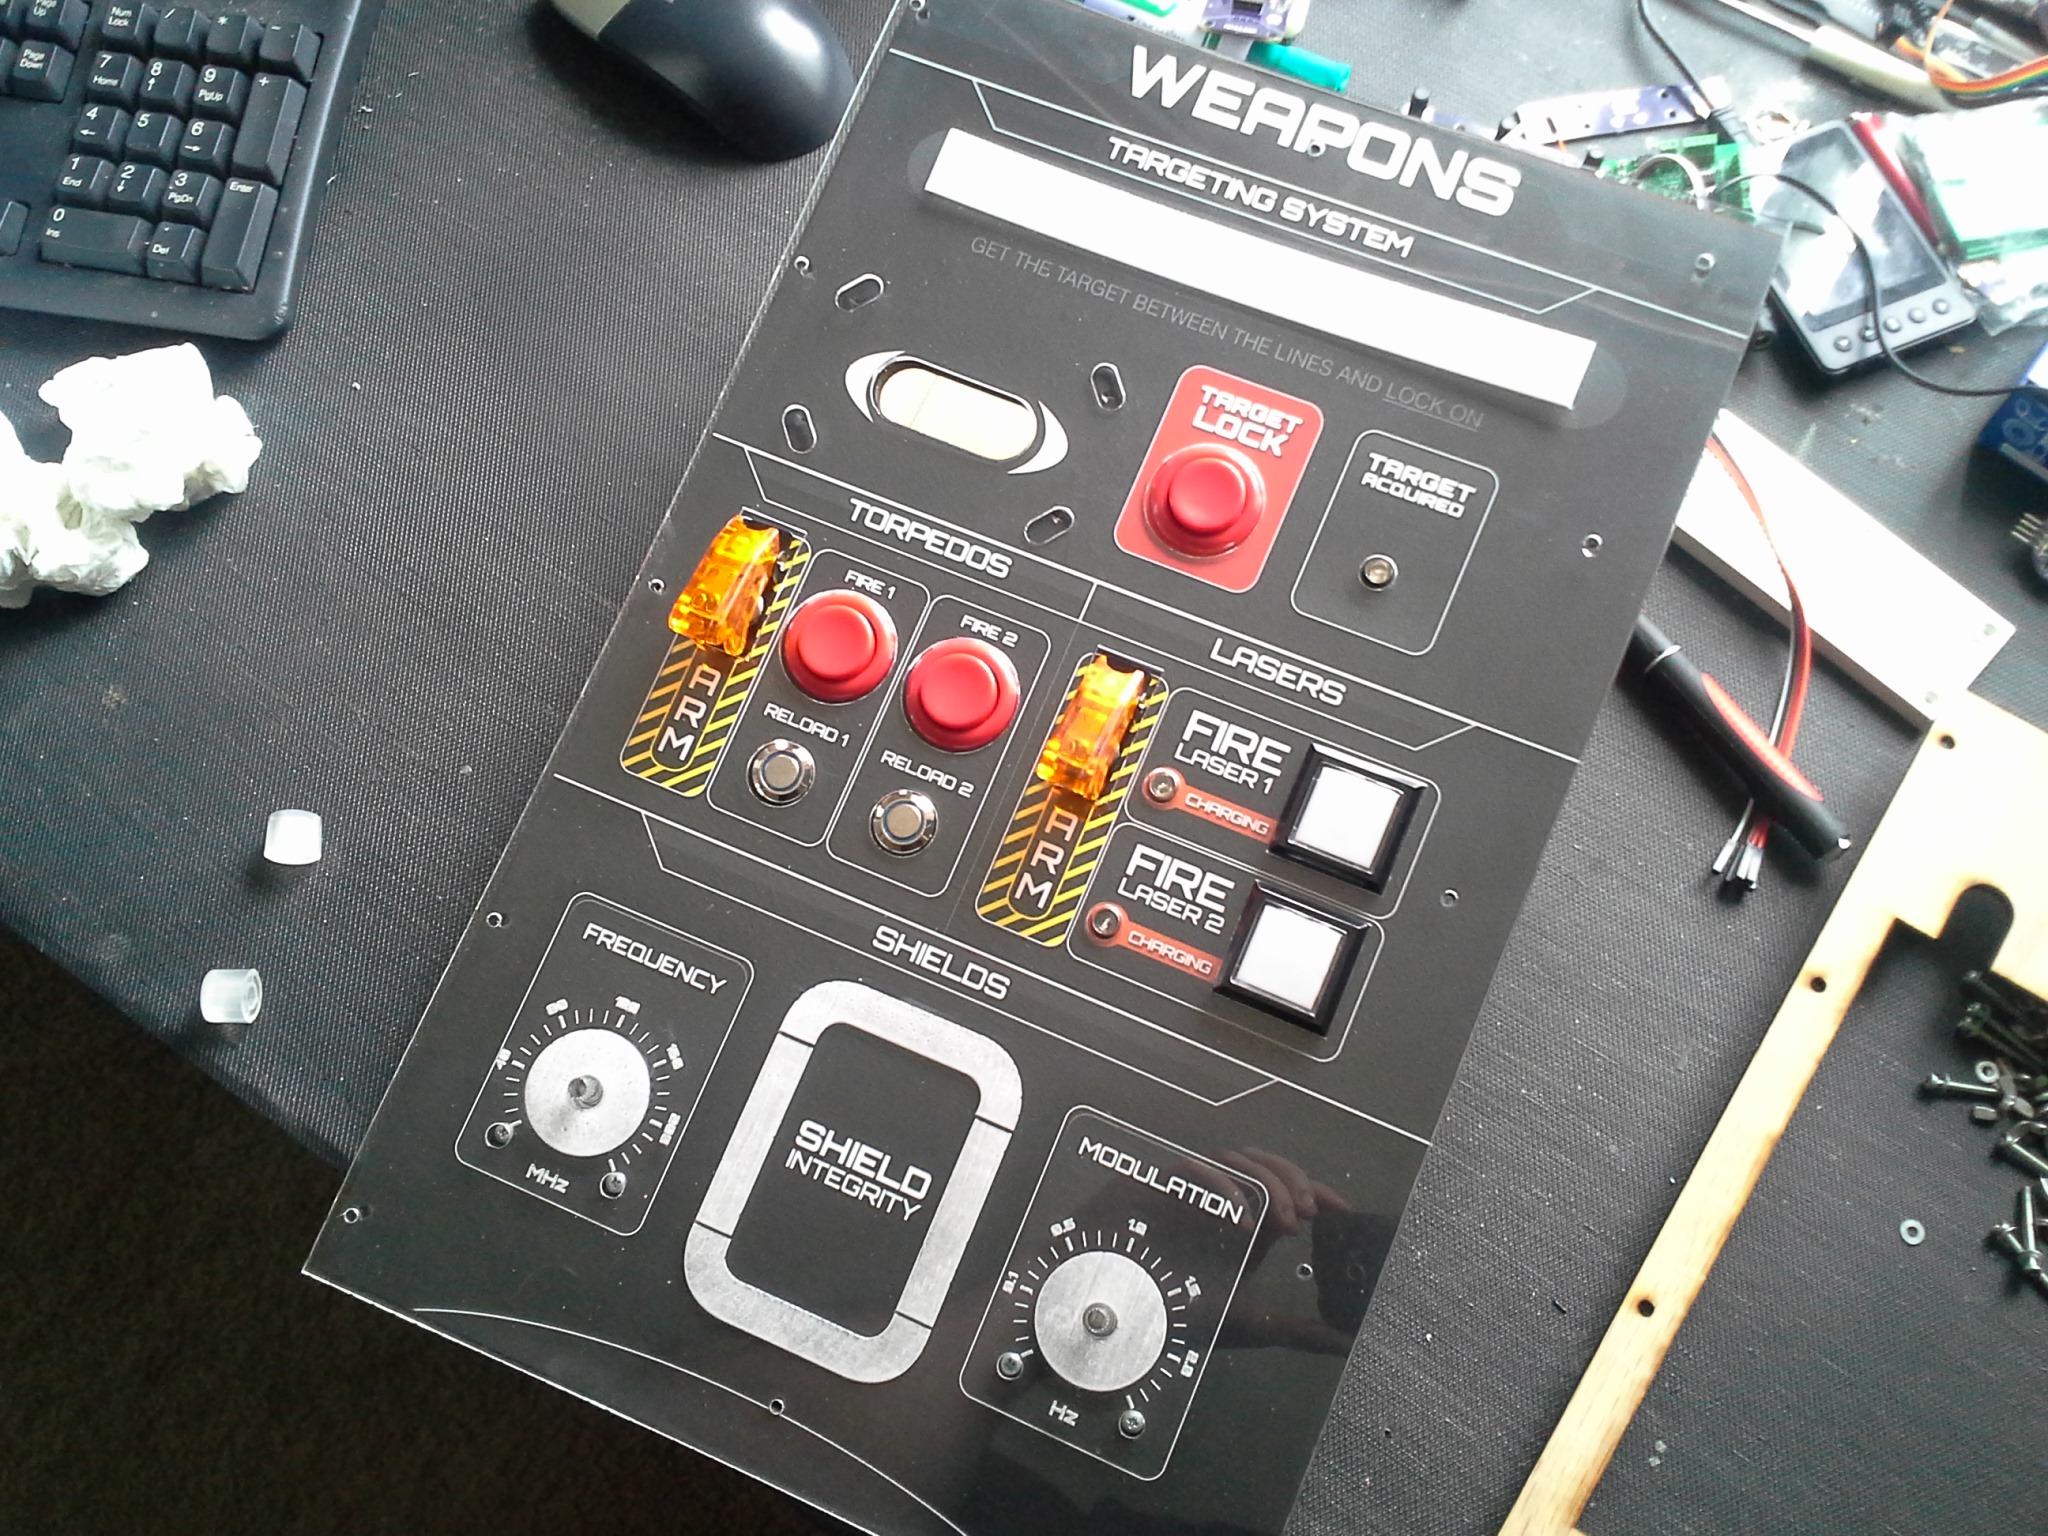
Most futuristic spaceships include a few common stations that group ship functions into a easy-to-access panel of buttons, switches, lights and other gizmos. Groups like weapons, engineering, helm and so on made the most sense to us, so I decided to go with “weapons” as the first prototype panel to build. Furthermore, to keep things a little more compact, I decided to integrate both offensive and defensive controls into this panel. Here are the systems I ended up going with:
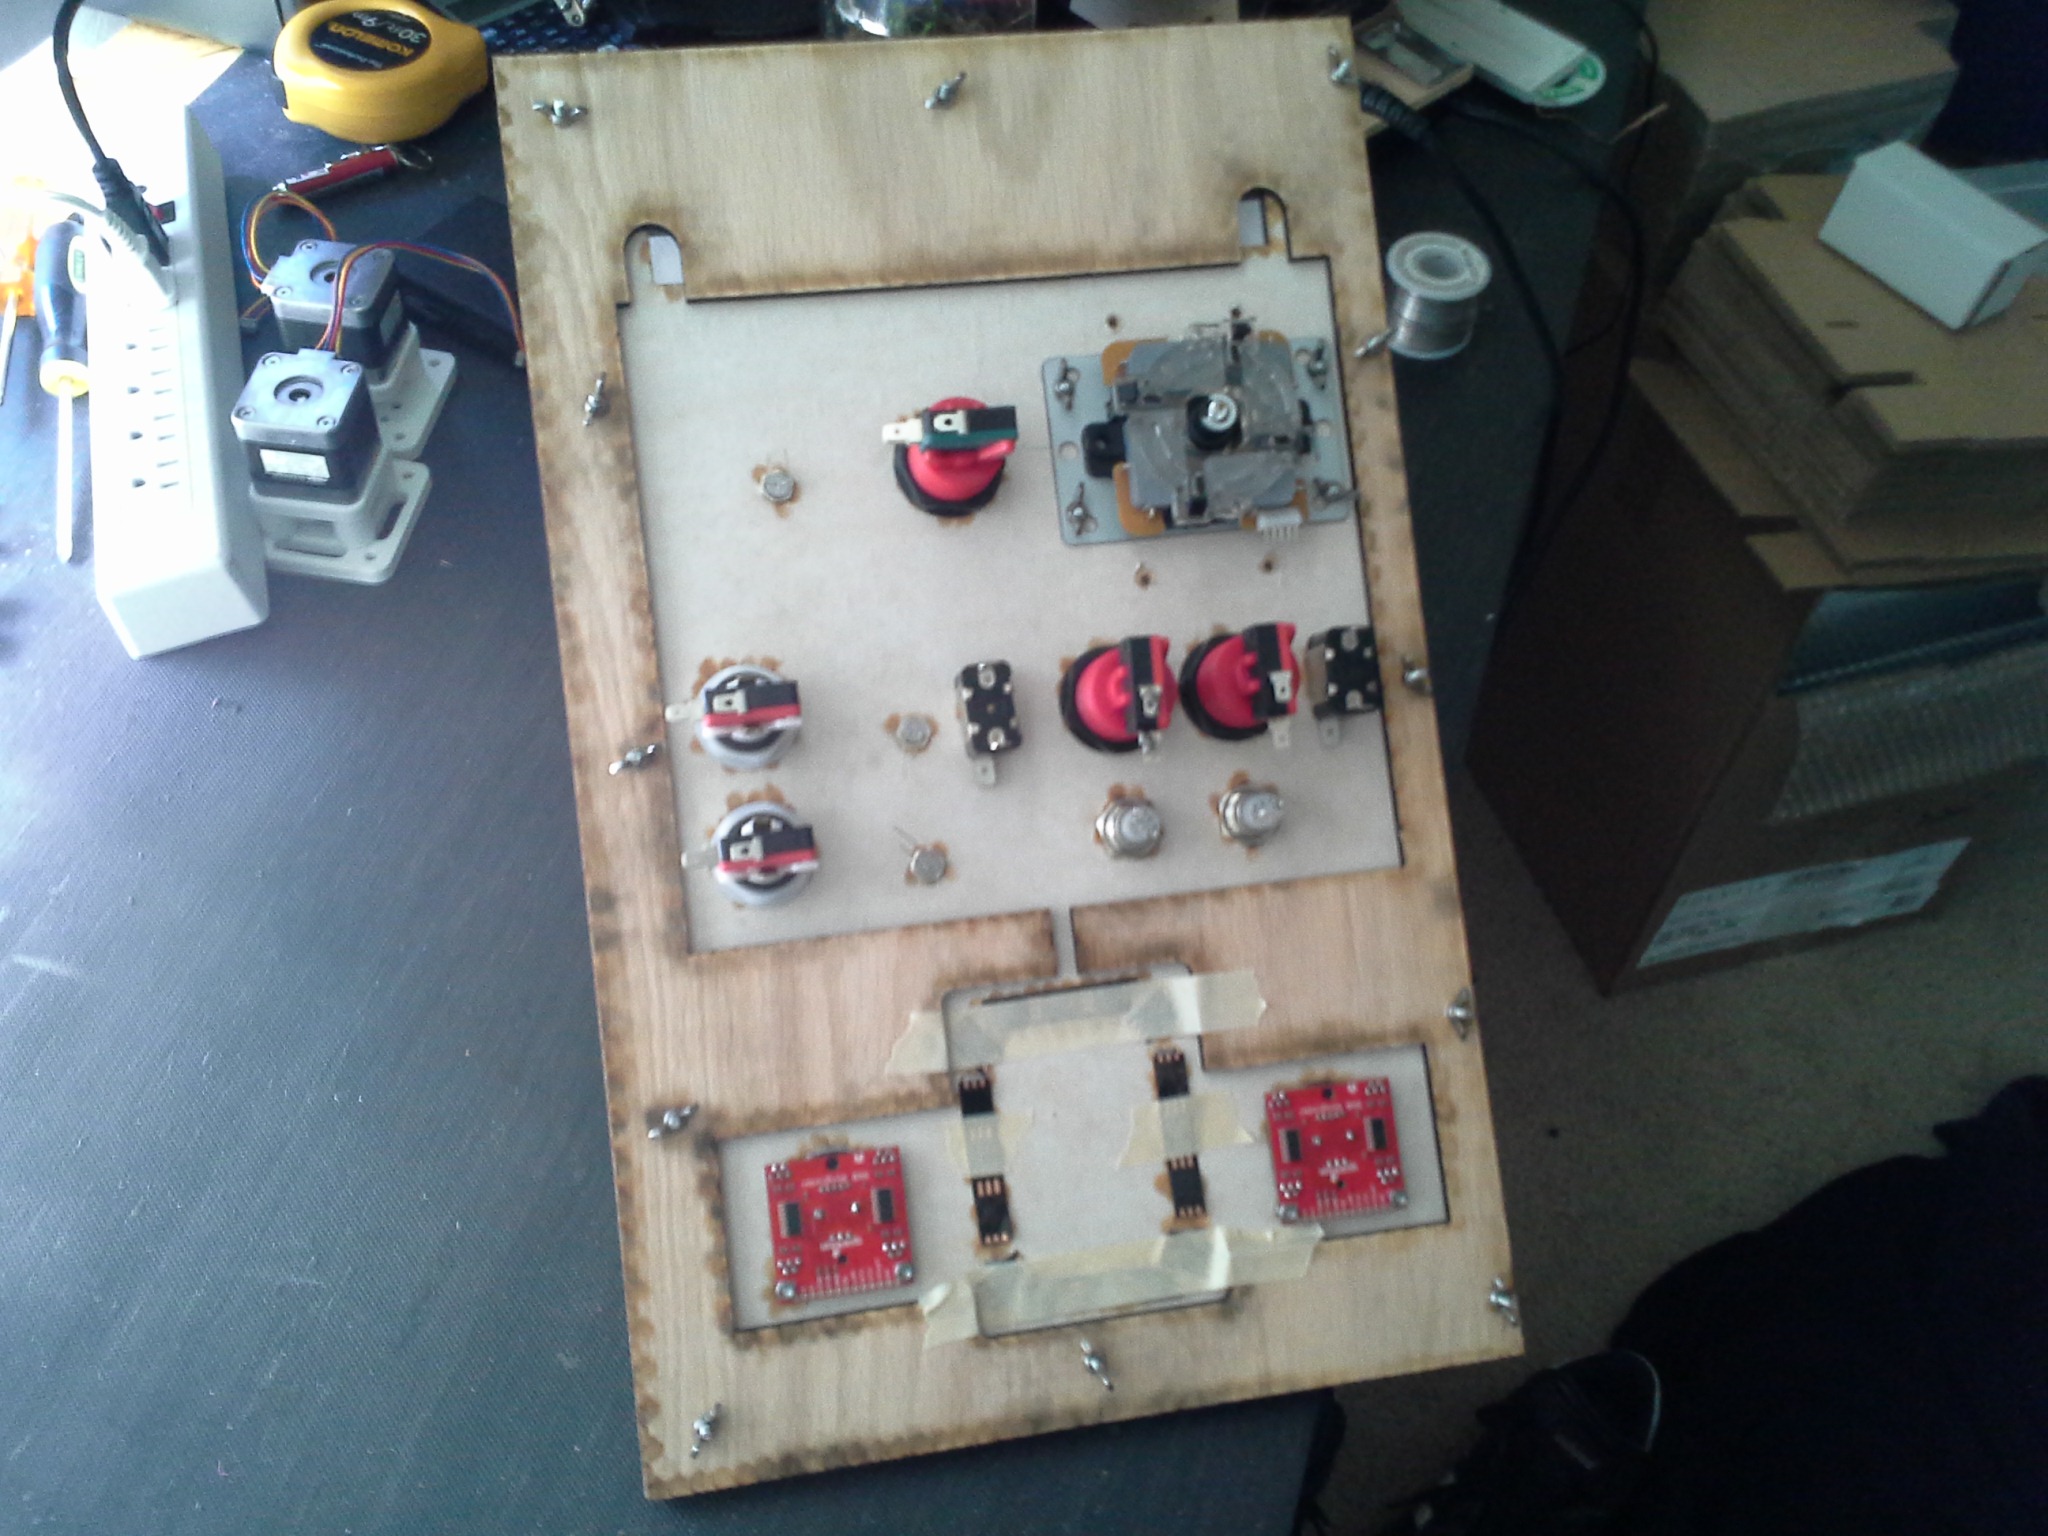
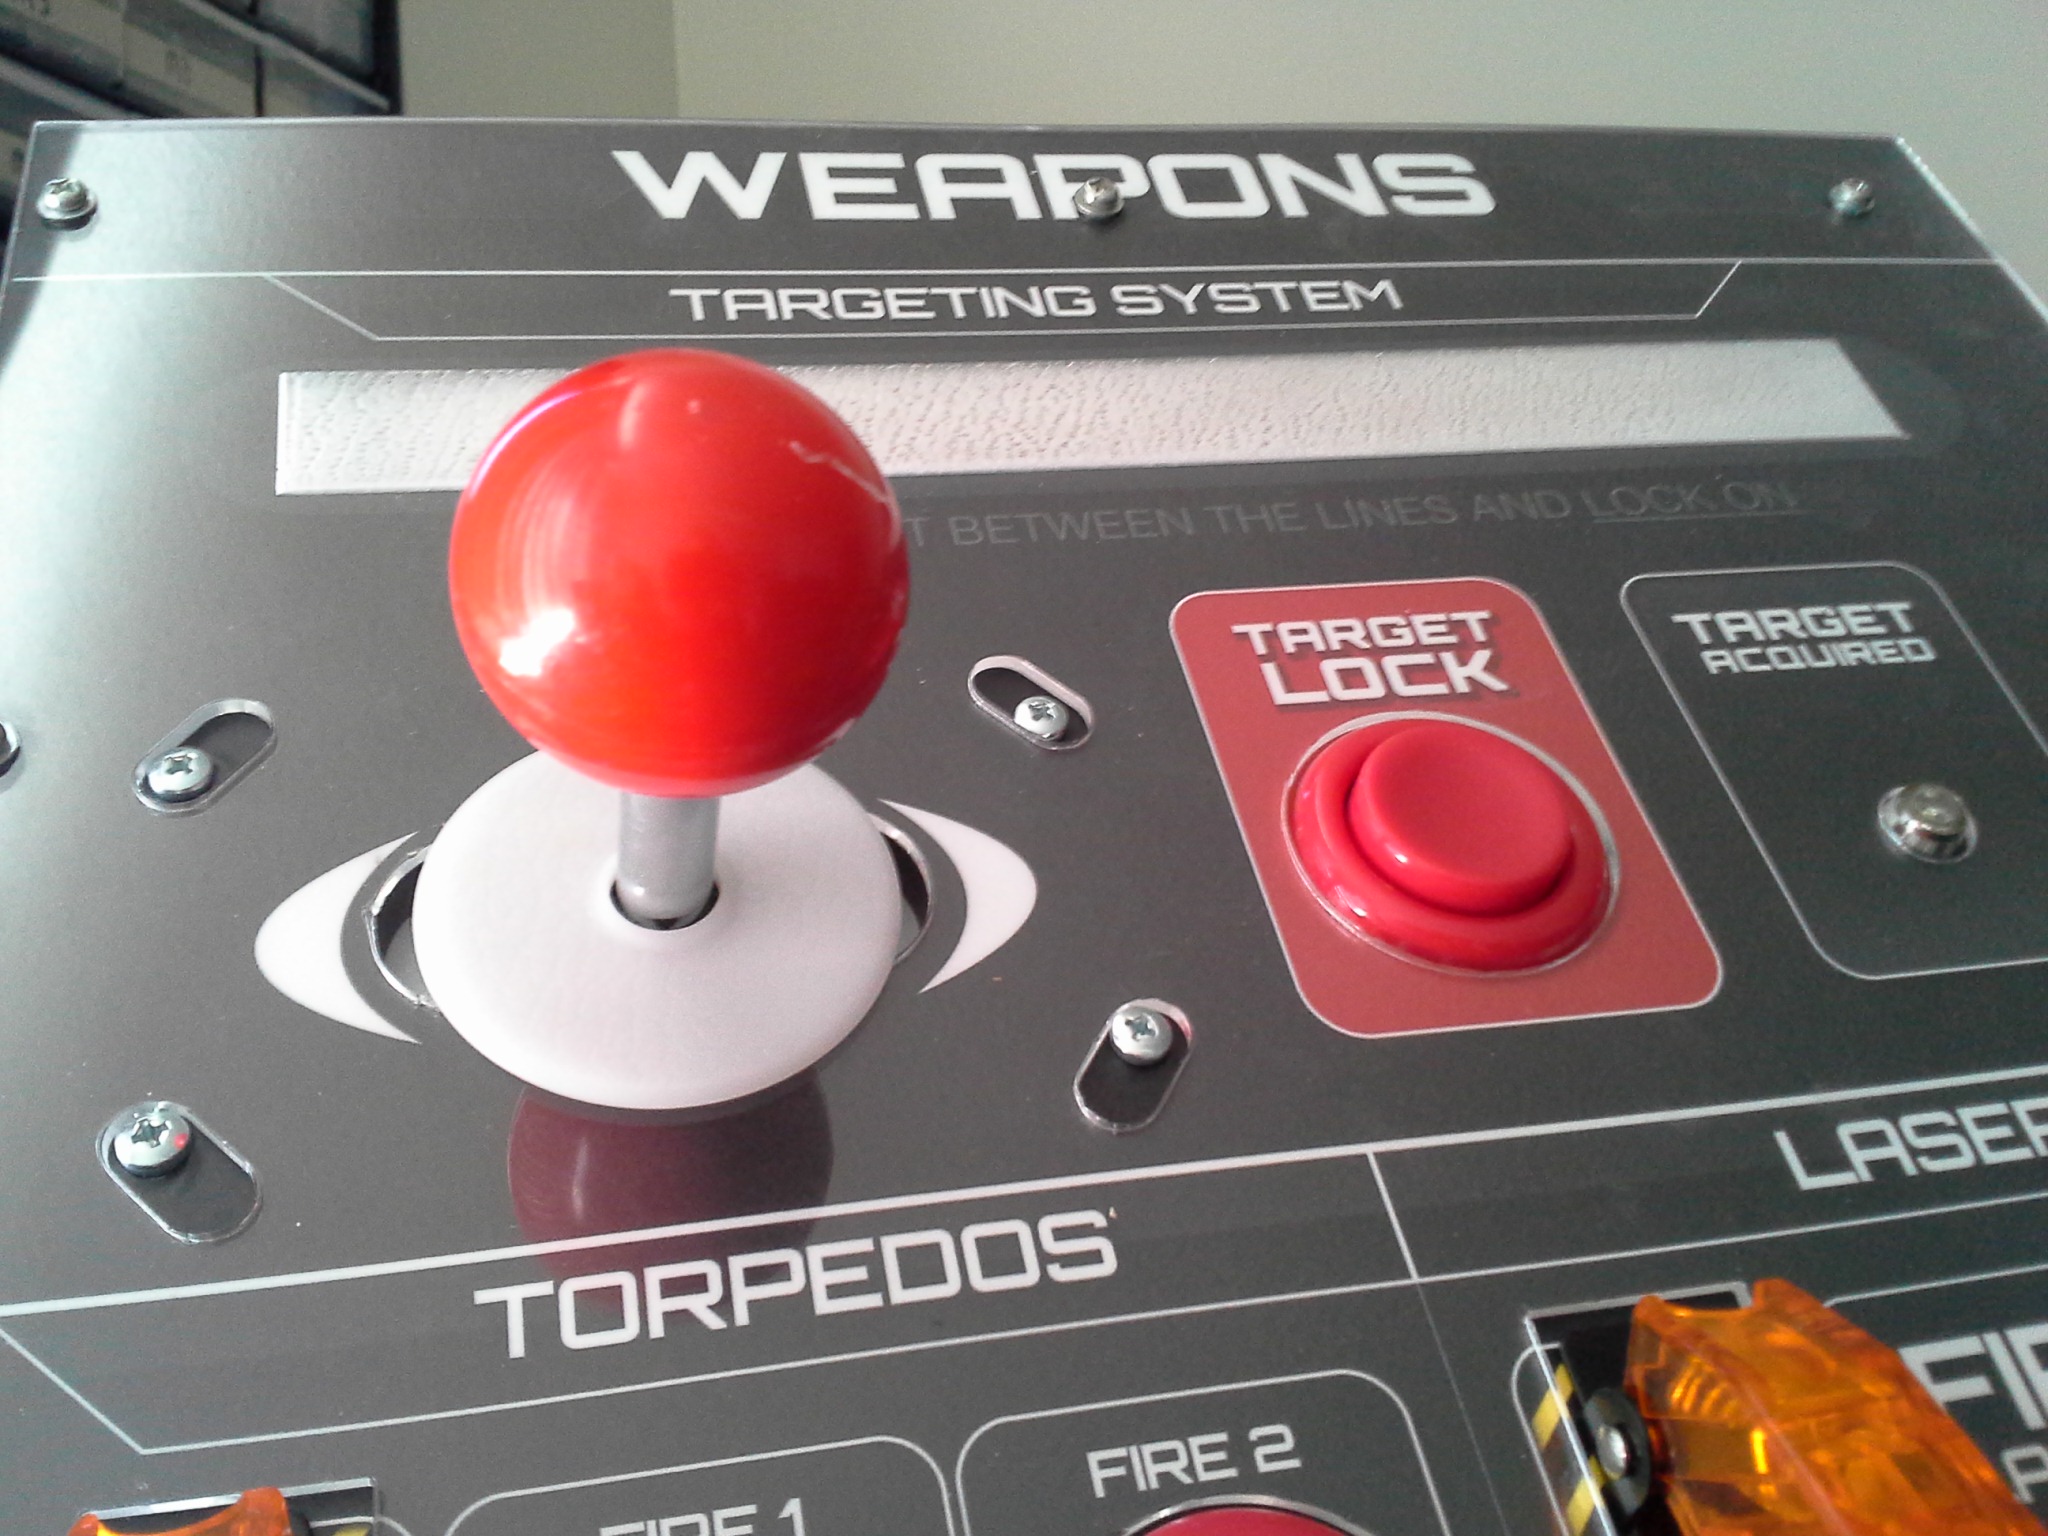
- Targeting system – using a joystick, the user can control the crosshairs on a strip of lights to try to capture a target, then press an arcade button to lock on. An LED indicates when a target has been successfully locked on and ready to fire upon.
- Torpedos – after flipping an illuminated cover and flipping a metal toggle switch, the user can fire torpedos for two bays, but only if they have used the illuminated metal buttons to load them!
- Lasers – after activating another metal toggle switch, the user can two laser cannons using two illuminated square buttons. But not too fast! Those lasers need time to charge, as shown by two LEDs. Hopefully these will actually actuate large strips of LEDs on the outside of the craft.
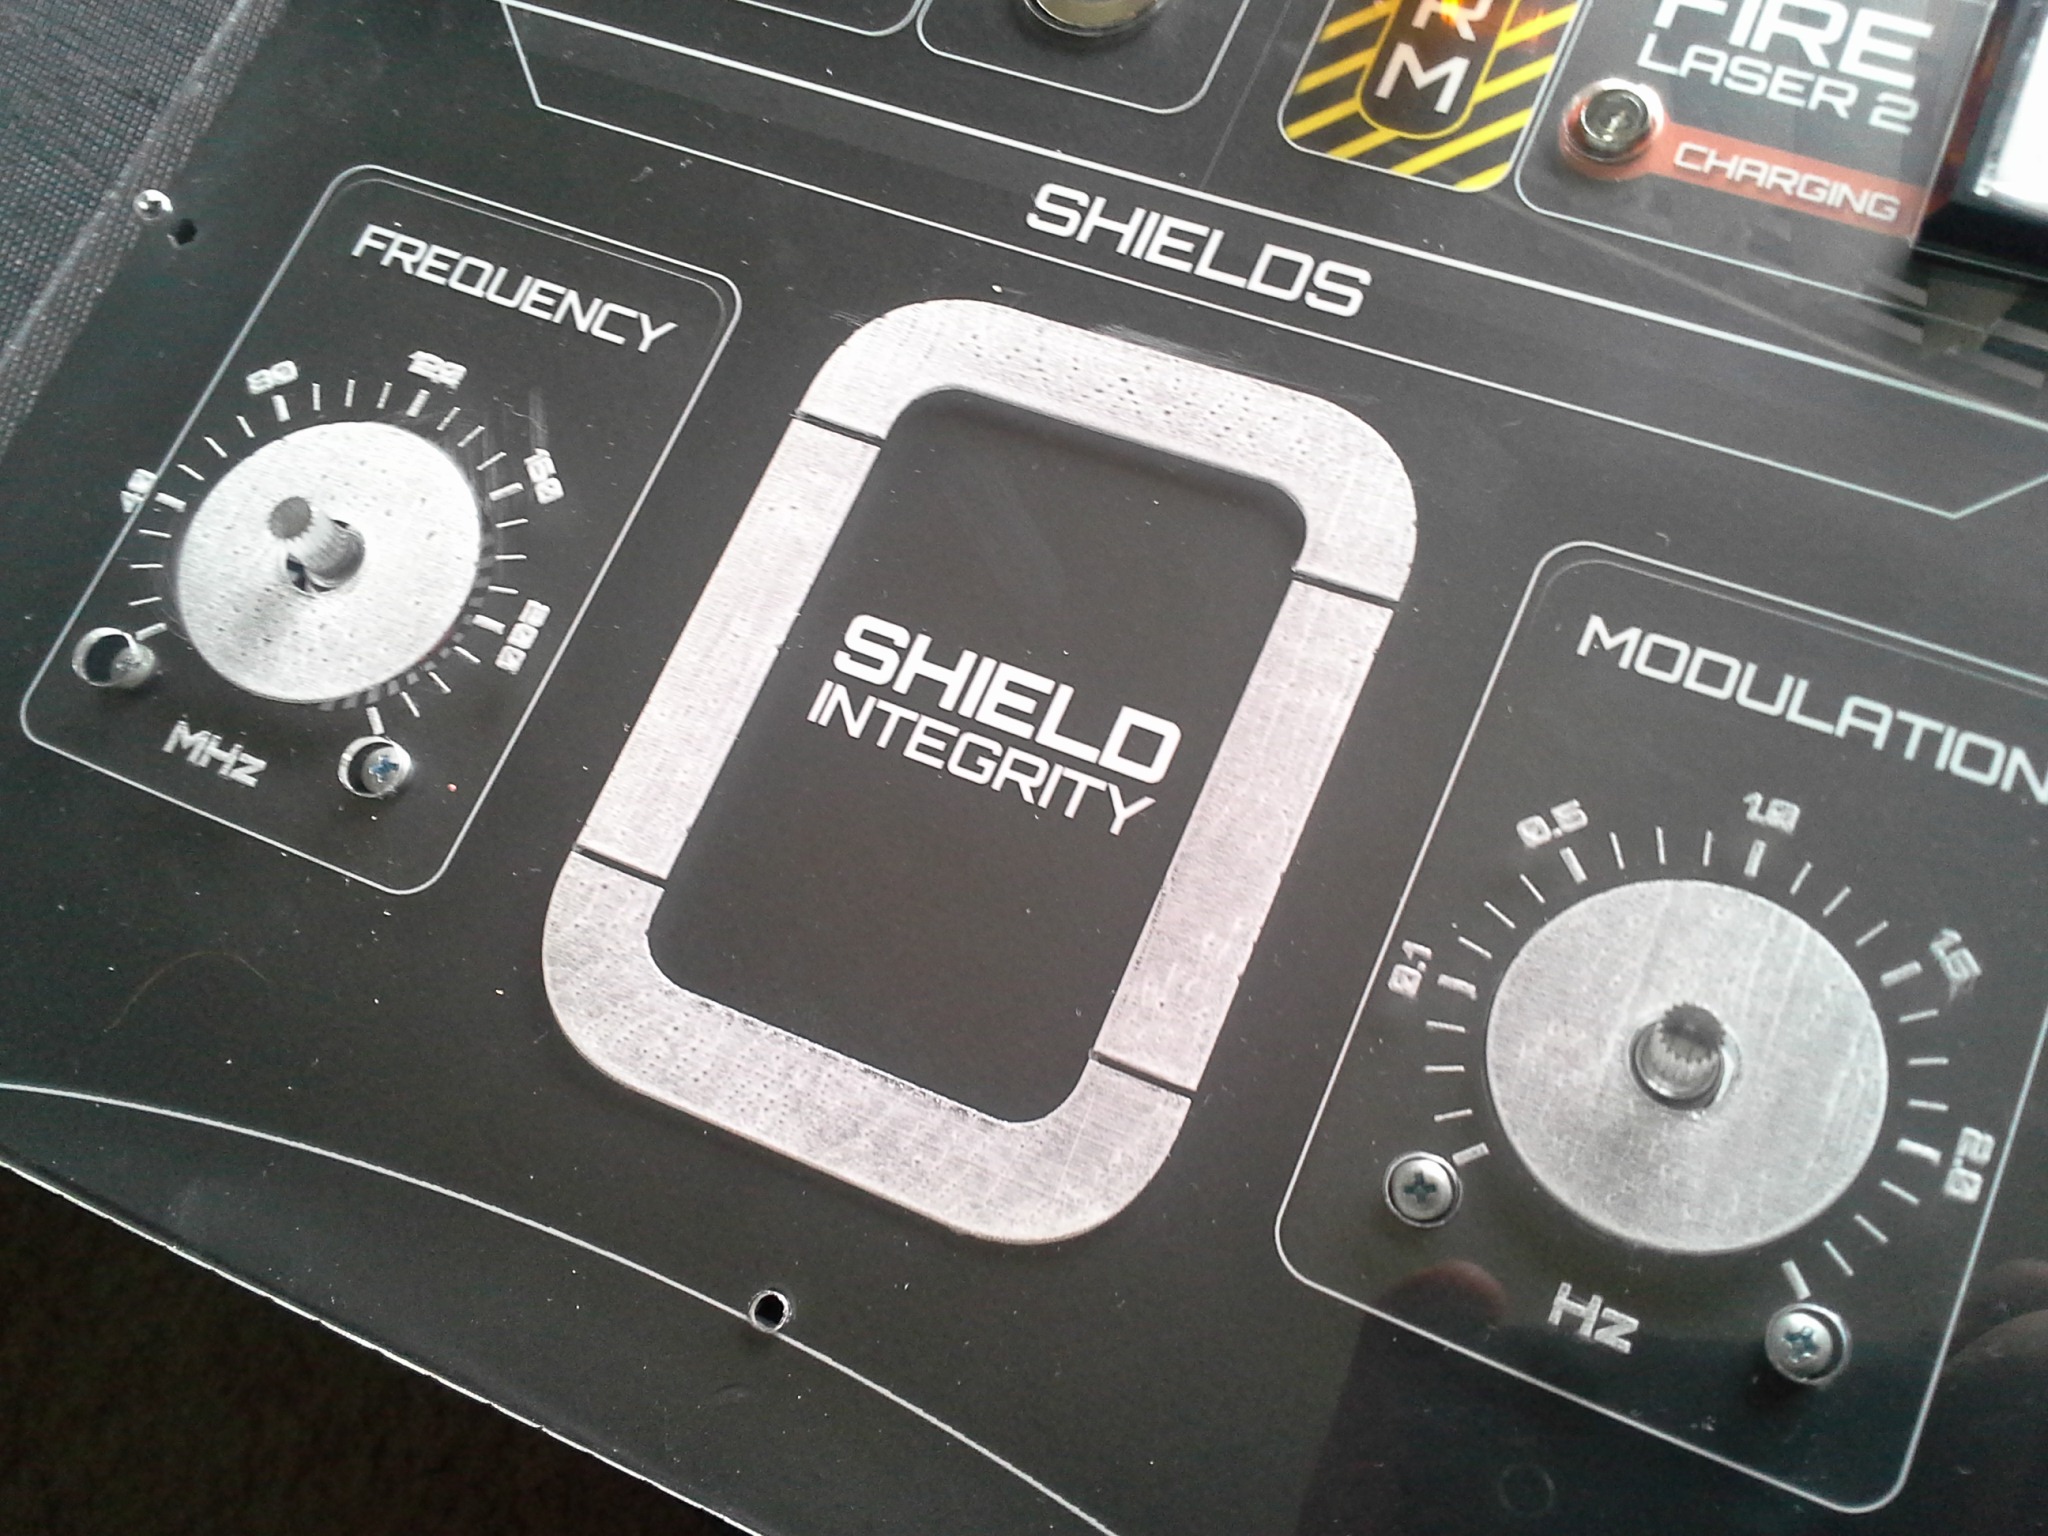
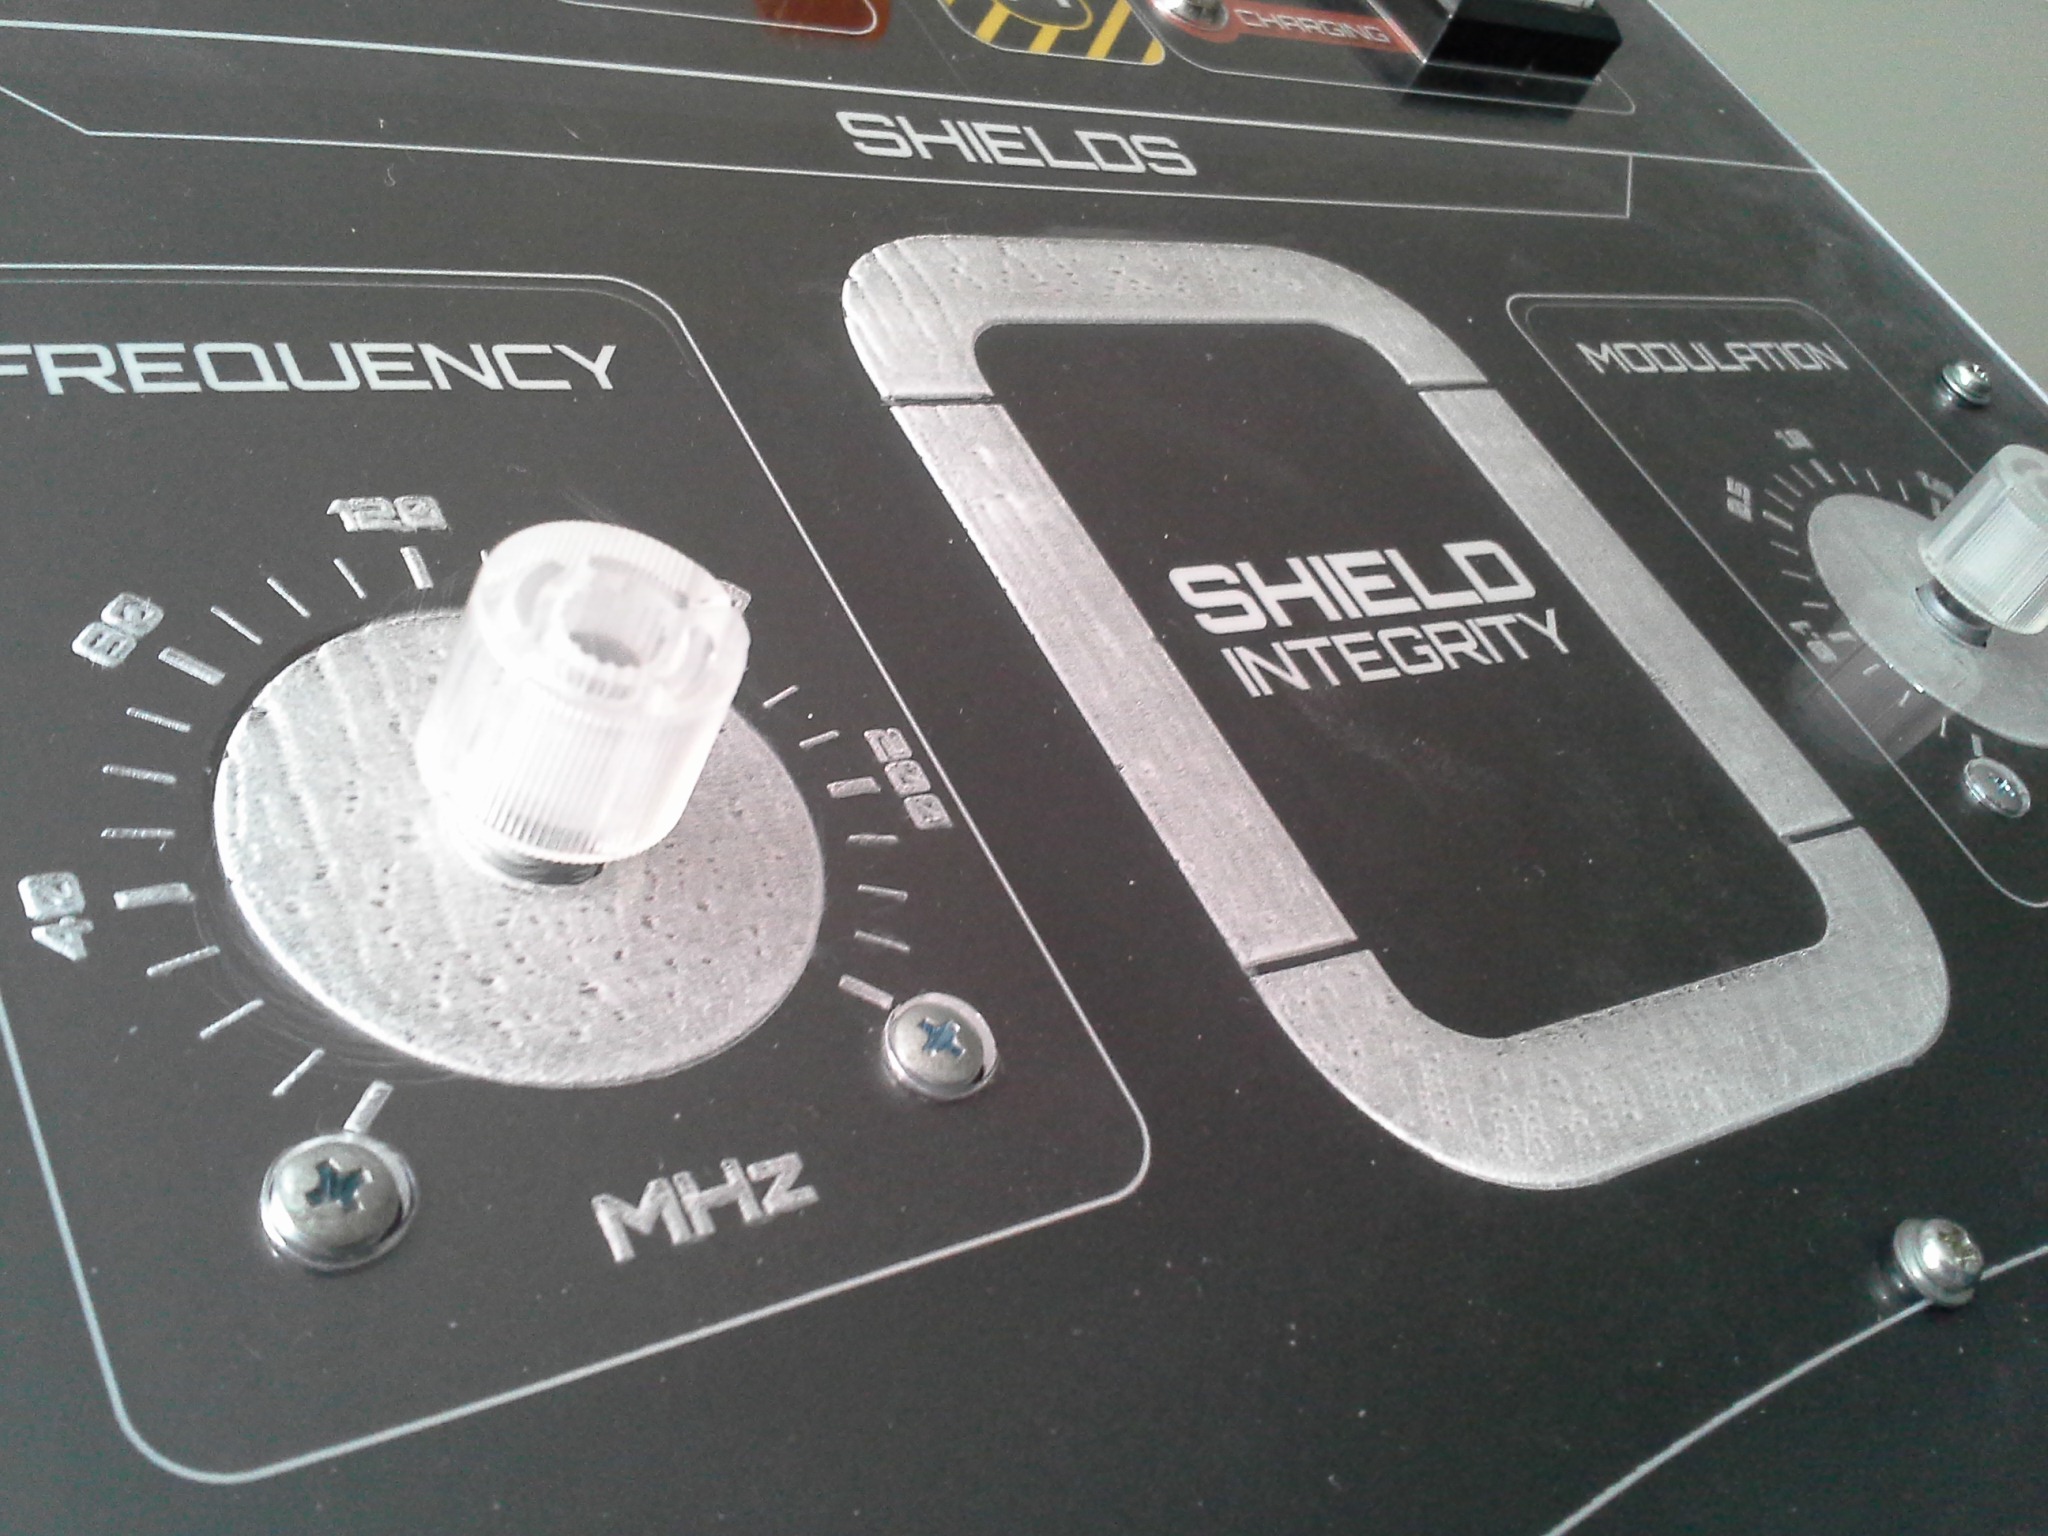
- Shields – two illuminated rotary encoders (with LED rings around them) all users to change the frequency and modulation of the shields to thwart incoming attacks. Strips of LEDs in the center indicate the strength of the shields on the four sides of the ship.
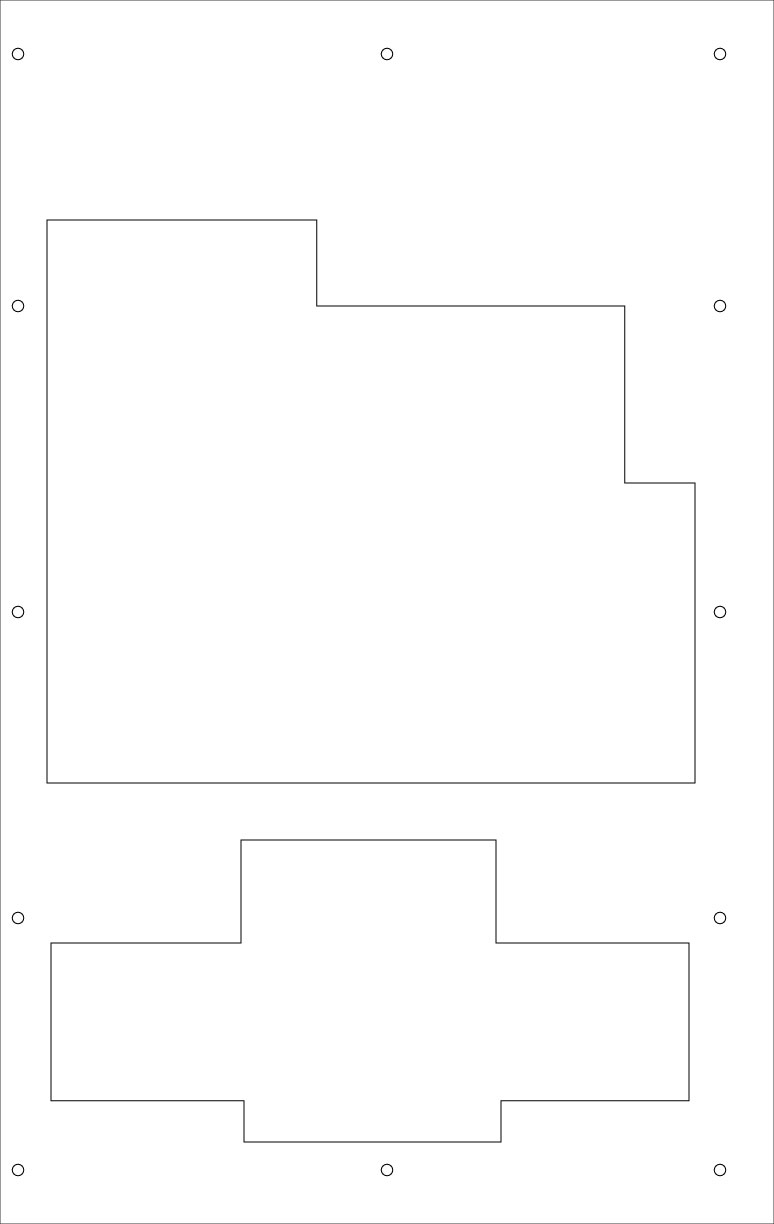
I used the actual dimensions of each of the parts I chose to create a pattern suitable for laser cutting a wooden base for the panel:
Fabricating the panel
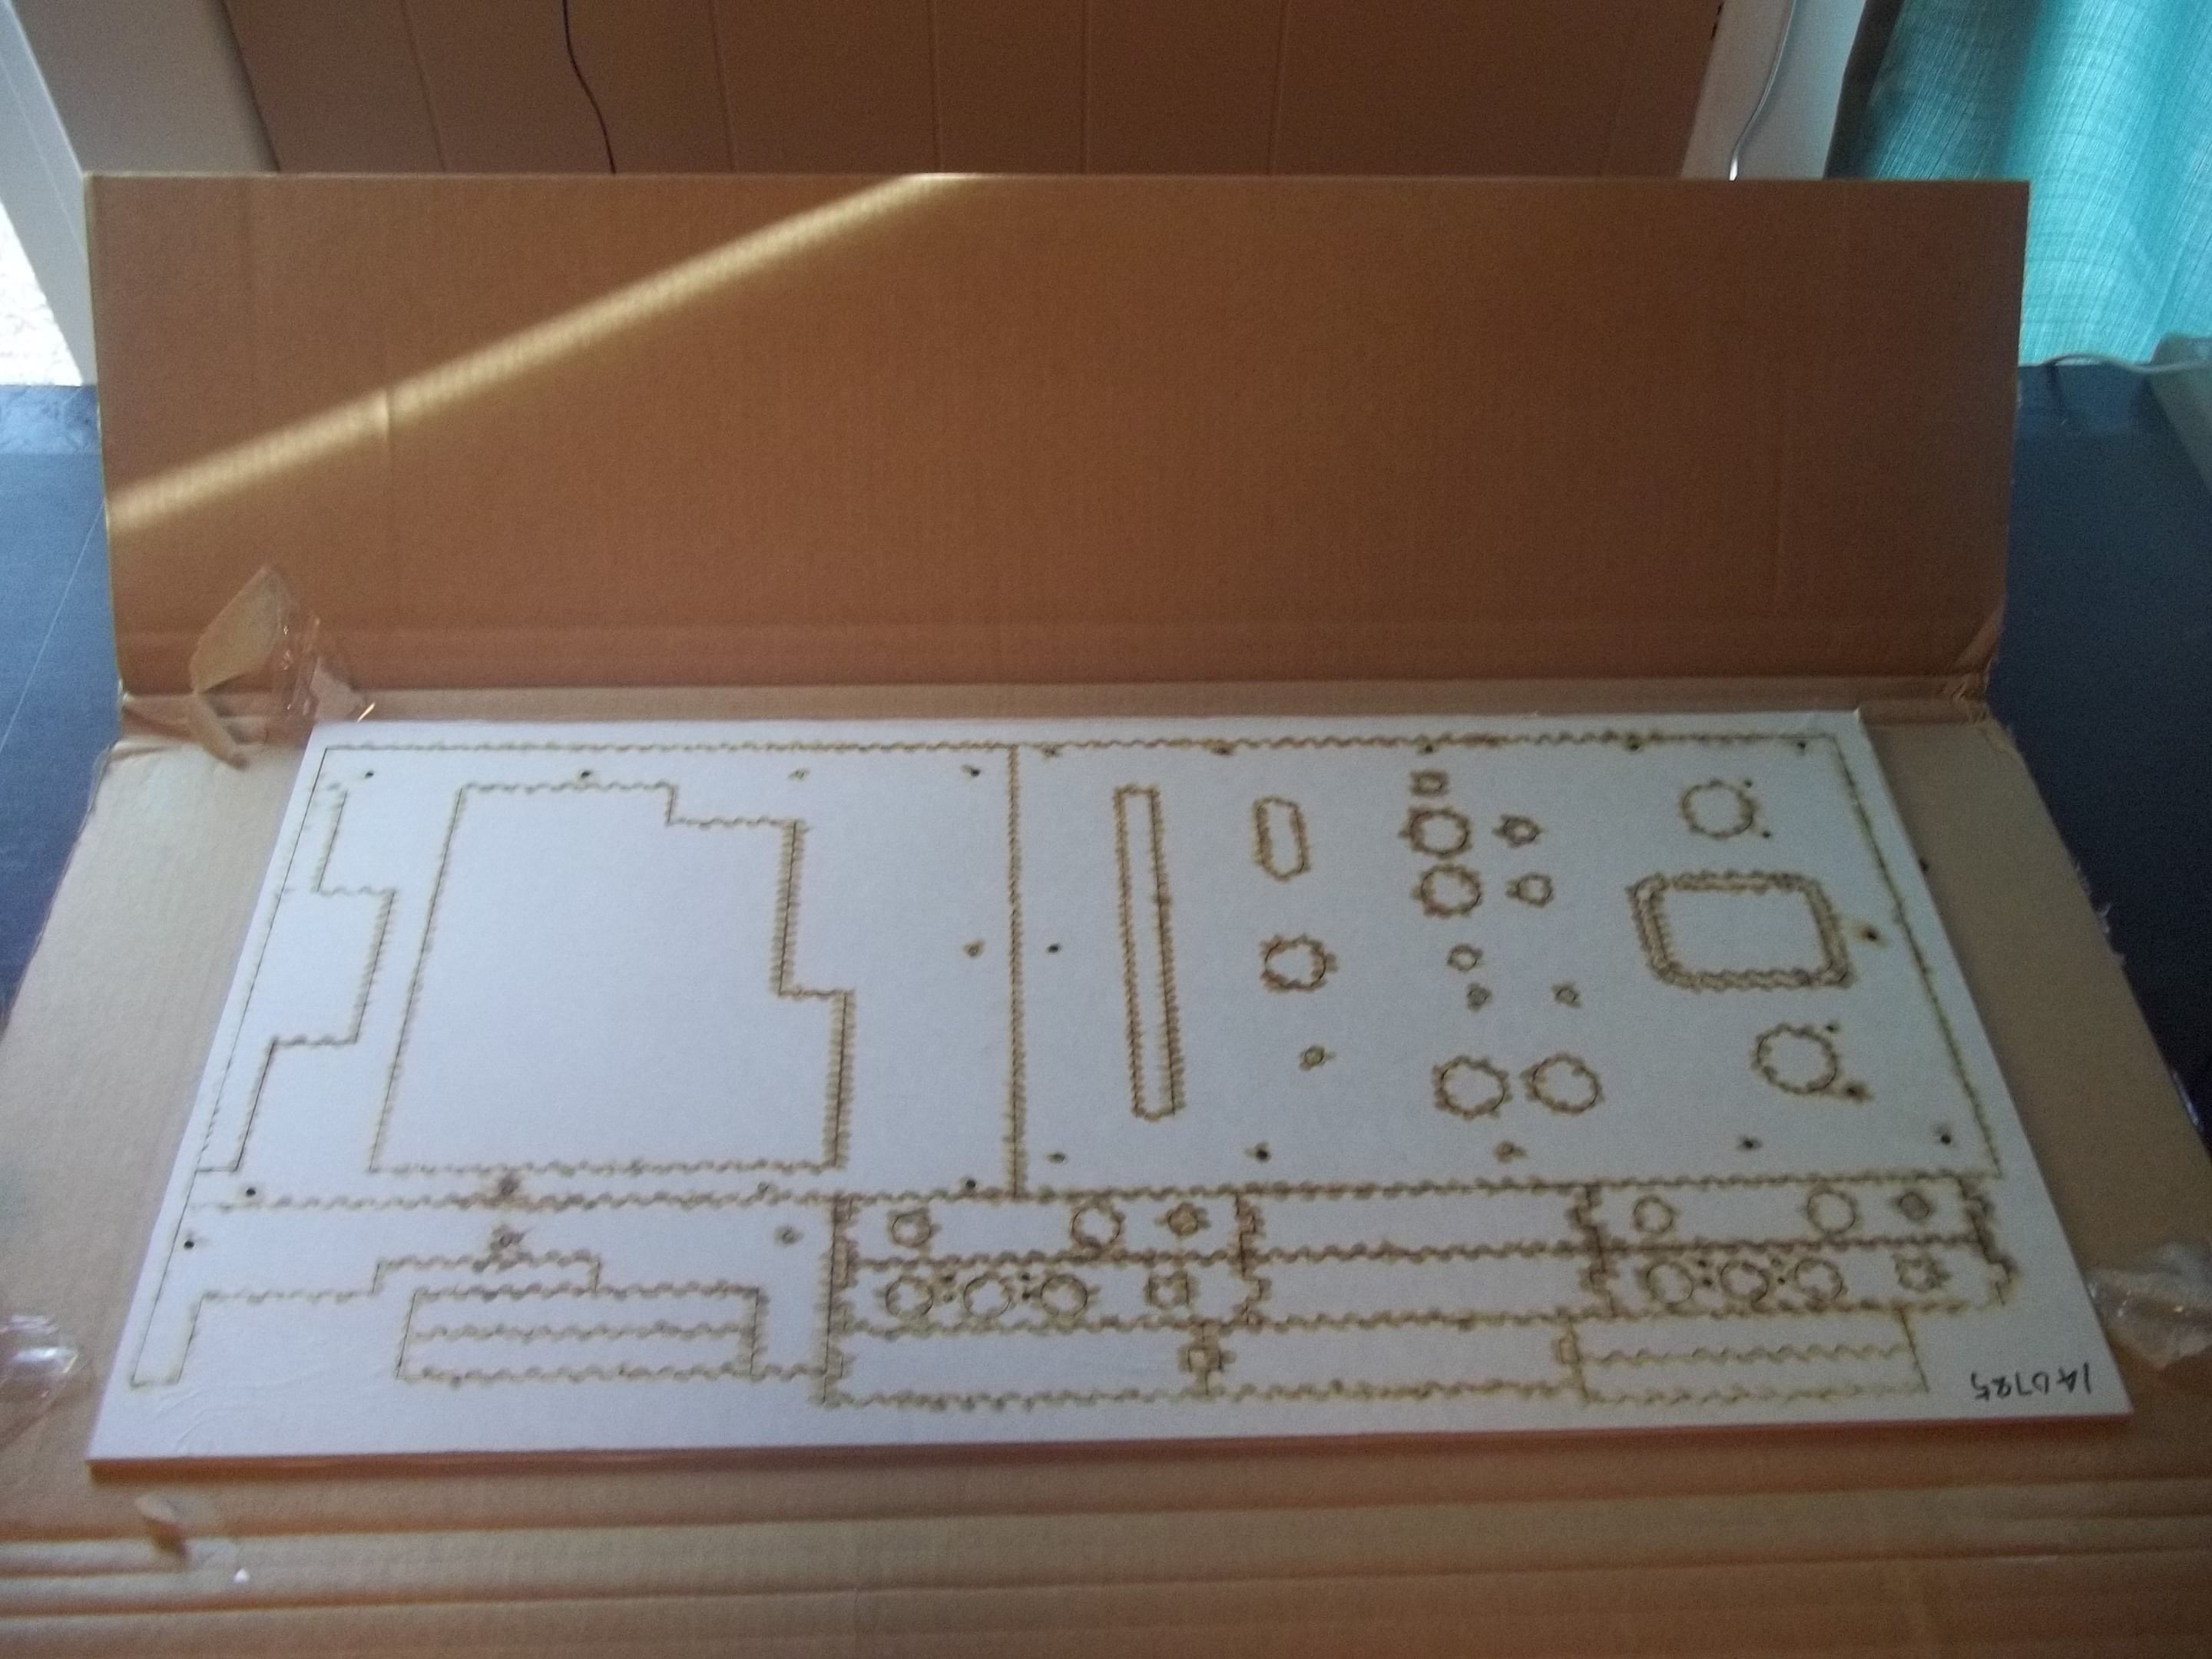
At the time that I was fabricating this part of the project I did not have access to any laser cutters, so I had to use a service called Ponoko to cut the wood for me. However, they do not allow for arbitrary design files to be uploaded; you have to use one of their standard templates and try to pack your design into it. Unfortunately, my design for using two two layers of wood didn’t fit very well into their templates, so I opted to split the bottom piece of wood to be able to re-arrange it a bit. I added a couple other cuts for other projects I am working on, then sent away for the parts to be fabricated.
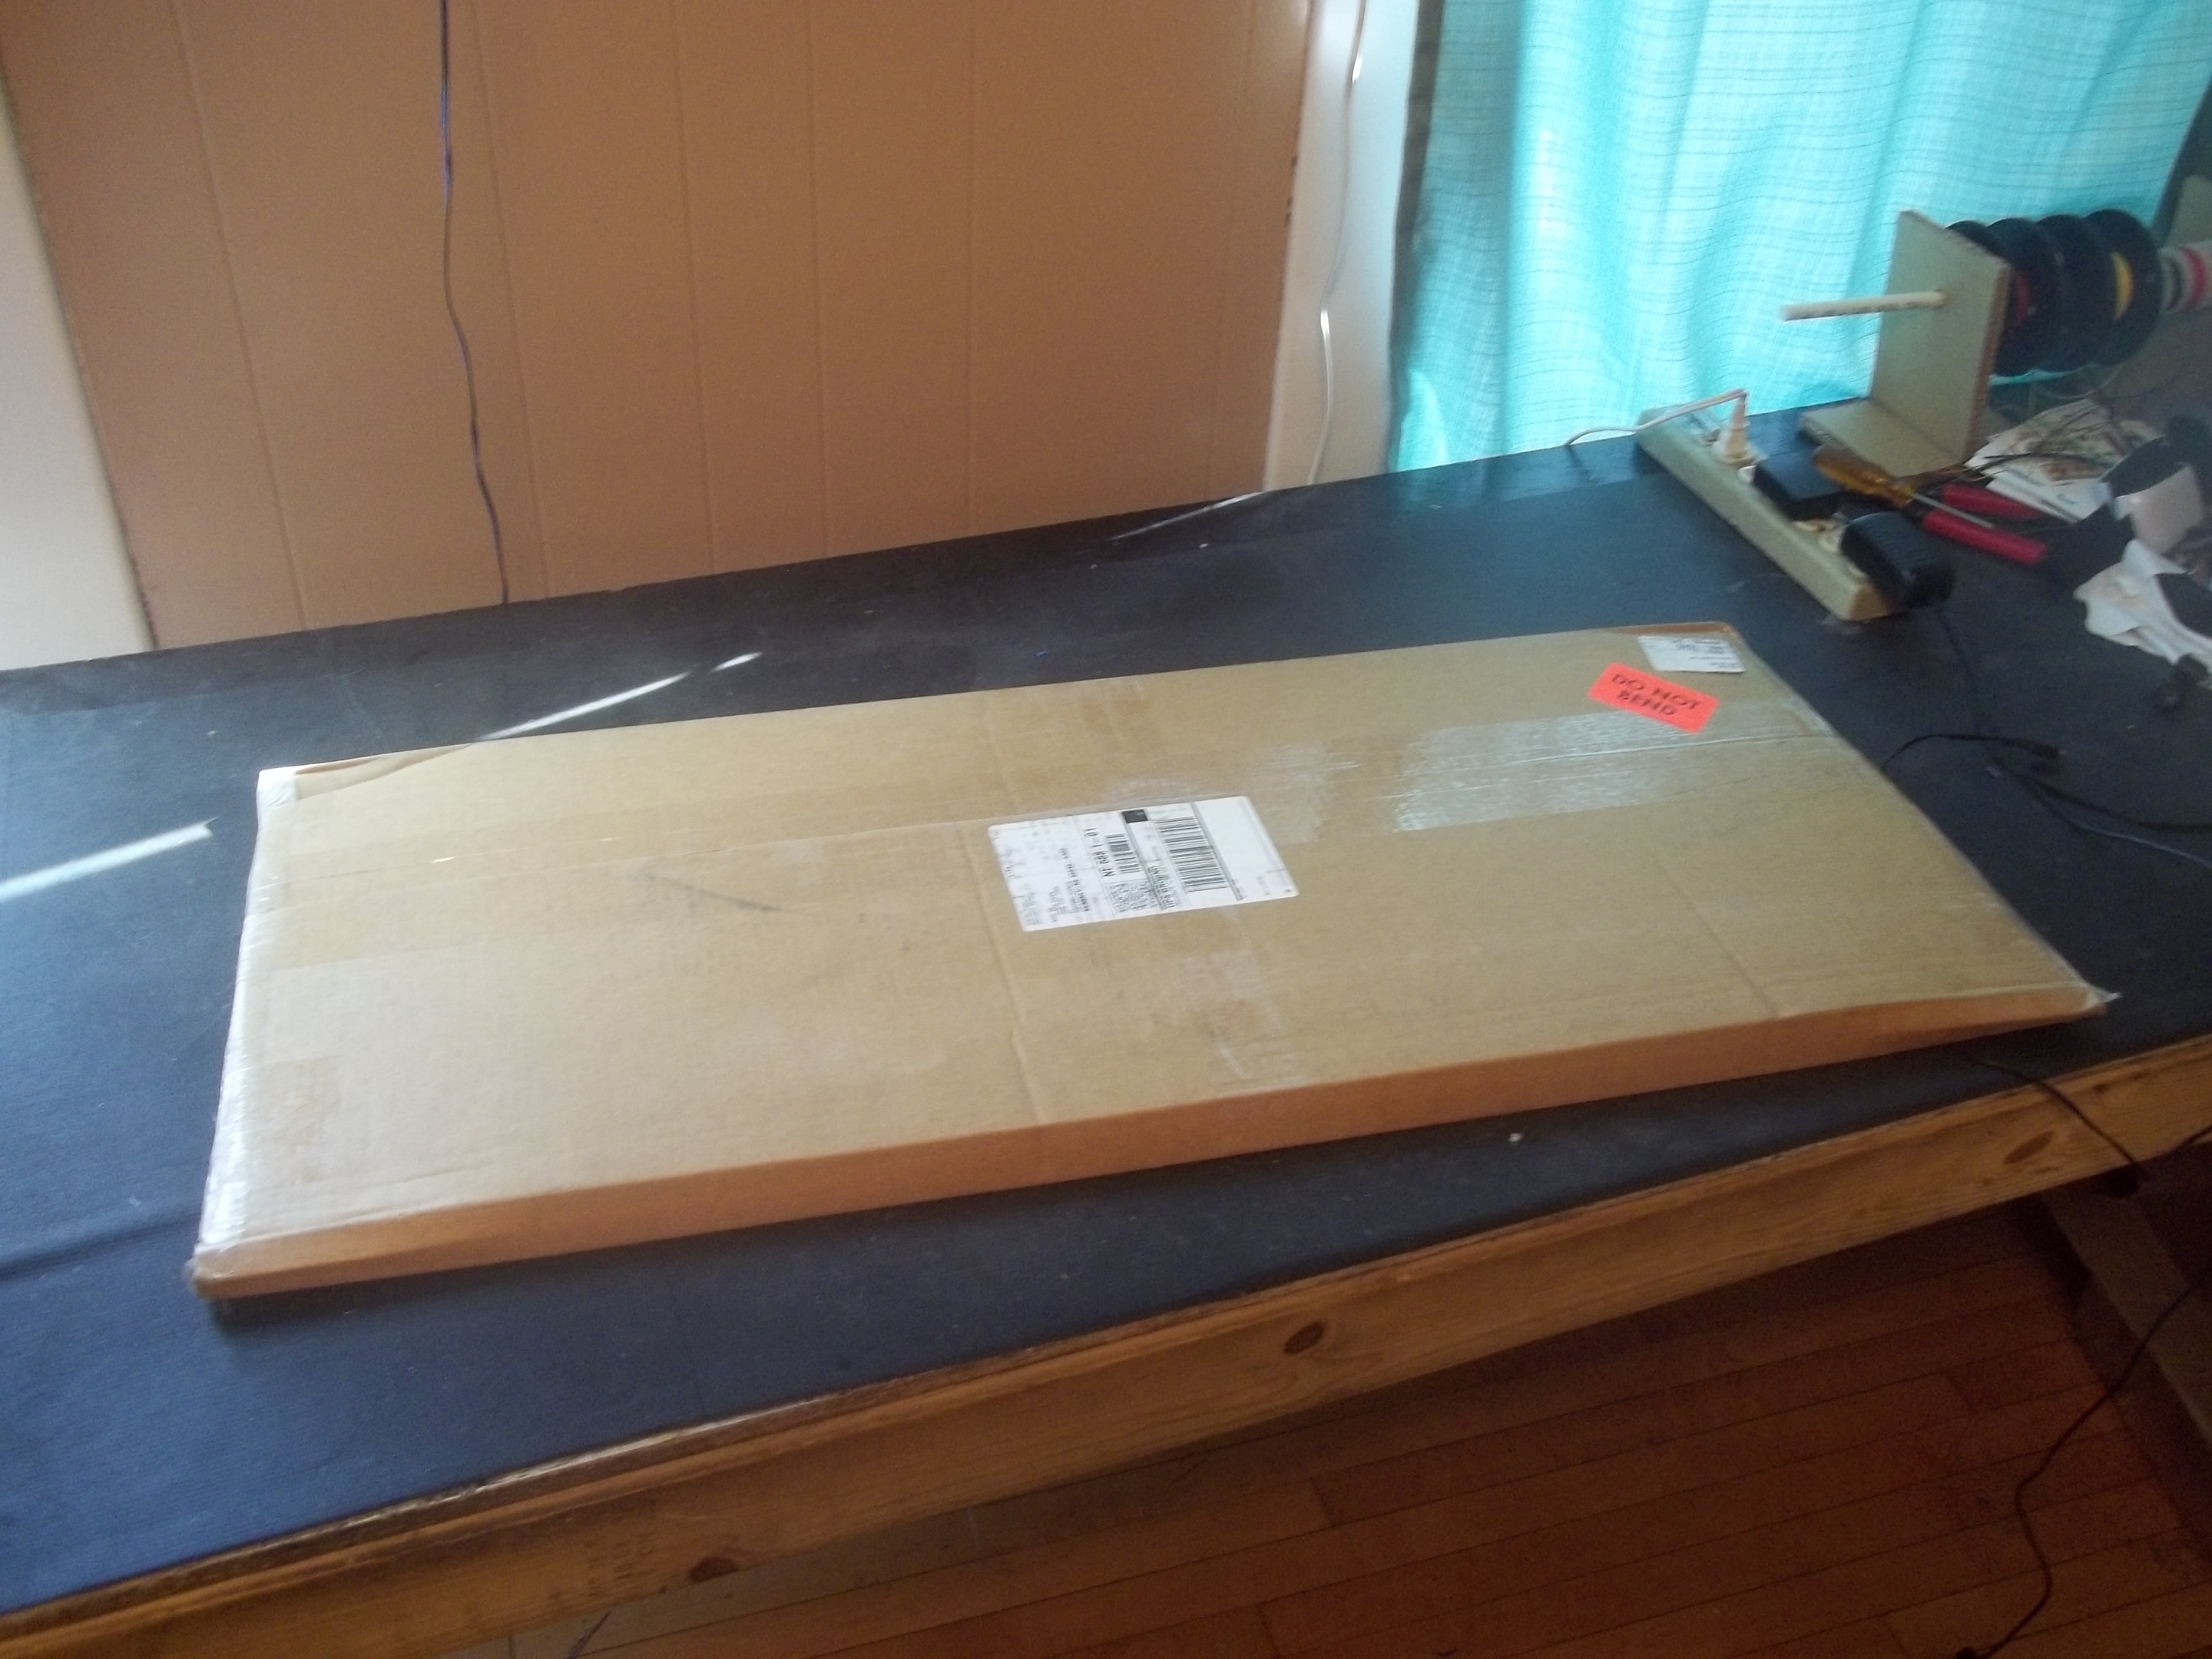
A few weeks later I got this package in the mail from Ponoko. Very satisfied with the service, and if I didn’t have access to a laser cutter I would definitely use them again in the future!

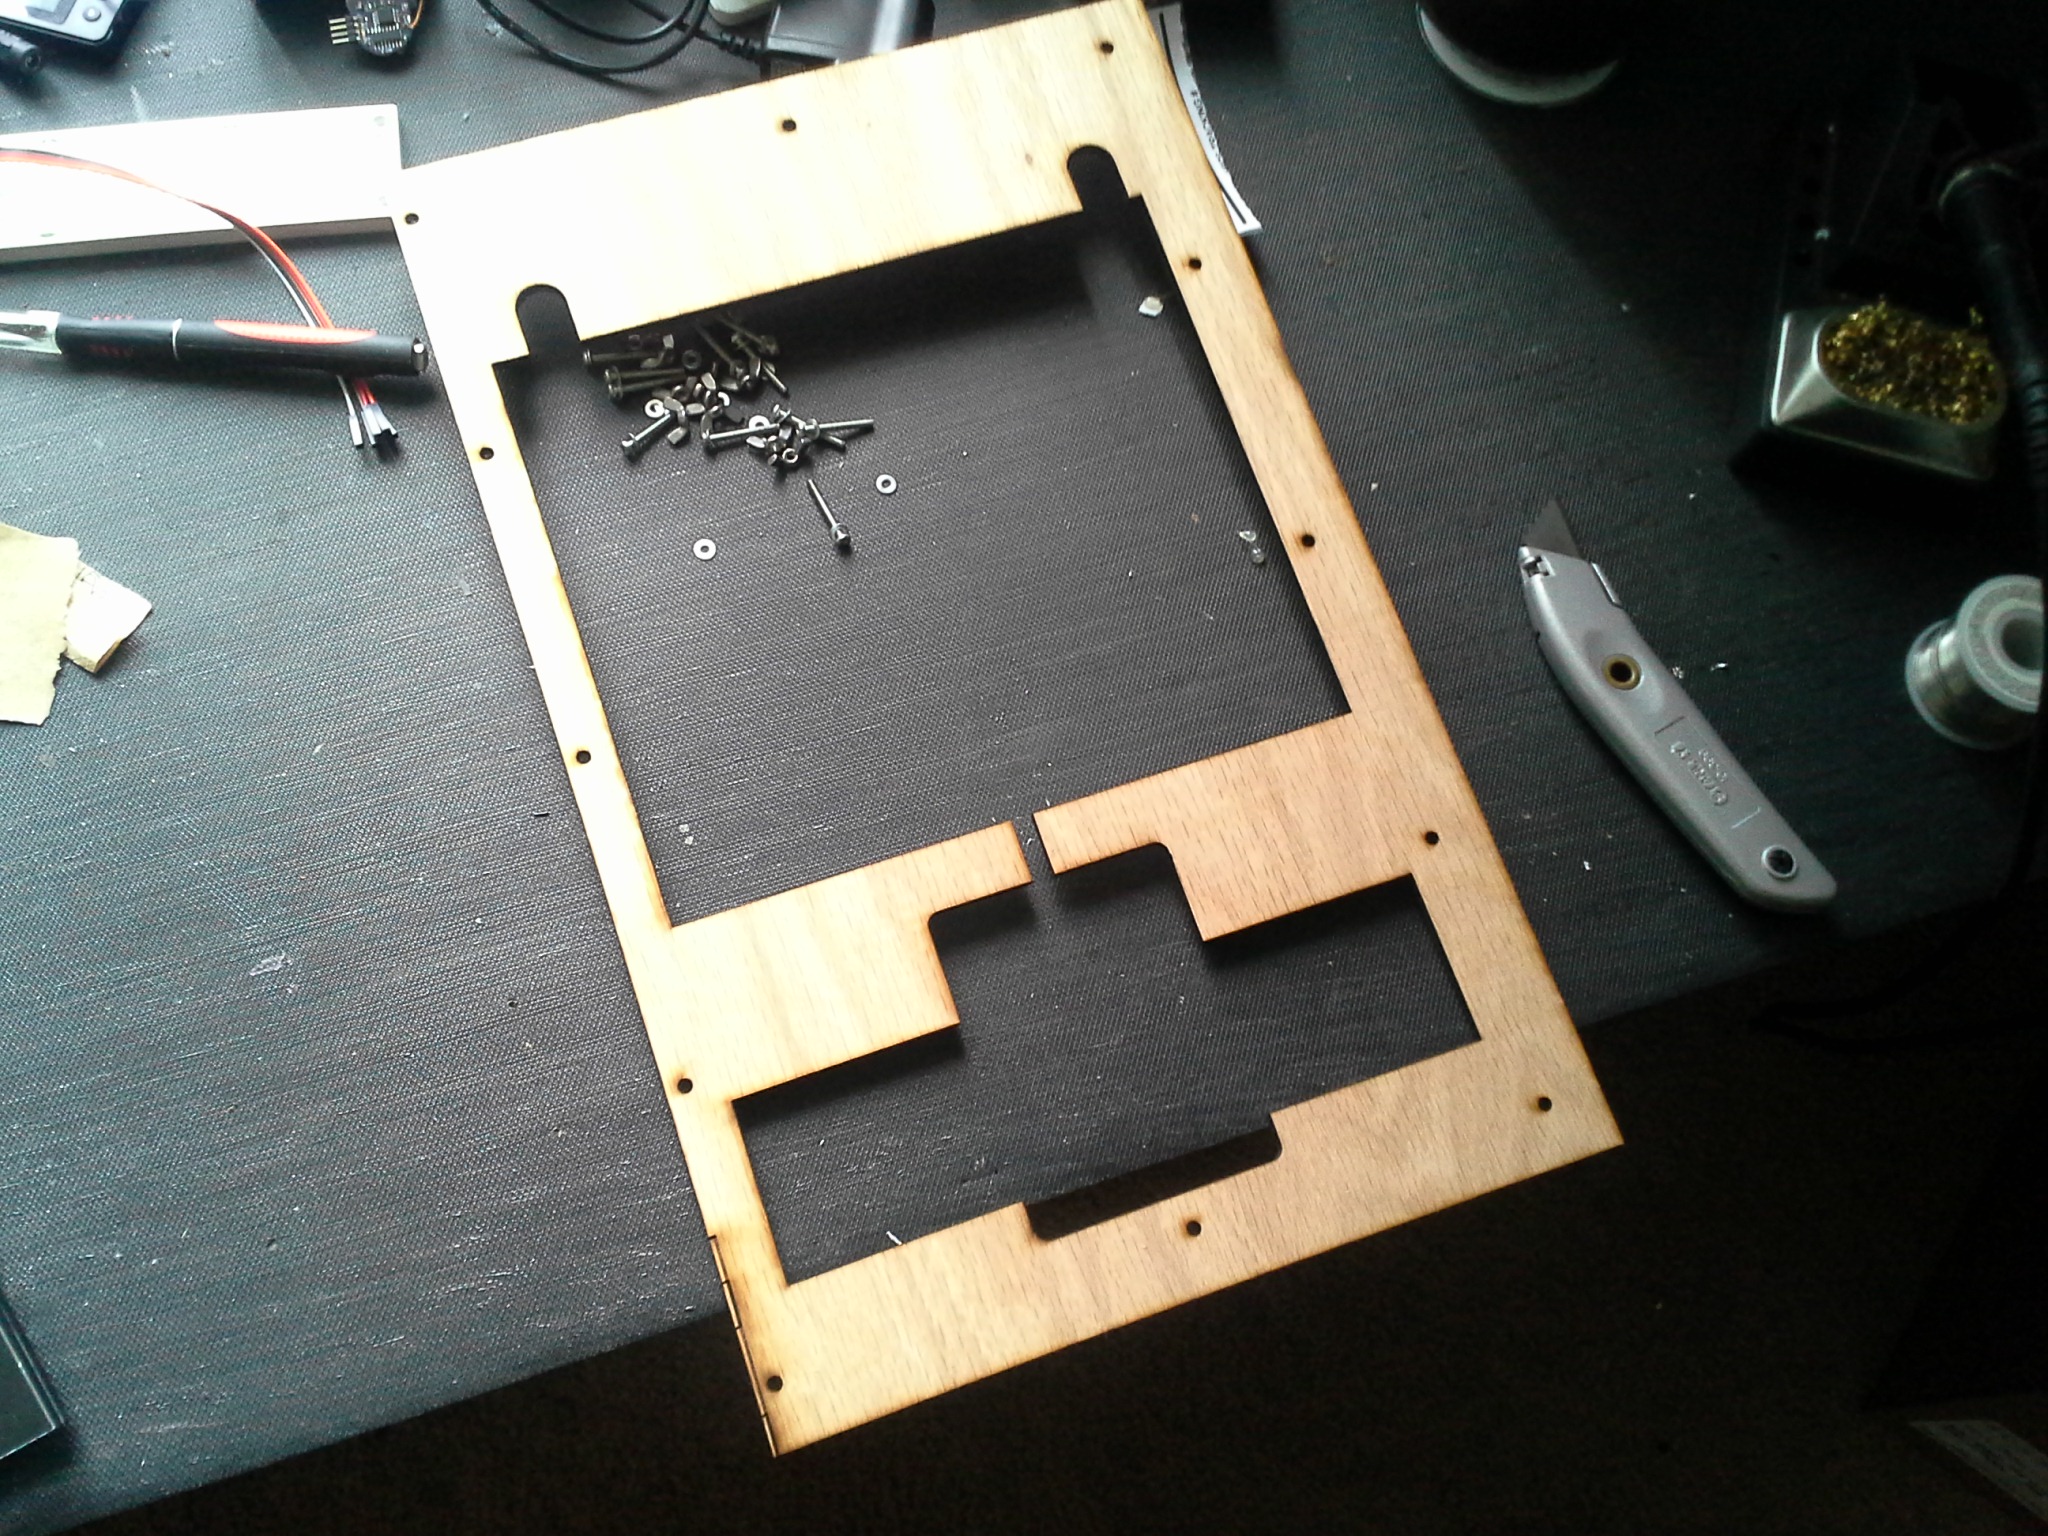
Later on in the process I realized that I wasn’t completely happy with the bottom wood layer, and needed to make some changes. By this time I had gained access to a nice laser cutter at a local community college’s Fab Lab, so it was much easier to cut it out and replace it.
Decal fabrication and application
Once I had the panel arranged how I wanted it, and all the measurements correct, I put together a pretty design for everything and had it printed as a vinyl decal through carstickers.com.
However, the first time I did this I ordered a “repositionable” vinyl sticker, thinking that this would surely be the safest way to go. Unfortunately, I later learned that the intended life of this type of decal is only 3-6 months, and is very susceptible to UV fading. Why even bother selling such a thing?
After I learned that, I re-ordered my decal as a plain old die-cut vinyl sticker and very carefully applied it to the MDF base. I applied some weight and let it sit for 24 hours to make sure that it was firmly applied, then used an Exacto knife to cut out all of the holes for the parts.
[flickr-gallery mode=”photoset” photoset=”72157646316890534″]
Plexiglass mask
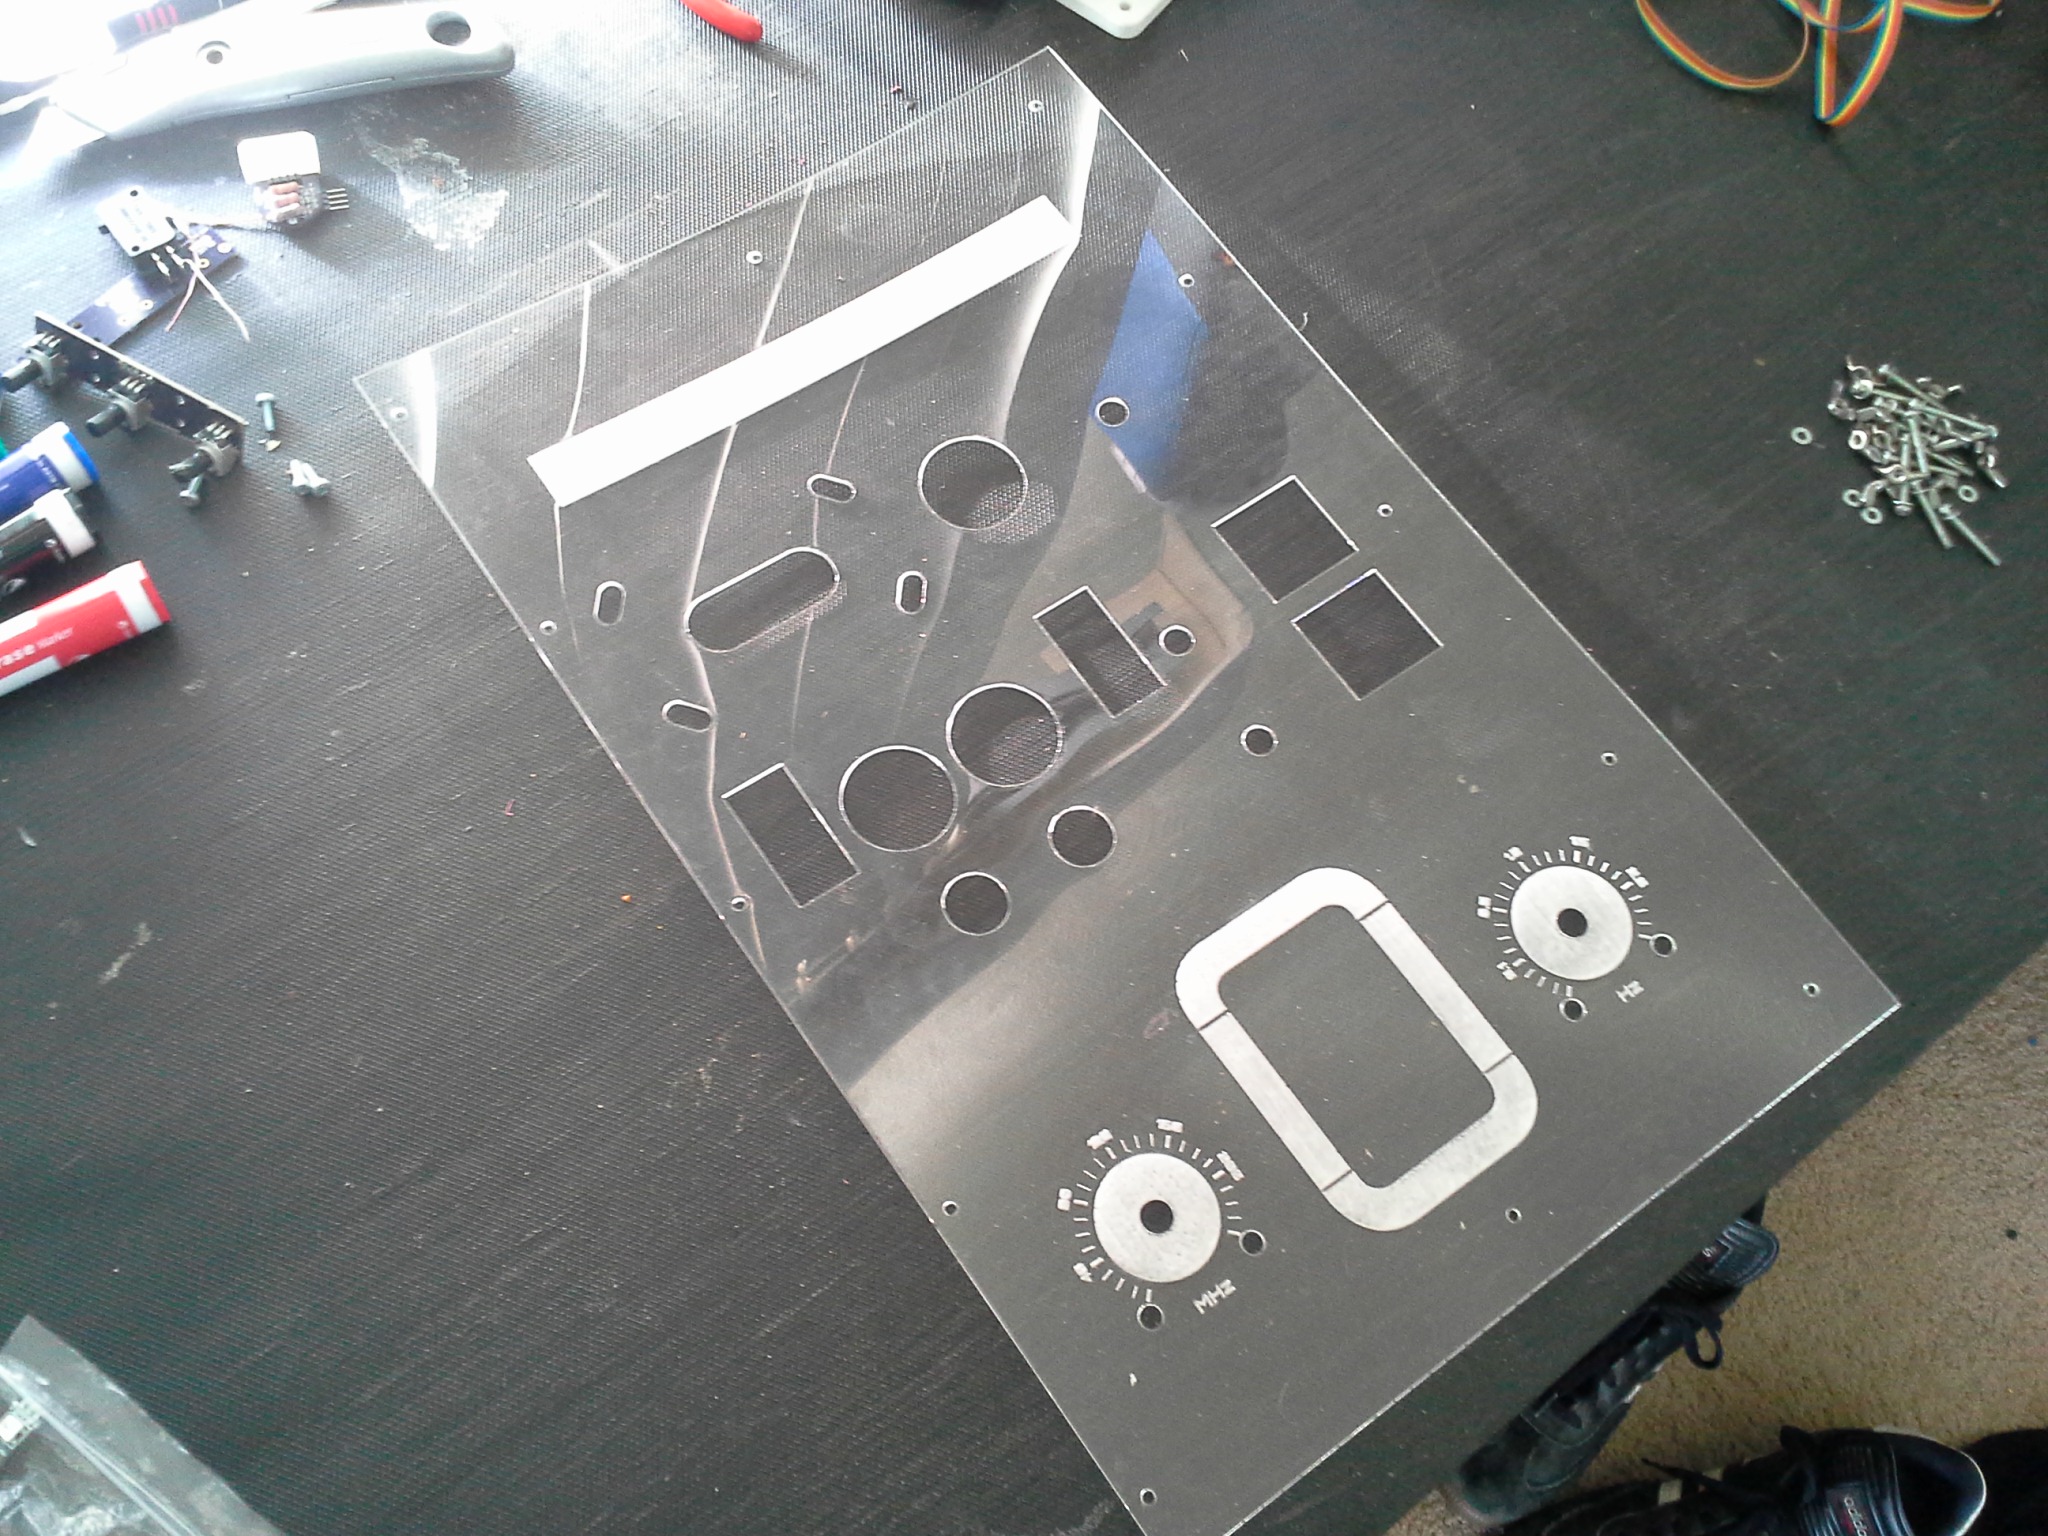
Once I was satisfied with the vinyl decal, I put together a design file for a plexiglass mask that would act protect the decal, with holes for all of the parts. This also happened to make the project look very polished and finished, a happy byproduct.
I visited a local Fab Lab and was granted access to their awesome 3×4′ laser cutter, with which I was able to cut and engrave the first test of this plexiglass mask:
[flickr-gallery mode=”photoset” photoset=”72157646316853104″]
After seeing the mask and playing with it, I learned that there were a few things I wanted to change:
- Update the footprints of a few of the parts to make the mask fit the parts better.
- Add some engraved dial markers around the circular LED displays at the bottom (frequency and modulation knobs).
- All of the engraved portions were pretty uneven and rough to the touch, so I wanted to mirror the design before cutting so that when it is applied, the visitor has a completely smooth surface to to the touch.
Again I visited the local Fab Lab and made the updated plexiglass mask using their laser cutter:
Next steps
Now that all of the physical fabrication and design work is done I can begin the phase that I have been most excited about – making it all work! That means wiring everything to a microcontroller, testing it all out and creating awesome interactions for people to play with. Onward!