Capturing, remixing and printing 3D models from found objects using 123D Catch, Meshmixer and netfabb
Required software
- Autodesk 123D Catch (http://www.123dapp.com/catch/) – cloud-based program that constructs 3D models based on images of real objects from cameras.
- We’ll use the desktop version (Win only) of the program in this tutorial.
- MeshMixer (http://www.meshmixer.com/) – fun, simple program useful for fixing and playing with 3D models.
- Netfabb (http://www.netfabb.com/) – program and used to repair 3D models for 3D printing. Can also be used to cut up models and give them a flat bottom.
- ReplicatorG (http://replicat.org/) – a program that takes 3D models and ‘slices’ them up into stacks of 2D graphics. We use this program to generate files that the Makerbot Replicator understands and can use to make the model in plastic.
Required hardware
- Decent camera for photographing physical object – an amazing camera is not necessary, but a cheap point-and-shoot camera may not have a decent-enough lens and will make your job more difficult.
- A consistent environment with diffuse lighting to photograph objects in.
- 3D printer – we use the Makerbot Replicator at UNK
- Only if you want students to print out their remixed objects at the end.
- Be sure to also pick up enough filament to print student work, if needed.
- OPTIONAL:123D scanning rig (http://www.thingiverse.com/thing:19558)
- Not required, but will help students get consistently good results.
- Assembly instructions at: http://www.instructables.com/id/Camera-rig-for-123D-Catch/
Process at a glance
Capturing 3D models from photographs is actually easier than you might think, thanks to Autodesk’s 123D Catch program. The program takes a series of photographs and tries to construct a 3D model from them, which you can then use for 3D printing. The most important part of this workshop is the actual photographing of the object. Here are the steps we’ll go through to make it all work:
- Find an object suitable for the capturing process.
- Prepare an environment to photograph the object in.
- Photograph the object from multiple angles.
- Use 123D Catch to construct a 3D model from the photographs.
- Use MeshMixer to mess with the resulting 3D model.
- Repair the model and give it a flat bottom using netfabb
- Prepare and slice the 3D model using ReplicatorG
- Print the 3D model on a 3D printer.
You can also imagine this process visually: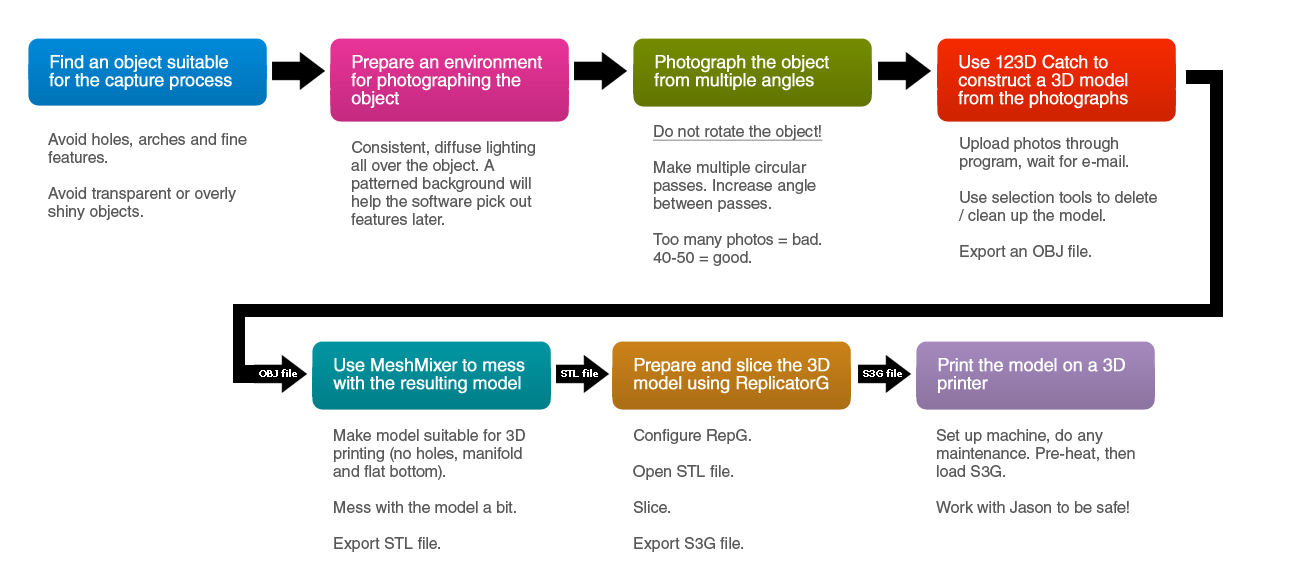
Find an object suitable for the capturing process
Not all objects are great for the capturing process. Do not use objects that have holes or arches in them. Also avoid transparent or overly shiny objects.
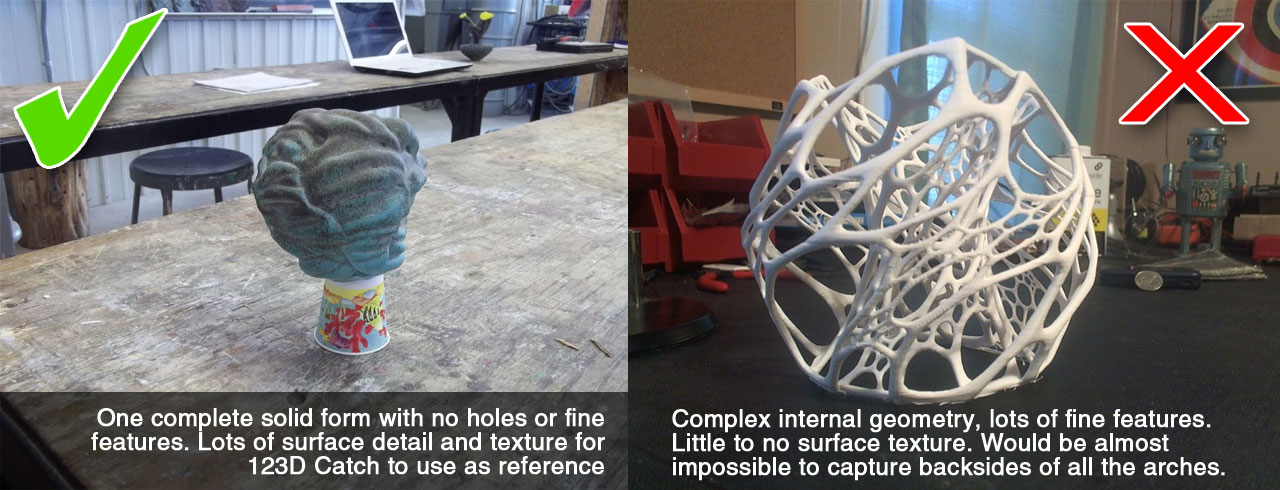
TIP: If your object has overhangs or holes, try rotating the object and laying it down differently
Prepare an environment to photograph the object in
In order for the 123D Catch software to function, the images that you take of your object must be consistently well-lit and contain plenty of reference points that persist between images. Trying to capture an object in bare room with white walls does not work as well as trying it someplace with textured walls and/or wood floors. A scanning rig like the one referenced in the “Required hardware” section above will help a lot here.
Lighting
Try to get the lighting as consistent as possible, with diffuse lighting being the best. Any shadows that persist between images may be considered part of the object from the software’s point of view. If you don’t have a lighting rig, try taking photos outside on a cloudy day, or near around dusk.
Providing reference points
The 123D Catch software constructs models by calculating common reference points between images, so a patterned background is always better than a plain one. Try putting your object on some newspaper or draw some colored lines on a piece of cardboard under the object.
Photograph the object from multiple angles
Before taking any photos of the object, plan out your approach. Your goal should be to make at least three circular passes around the object, taking photos at regular intervals with consistent
distance, zoom, height and angle. Study the tutorial videos provided by Autodesk and do a few practice runs before working with the students. Here are some basic tips to keep in mind:
- Start by planning to make a nearly-level circular pass around the object. Keep the object in the middle of the shot and filling the frame (not too big, not too small).
- Take approximately 10-20 photos while walking around the object. Keep the intervals regular and your distance to the object constant. This is where having a scanning rig would help immensely.
- Do NOT rotate the object!
- Adjust your angle to the object so that you are looking slightly down at it (say 45-60 degrees or so) – not directly over it.
- Take another 10-20 photos walking around the object at the new angle. Again be consistent with the intervals and the distance.
- Adjust the angle again so you are almost looking straight down to the object.
- Take another ~5 photos around the object.
- Take a couple extra photos of hidden or complex details you may be concerned about.You should end up with no more than 40-50 photos. It is actually possible to take too many photos, so be careful with your planning.
Use 123D Catch to construct a 3D model from the photographs
The free program 123D Catch from Autodesk can do all the heavy-lifting of constructing a 3D model from the photographs of the object. Download the desktop program and open it up.
- Open the 123D Catch desktop program.
- Click on “Create a New Capture”
- Create a new Autodesk account (free) or sign in with another service.
- Navigate to the folder where you have all your photos, select them all and hit Open.
- Click the “Create Project” button.
- Supply your name and e-mail address, and agree to the terms.
- Your 3D model will be e-mailed to you when it is done.
- On the next window, update whatever fields you want and click the Email Me button.
- Wait for your photos to upload.
When your model is finished processing, you will be sent a download link for the 3DP project file via e-mail. Grab it and open it in 123D Catch.
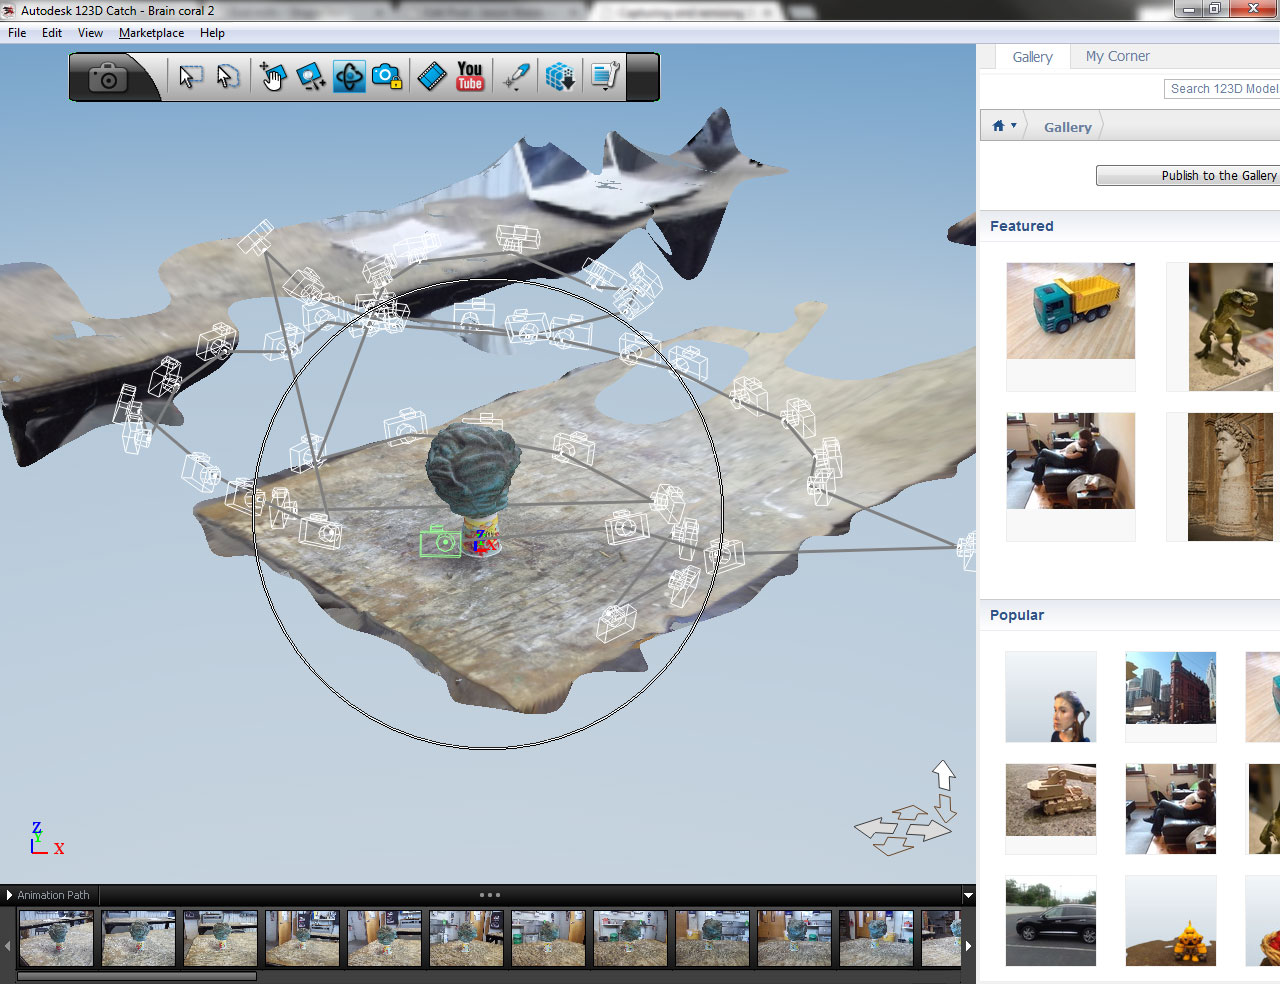
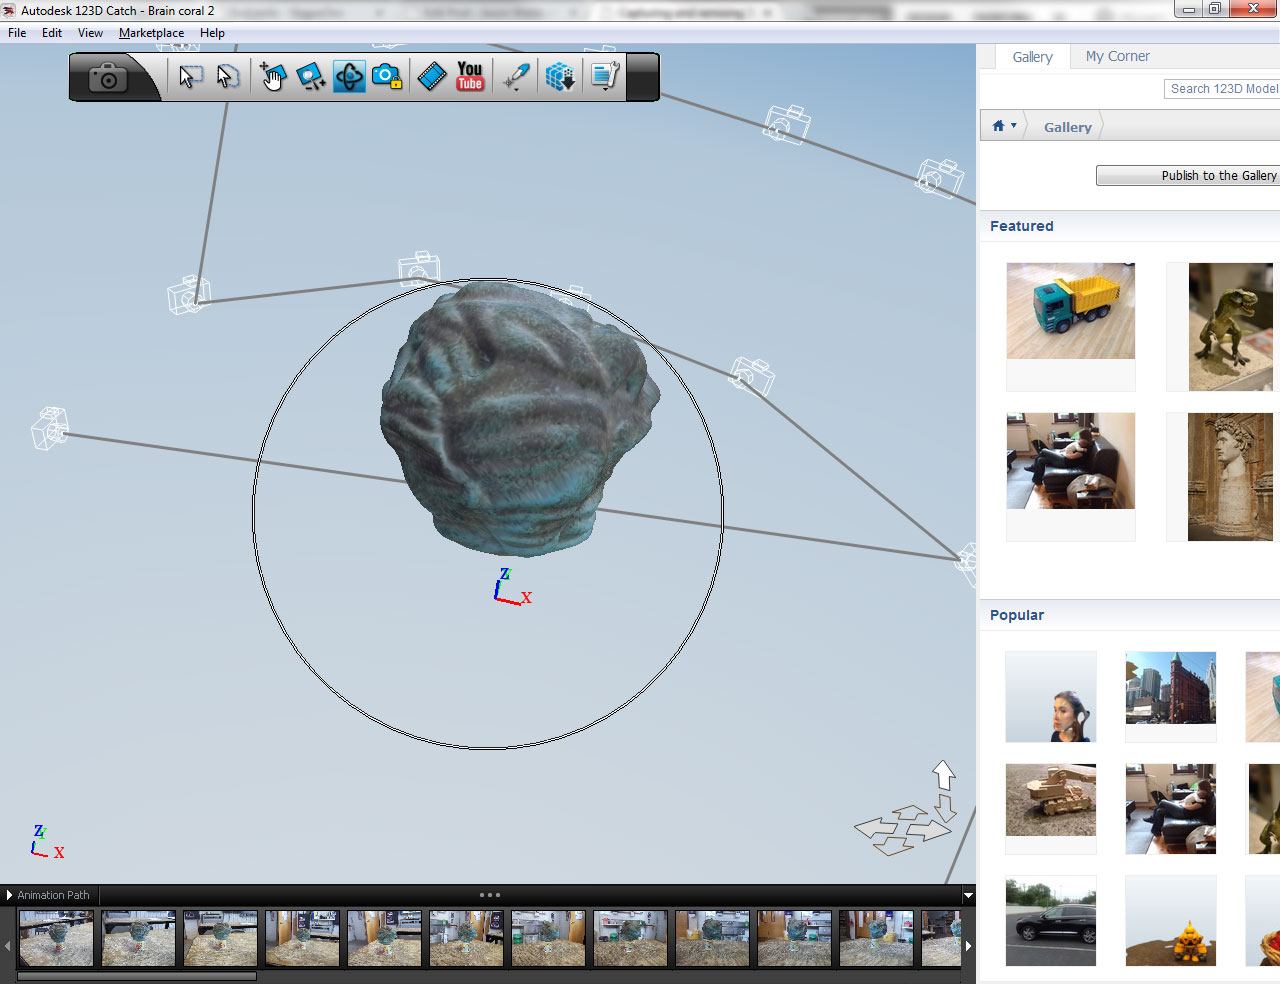
Cleaning up the 3D model
The model created by 123D Catch will contain more than just the object you were photographing; it will also contain parts of the platform it was sitting on and possibly bits of the surrounding environment.
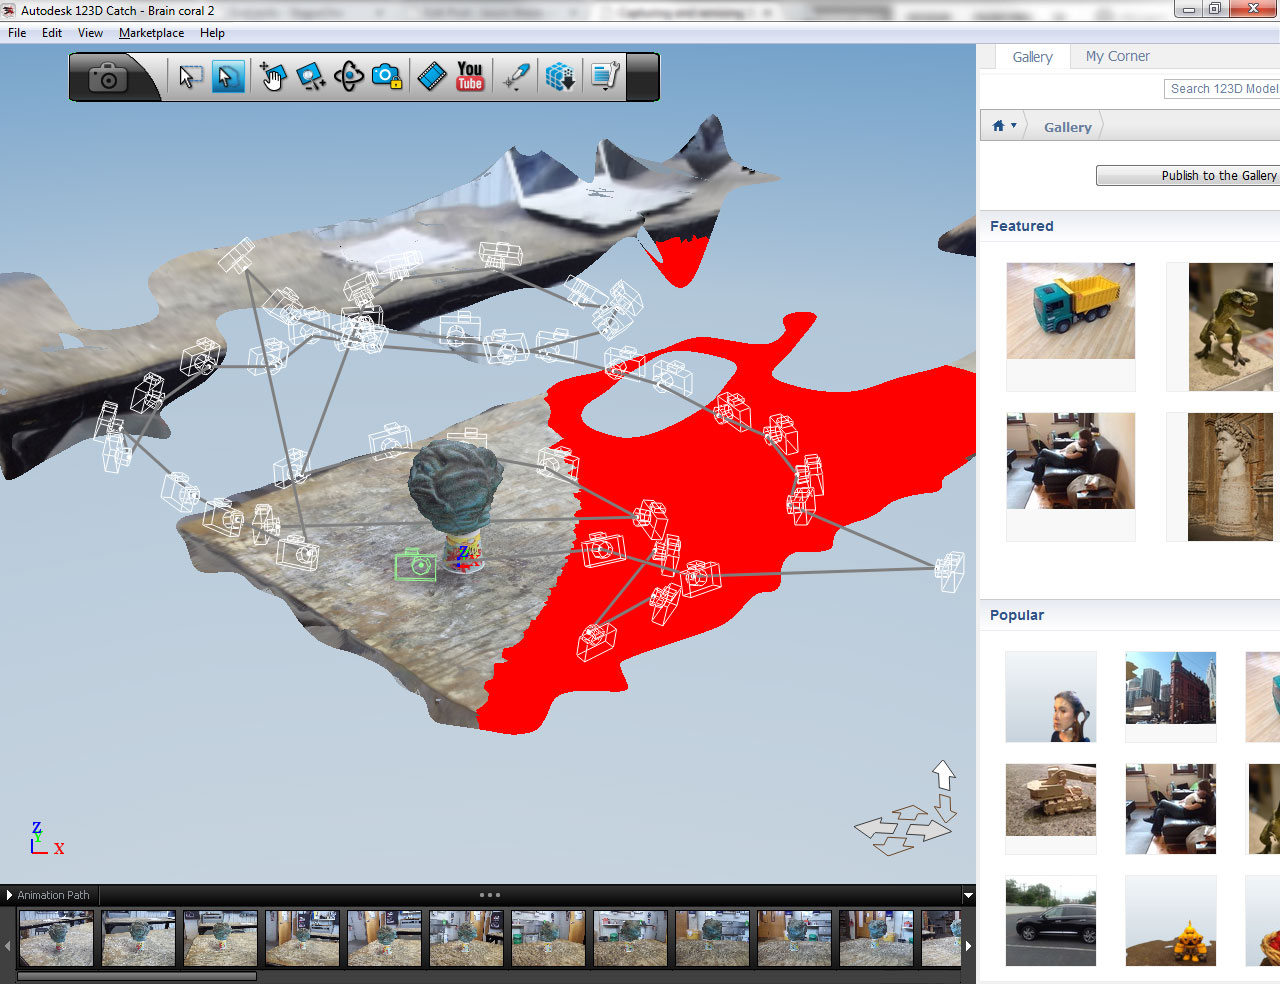
- Save the scene with a different filename so you always have a backup of the original.
- Use the rectangular and lasso selection tools to select parts of the object that you do not want and delete them.
- Go to File > Export Capture As and save your 3D model as an OBJ file.
- If this feature is grayed out, you may need to sign in. You can do this at the top right of the program (at the top of the white toolbar).
Use MeshMixer to mess with the resulting model
With your cleaned 3D model saved in the OBJ format, you can now play with it a bit and get it suitable for 3D printing. We’ll use MeshMixer to fill in holes and gaps, and to do fun things to the mesh. However, MeshMixer is a quirky, annoying little program to use, so be patient and focus on managing student frustration.
Make the 3D model suitable for 3D printing
- Save a copy of your OBJ file so you always have a backup of the original.
- Open MeshMixer and open your OBJ file using File > Import.
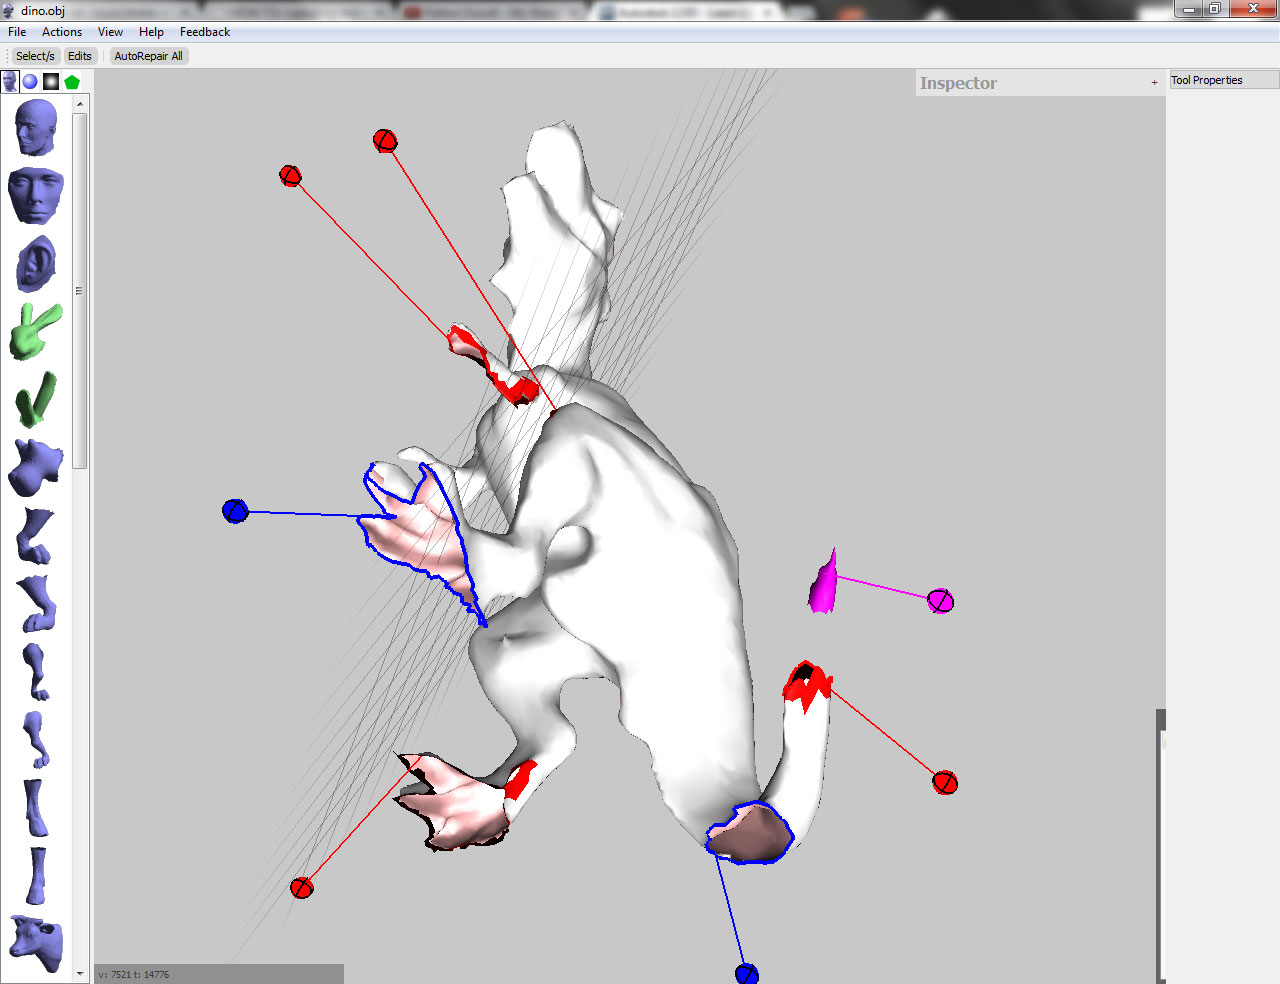
- Click the “Inspector” tool.
- Blue spheres point to holes
- Red spheres point to non-manifold areas
- Purple spheres point to disconnected areas
- Click “Autorepair all”, or click each sphere individually, to repair problem areas.
- Use Edit > Plane cut to give your model a perfectly flat bottom, which is necessary for 3D printing.
- Make absolutely sure that the plane is not at a strange angle – always use an interval of 90 degrees!
Have fun with the model!
- Just to be safe, save another copy of your OBJ with the flat bottom and fixed holes.
- Play around with the various brushes and tools to mess around with the surface of the model.
- Drag partial mesh components from the left-hand toolbar and superimpose them on your model.
- Stay away from the bottom of your model; you don’t want to have to fix it all over again!
- When you’re all done, use the File > Export tool to export an STL file of your model.
Repair the model and give it a flat bottom using netfabb
The last thing you need to do to the model is to make it suitable for 3D printing. Specifically, we want to fill any holes in the surface, and slice the bottom off so it is nice and flat. We’ll use netfabb Studio Basic to do all of this for us!
Fill all the holes / correct surface weirdness
- Open your model using netfabb Studio Basic
- Click the Repair button on the top toolbar (red cross symbol)
- Click on “Automatic repair” at the bottom, then select and execute “Default repair”
- Click on “Apply repair” and hit Yes when it asks you to remove the old part
- You should see all of the holes get filled in with new surfaces
Cut the model to give it a flat bottom
- Find the “Cuts” section on the right side of the screen
- Move the “Z” slider to move a blue line up and down your model. Your model will be cut at the line.
- If the blue line is at a weird angle to your model, you’ll need to rotate it.
- Click “Execute cut”, then click the “Cut” button at the bottom to actually cut your model.
- You can now click on the section that you don’t want and hit your delete key to remove it.
You can now export your model by using the “Part > Export part > as STL” menu at the top.
Prepare and slice the model using ReplicatorG
When you have a cool 3D model, with no holes and a flat bottom, you are ready to print. Download and open ReplicatorG to get started.
- Open ReplicatorG and go to “Machine > Machine Type (Driver)” and select “The Replicator (Single)” so that it knows what kind of machine you will be using.
- Open the STL file (3D model) you exported from MeshMixer.
- Explore the different tools that are built-in to ReplicatorG to move, rotate and scale your model however you want.
- Use Scale to bring the size of your object down. Medium to large sized prints don’t work well on our Makerbot.
- Click “Generate GCode” to open the slicing settings.
- In general, the default slicing settings are fine.
- Click “Generate Gcode” and let it slice your model up. Depending on the size and complexity of the model, this could take a while, so be patient.
- If you begin noticing many errors popping up in the console at the bottom of ReplicatorG, stop the slicing process. You will need to re-examine the mesh in MeshMixer for holes or errors, and maybe even run it through the Netfabb Cloud Service
- When slicing is complete, use the Estimate tool in the “Gcode” menu (or hit Command/Ctrl + E) to see how long it’ll take to print your model.
Print the model using the Makerbot Replicator
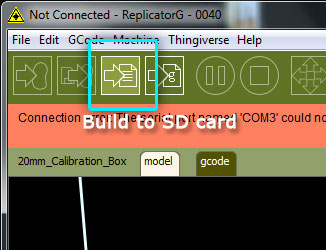 Once you’ve sliced your model using ReplicatorG, you can export the data to a special file format that the printer can understand called X3G. There is a special button that does this for you in ReplicatorG called “Build to file for use with SD card”, and it is the 3rd button from the left at the very top of the ReplicatorG program.
This is definitely a step that should be handled by the instructor. Prints can take more time than you might like (expect several hours for these models), so it’s important to manage machine time in some way. Having a master schedule or a single person managing the machine will ensure that jobs are printed efficiently and maintenance / troubleshooting can happen before issues get out of hand.
- Export an X3G file from ReplicatorG after slicing your model.
- By default, RepG will want to export an S3G file, so be sure to use the file type dropdown to select X3G!
- Keep the filename short but understandable. Long filenames are ignored by the machine!
- Put the X3G file onto an SD card.
- Insert SD card into Makerbot Replicator.
- Run the print job by selecting the filename of your model under the “Print from SD” menu.